As part of my endeavour to make one new recipe a week, I've been trying a bunch of different things. While I probably average that, often it's been a one day-three new recipes deal. It's not quite my goal but it's working. The bottom line is that I'm cooking more, period, even dragging out old favourites that have long been ignored, and that makes me happy.
I am a sucker for cake, and a fan of things I can eat with my hands, so a good snack cake is always welcome. In flipping through old cookbooks, I have often come across the old Soup to Nuts Cake recipe which contains, as one of its ingredients, a can of condensed tomato soup.
Yes. Soup. When you remember that tomatoes are technically fruit, it seems far less weird. After all, we throw veggies in cakes all the time. Carrots, zucchini, I've even heard tell of beets! Perhaps you've heard of these cakes. I imagine they've come from a long lost soup can label or brand-name recipe book. The recipe is far older than I am. As this is the summer of making new things, I decided that what has long intrigued me would be made and tasted.
Oh, the colour! No amount of late-night, poorly lit, kitchen photography can capture that orangey-red.
The smell when mixing reminded me quite a lot of pumpkin cookies. The spices would be mostly responsible for that, I'm sure, but even the soup helped to evoke that scent. The batter was delicious!
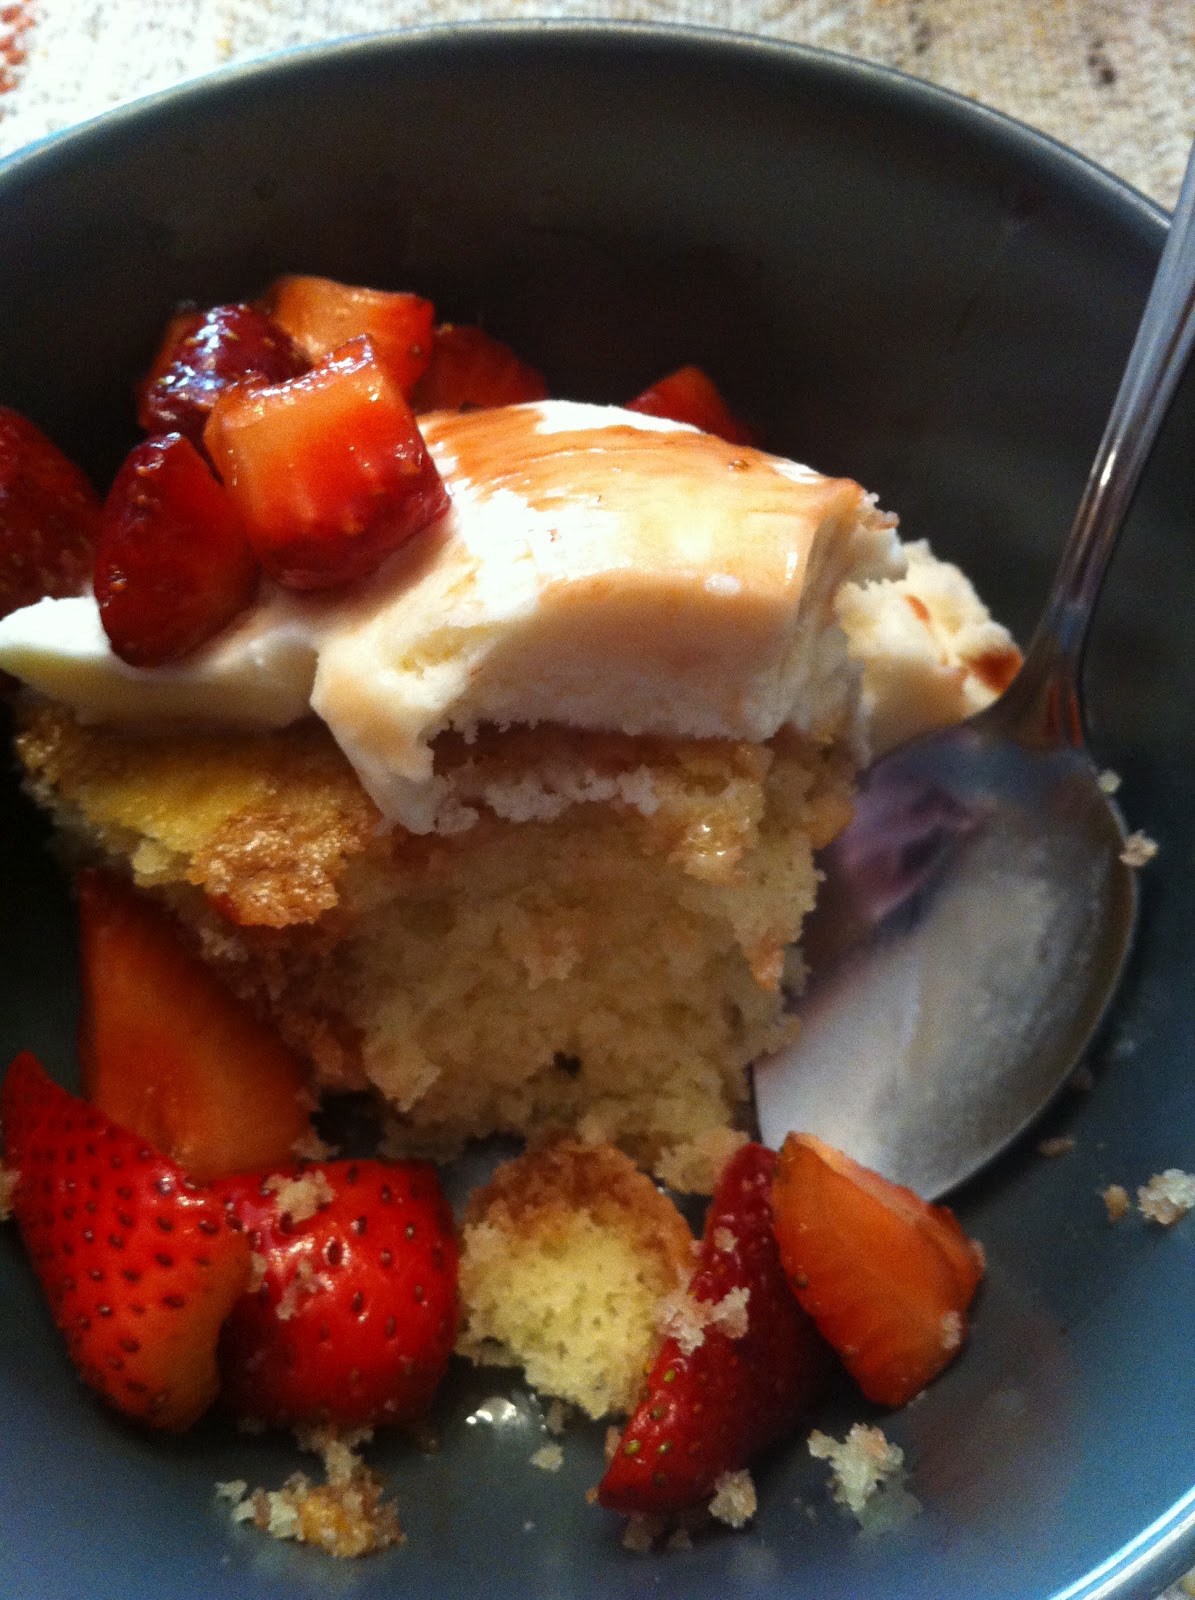
Again, the camera let me down here and shows the cake as kinda saffron-y instead of more pumpkin-y hue. Perfect with a brown sugar frosting but lovely without. It was moist and delicious, improving in texture the next day but it didn't last much longer than that. I'm not going to lie, I loves me some cake, people! This one did not disappoint so I'll definitely be making it again - in fact, I have since the original photos were eaten in the two weeks lost in the Great Computer Crash of Twenty Twelve.
The recipe called for walnuts but since we had pecans, I used them instead. I prefer pecans to walnuts anyway. I skipped the currants. I have even subbed in craisins. I baked it in a 8x12 pan! It's a very forgiving recipe. By changing the butter to margarine, you could very easily make this cake vegan, since there are no eggs in it. I double-checked the ingredients on the soup can to be sure, so I was impressed with that, though eating vegan is always more incidental than intentional for me. I'm little and pale so going meatless will likely never be a viable option for me, (and I believe not-so-secretly that margarine is evil) but it's nice to have recipes when inviting vegan friends for tea or taking to potlucks when you know there'll be people with dietary restrictions. Until such an occasion, I'm using butter.
Mmmmm, butter....
Aiming to refresh my creativity in my own little world. To be sweet but not too sweet. To organize my inspiration. And maybe, just maybe, pass a little of it onwards.
Showing posts with label food. Show all posts
Monday, July 30, 2012
Saturday, July 14, 2012
Pulled Pork: Easier Than It Sounds. Now with Coleslaw and Pie!
Where does a week go? I had started writing a post a couple days ago regarding a cake recipe I'd tried. Then I went to find my photos and ....???? Apparently, they exist solely in my memory. Alack and alas.
So, on to something saucier.* After Mothers' Day's culinary triumph, I had to follow up with something delicious for Dads' Day. I decided I'd finally try Pulled Pork sandwiches with coleslaw and pie. I'd skimmed a bunch of recipes online that needed a smoker or involved a number of ingredients I'd never tried or took too long so I said, "Heck with it, I'm just going to the store and I'll make it up when I get there."
After a little wandering down the aisles, I grabbed a tasty sounding jar of salsa (and it was)
and a couple bottles of a barbecue sauce I had never heard of or seen prior to a random mention on a food blog that morning. And it was on sale. Score!!!
I also grabbed some multigrain kaiser rolls and some shredded broccoli/cabbage slaw mix (lazy, I know) for dinner, and scoped out the fruit aisle. Apricots and plums sounded like pie to me!**
Pulled Pork:
Note: Try your salsa and bbq sauce before committing to throwing them in the slow-cooker. You want to be sure they work together because they will get to know each other intimately. Very intimately..
Place roast in a slow cooker and cover with salsa. Squirt 1/4 cup of bbq sauce over top. Cover and roast 3-4 hours on High (if you're short of time) or preferably 7-8 hours on Low. Meat should be tender enough to come apart into nice juicy shreds when pulled with a fork. Remove pork to a baking pan or rimmed plate and shred, discarding any fatty, grisly bits.
Skim fat off liquid remaining in slow cooker and remove about 1/3 of liquid remaining after that. Leave as much of the salsa chunks as possible. Return shredded pork to cooker, add rest of bbq sauce - until thoroughly coated but not quite soupy - and cover. Cook on Low for 20 minutes to an hour.
Serve on buns with coleslaw.
Carly's Coleslaw Dressing
It's no secret that I despise mayonnaise. I have often seen creamy coleslaws but have refrained from eating them, knowing I would be disappointed and disgusted at the first bite. I also knew that these sandwiches needed coleslaw. So I invented my own, very tangy dressing. Adjust all of these ingredients to your own taste. I didn't measure precisely - I used mostly tasting and tweaking. However, I've made it since and seem to have cracked the proportions. By tablespoon, I mean a well-rounded regular old spoon. I did not use my trusty measuring spoons.
Combine. Taste. Add to slaw mix of your choice and to the moisture level you prefer.
Dad was definitely happy. I'm calling it a huge success!
And yes, I made rosemary potato wedges and more aioli. I'm so deeply in love with aioli that with a dish of raw carrots, I consider it the best late-night snack though garlicky. :-)
*I realize that this recipe is in no way vegan, vegetarian, kosher or halal. However, the pie, if you skip the butter, could be all of the above. The coleslaw, if you sub in vegetarian/vegan mayo for the yogurt could be vegan as well.
** I used my basic, sub in random fruit pie recipe.
So, on to something saucier.* After Mothers' Day's culinary triumph, I had to follow up with something delicious for Dads' Day. I decided I'd finally try Pulled Pork sandwiches with coleslaw and pie. I'd skimmed a bunch of recipes online that needed a smoker or involved a number of ingredients I'd never tried or took too long so I said, "Heck with it, I'm just going to the store and I'll make it up when I get there."
After a little wandering down the aisles, I grabbed a tasty sounding jar of salsa (and it was)
and a couple bottles of a barbecue sauce I had never heard of or seen prior to a random mention on a food blog that morning. And it was on sale. Score!!!
I also grabbed some multigrain kaiser rolls and some shredded broccoli/cabbage slaw mix (lazy, I know) for dinner, and scoped out the fruit aisle. Apricots and plums sounded like pie to me!**
Pulled Pork:
- 1 pork butt roast - get a bigger one than you think you'll need, if it turns out to be a little fattier than you planned, you'll still have enough for a number of people. All the better if it yields leftovers!
- 1 jar salsa - I used PC Smoky Chipotle Salsa (picked both because I love chipotle and I'm a sucker for a beautiful label. It's a medium hot salsa but you can go hotter than you normally would for just eating since the spice diffuses quite a bit)
- 1-2 bottles of Sweet Baby Ray's Barbecue Sauce (or your favourite - you have to like it or this will be a terrible meal for you. If you have a large roast, you'll probably use a bottle and a half to two bottles. Smaller roasts might be fine with one.)
Note: Try your salsa and bbq sauce before committing to throwing them in the slow-cooker. You want to be sure they work together because they will get to know each other intimately. Very intimately..
Place roast in a slow cooker and cover with salsa. Squirt 1/4 cup of bbq sauce over top. Cover and roast 3-4 hours on High (if you're short of time) or preferably 7-8 hours on Low. Meat should be tender enough to come apart into nice juicy shreds when pulled with a fork. Remove pork to a baking pan or rimmed plate and shred, discarding any fatty, grisly bits.
Skim fat off liquid remaining in slow cooker and remove about 1/3 of liquid remaining after that. Leave as much of the salsa chunks as possible. Return shredded pork to cooker, add rest of bbq sauce - until thoroughly coated but not quite soupy - and cover. Cook on Low for 20 minutes to an hour.
Serve on buns with coleslaw.
Carly's Coleslaw Dressing
It's no secret that I despise mayonnaise. I have often seen creamy coleslaws but have refrained from eating them, knowing I would be disappointed and disgusted at the first bite. I also knew that these sandwiches needed coleslaw. So I invented my own, very tangy dressing. Adjust all of these ingredients to your own taste. I didn't measure precisely - I used mostly tasting and tweaking. However, I've made it since and seem to have cracked the proportions. By tablespoon, I mean a well-rounded regular old spoon. I did not use my trusty measuring spoons.
- 1 cup plain greek yogurt
- 2 tbsp apple cider vinegar
- 2 tbsp brown sugar
- 1 1/2 tbsp dijon mustard
Combine. Taste. Add to slaw mix of your choice and to the moisture level you prefer.
Dad was definitely happy. I'm calling it a huge success!
And yes, I made rosemary potato wedges and more aioli. I'm so deeply in love with aioli that with a dish of raw carrots, I consider it the best late-night snack though garlicky. :-)
*I realize that this recipe is in no way vegan, vegetarian, kosher or halal. However, the pie, if you skip the butter, could be all of the above. The coleslaw, if you sub in vegetarian/vegan mayo for the yogurt could be vegan as well.
** I used my basic, sub in random fruit pie recipe.
Saturday, May 26, 2012
The New Recipe Rule: Aioli, Steak, and Cake
At the end of April, I decided to try at least one new recipe a week. I've had some interesting results so far - the sourdough being the most (and unexpectedly) challenging. But I've enjoyed myself and tend to get ridiculously excited when I find the next one I plan to try...
When I saw this list posted at littlebrownpen, it sounded amazing but I was skeptical about the aioli My understanding of aioli was that it was a fresher, fancier version of mayonnaise. I loathe mayonnaise. I won't even use a knife that's been used to spread mayonnaise even if it's been wiped clean on a piece of bread. I ask every server at every restaurant what exactly I can expect if I order a particular sandwich and ask for them to hold the mayo every time.
However, I figured I had nothing to lose by trying it and I'd always heard that fresh was amazing, etc. I hadn't bought a Mother's Day gift....
HOLY AIOLI! It's definitely not mayonnaise. It's definitely a workout. It's definitely worth it.
I made the other recipes, too. It's probably one of the best meals I have ever made in my life. One of the best I've eaten, too. Seester was in charge of the bbq. She cooked the steaks perfectly. She'd want me to tell you that. I want to tell you that the fresh parm on top melts into the steak and adds just the right bite...
I did use potatoes that were larger than large apparently so I'll be wiser next time. But dipping them in the aioli was delicious!
For dessert, I stuck to a old family favourite from a community fundraiser cookbook that lost its cover decades ago. I had already tackled three new ones in a single meal - I figured I was safe. And it's new to you. :-)
You can tell from the picture that it's well-loved and oft-made. It's not too sweet, has a rustic texture, and a really nice flavour.
I top it with balsamic strawberries and frozen vanilla ice cream or yogurt. For the strawberries, hull and slice (or quarter) two pints of strawberries. Add a few tablespoons of brown sugar and a couple tablespoons balsamic vinegar (trust me!) and let the berries macerate. I leave the bowl on the counter and stir it once every 15-30 minutes for a couple of hours... Delicious.
Recipe links - found via littlebrownpen:
The Creamiest Aioli - lots of garlic and lemon goodness
Baked Potato Wedges - it's the garlic and fresh rosemary that make these special
Grilled Filet Steak and Arugula - I used mixed field greens with herbs instead of 100% arugula with great success
Enjoy!
PS: If you borrow recipe books, magazines, etc., and forget to photocopy or type up the recipes you want to try until 3 seconds before you were going to give the book, magazine, etc., back to the lender, whip out your phone or camera and snap a picture of it. You can also take a picture of complicated technique photos or the finished dish photo. That way, if you never end up making the recipe, you haven't spent a ton of time or photocopier money, copying the recipe.
When I saw this list posted at littlebrownpen, it sounded amazing but I was skeptical about the aioli My understanding of aioli was that it was a fresher, fancier version of mayonnaise. I loathe mayonnaise. I won't even use a knife that's been used to spread mayonnaise even if it's been wiped clean on a piece of bread. I ask every server at every restaurant what exactly I can expect if I order a particular sandwich and ask for them to hold the mayo every time.
However, I figured I had nothing to lose by trying it and I'd always heard that fresh was amazing, etc. I hadn't bought a Mother's Day gift....
HOLY AIOLI! It's definitely not mayonnaise. It's definitely a workout. It's definitely worth it.
I made the other recipes, too. It's probably one of the best meals I have ever made in my life. One of the best I've eaten, too. Seester was in charge of the bbq. She cooked the steaks perfectly. She'd want me to tell you that. I want to tell you that the fresh parm on top melts into the steak and adds just the right bite...
I did use potatoes that were larger than large apparently so I'll be wiser next time. But dipping them in the aioli was delicious!
For dessert, I stuck to a old family favourite from a community fundraiser cookbook that lost its cover decades ago. I had already tackled three new ones in a single meal - I figured I was safe. And it's new to you. :-)
You can tell from the picture that it's well-loved and oft-made. It's not too sweet, has a rustic texture, and a really nice flavour.
I top it with balsamic strawberries and frozen vanilla ice cream or yogurt. For the strawberries, hull and slice (or quarter) two pints of strawberries. Add a few tablespoons of brown sugar and a couple tablespoons balsamic vinegar (trust me!) and let the berries macerate. I leave the bowl on the counter and stir it once every 15-30 minutes for a couple of hours... Delicious.
Recipe links - found via littlebrownpen:
The Creamiest Aioli - lots of garlic and lemon goodness
Baked Potato Wedges - it's the garlic and fresh rosemary that make these special
Grilled Filet Steak and Arugula - I used mixed field greens with herbs instead of 100% arugula with great success
Enjoy!
PS: If you borrow recipe books, magazines, etc., and forget to photocopy or type up the recipes you want to try until 3 seconds before you were going to give the book, magazine, etc., back to the lender, whip out your phone or camera and snap a picture of it. You can also take a picture of complicated technique photos or the finished dish photo. That way, if you never end up making the recipe, you haven't spent a ton of time or photocopier money, copying the recipe.
Saturday, May 12, 2012
Sourdough: The Complete First Series (photo-heavy)
So I mentioned that I picked up this book.
And I mentioned that I'd started a starter and planned to make sourdough. The starter now lives in the fridge, by the way. I named it Keith.
Then came about a week of trials and a whole lot of errors.
Episode One: The Trusting Home Chef
I am a person who follows a recipe very faithfully the first time I make it. I made my starter from my other starter (two starter process - odd I know) the night before and left it to get all fluffy and yeasty. It was beautiful, stretchy and sticky, and there was more than enough for two so in the morning, I saved the extra second starter and popped it in the fridge with Keith.
Then I measured out my ingredients, dissolved Second Starter in a little warm water and dumped in my flour and salt.
It felt dry. However, this author is an award-winning breadmaker with international credentials so I trusted that he wouldn't steer me by the wayside. Bah!
Dough did not relax during its initial pinch-knead-rest cycles. Dough did not rise in the first hour in the bowl stage. Dough did not rise during its 3-6 hours in a colander lined with a floured tea towel stage. After a few hours, I grew desperate and popped it in the warming drawer of the oven on the dough-proofing setting. Dough did not proof. Dough dried out. Dough was a brick. Dough ended up in the garbage never having realized its destiny. Bah!
Theories:
1) I need to use my kitchen scale for bread ingredients - don't know why I didn't. Really foolish. But 2 cups of flour and 8 7/8oz can be dramatically different things.
2) The kitchen is too chilly for rising.
3) My warm water was too cold in the beginning.
Episode Two: Scale Away With Me
This time I weighed my ingredients. I ended up using almost 1/2cup less flour (from 2 cups total!) Professional bakers always use weights instead of volume, right? Hmm.
Dough felt better but still stiff. It didn't rise a lot in the first stages but I figured in the colander stage, this time it would work. Bah! Once in the colander and covered with the tea towel, the top of the dough again dried out. Disgusted, I left it sitting on the counter as I whipped up another second starter.
Theories:
1) I have often heard that Canadian flours are harder and you need less of them for most recipes that aren't developed in Canada. Weighting or not, the amounts are going to be off.
2) I'm not getting the dough enough moisture or warmth. When using a two-bowl covering system (the book recommends covering the dough in the first couple of stages with the bowl that held the flour), probably shouldn't use a plastic bowl to cover. They don't collect condensation on the inside and don't absorb the warmth in the air.
Episode Three: Jungle Fever or The Sun Rises Faster
In the morning, I had a fresh batch of Second Starter. For those keeping track, this was my SECOND Second Starter, which overnight, had outgrown its container and was slipping out underneath the lid it had managed to pop off. Don't care, I'm using it anyway. I plop that starter into some very warm water and whisk it until it's all dissolved and the kitchen smells like a brewery. I also discover that Dough Two, that I abandon on the counter and forgot about, has managed to do some rising underneath the dried out top. Hunh. Well, I figured, set it on a pan, cover it and we'll bake it with Three, just for sh*** & giggles.
I measure the flour by feel. I add only as much as the dough can handle and still look like the picture. I'm okay with it being a little sticky if it's still elastic and pliable. It has a little give to it. The first pinch-knead-rest cycles feel awesome. I'm thinking that I might have nailed it this time. I start plotting bakery takeovers like Daniel Day Lewis... There will be Bread! I even have a bit of a crazy old prospector jig in the kitchen. (There Will Be Blood - Anyone? No?)
This time, I mist the inside of the covering bowl and place warm towels over it.
And it barely rises. I give it 7 hours and it barely gets bigger. And it's starting to dry out. I know the recipe said small loaf but COME ON! Two rose higher and its half-crusty already. Bah!
I heat the oven with a small pan on the lower rack. I place deformed and dried out Dough Two on the sheet with sluggish Dough Three. When the oven is hot, I readjusted the temp, throw pour boiling water in the hot pan, slide in the sheet and bake.
Bread has good flavour. It's a little too done on the bottom and man, it's dense, but it's enough of a step forward to keep me going.
Theories:
1) In my growing impatience and familiarity with the recipe, I mis-measured the salt. Salt kills yeast. Dead yeast=no rise.
2) My water in the beginning was too warm. Hot water kills yeast. See above.
3) The oven was too hot. It has difficulty at very high temperatures so rather than crank it up and turn it down, set it to the lower temp in the first place.
4) The hot pan for steam was too close to the bottom of the baking sheet. I should've set it on the very bottom of the oven.
Episode Four: The Reckoning
I will lick this thing if it kills me. This time, I use my wrist to determine water temperature. I measure the salt precisely before adding to the flour, of which I use just enough to arrive at that perfect tacky dough feel. I cover with a metal bowl. The pinch-knead-rest goes perfectly. Meanwhile, I have turned on the fireplace in the living room. It does its one-hour in the bowl near the fireplace in the warm living room. I transfer the dough to the lined and floured colander. This time, I place a wet tea towel over the top of the colander. It returns to its set near the fireplace.
Four hours later, it's doubled in size.
I heat the oven to 425, not 475. I place the steam pan in the bottom of the oven. I add my hot water. I move my too good to be true at this point Dough Four to the pan, which sticks to the towel a bit and mucks the top but I don't care. I cut the v's and I slide it into the oven.
Instead of a prospector jig, I'm holding my breath, like I'm defusing a nuke. (Red wire? Blue wire? Oh, no, they're all yellow!)
And it's beautiful.
Final comments:
1) I love that the starter is just flour and water. It relies on wild yeast. Therefore the recipe was remarkably cheap to screw up several times. Flour, water, salt, starter. That's it. Hmmm, chemistry and biology working together. Delicious and educational!
2) The book, though I have no doubt of the talents of the chef, is not written for the novice/average home baker. If I hadn't made breads from scratch before, the first few attempts would probably put me off trying again. It was MY experience with bread and Canadian flour that allowed me to tweak what was going on and not his advice. However, now that I know that the flour measure will be tremendously off, I feel confident trying other recipes from it. Find an easier recipe if you've never made bread before.
3) It makes great french toast.
And I mentioned that I'd started a starter and planned to make sourdough. The starter now lives in the fridge, by the way. I named it Keith.
![]() |
| Keith |
Episode One: The Trusting Home Chef
I am a person who follows a recipe very faithfully the first time I make it. I made my starter from my other starter (two starter process - odd I know) the night before and left it to get all fluffy and yeasty. It was beautiful, stretchy and sticky, and there was more than enough for two so in the morning, I saved the extra second starter and popped it in the fridge with Keith.
![]() |
| Son of Keith |
![]() |
| It's not a tumah... |
Theories:
1) I need to use my kitchen scale for bread ingredients - don't know why I didn't. Really foolish. But 2 cups of flour and 8 7/8oz can be dramatically different things.
2) The kitchen is too chilly for rising.
3) My warm water was too cold in the beginning.
Episode Two: Scale Away With Me
This time I weighed my ingredients. I ended up using almost 1/2cup less flour (from 2 cups total!) Professional bakers always use weights instead of volume, right? Hmm.
![]() |
| A little like old chewing gum |
Theories:
1) I have often heard that Canadian flours are harder and you need less of them for most recipes that aren't developed in Canada. Weighting or not, the amounts are going to be off.
2) I'm not getting the dough enough moisture or warmth. When using a two-bowl covering system (the book recommends covering the dough in the first couple of stages with the bowl that held the flour), probably shouldn't use a plastic bowl to cover. They don't collect condensation on the inside and don't absorb the warmth in the air.
Episode Three: Jungle Fever or The Sun Rises Faster
In the morning, I had a fresh batch of Second Starter. For those keeping track, this was my SECOND Second Starter, which overnight, had outgrown its container and was slipping out underneath the lid it had managed to pop off. Don't care, I'm using it anyway. I plop that starter into some very warm water and whisk it until it's all dissolved and the kitchen smells like a brewery. I also discover that Dough Two, that I abandon on the counter and forgot about, has managed to do some rising underneath the dried out top. Hunh. Well, I figured, set it on a pan, cover it and we'll bake it with Three, just for sh*** & giggles.
I measure the flour by feel. I add only as much as the dough can handle and still look like the picture. I'm okay with it being a little sticky if it's still elastic and pliable. It has a little give to it. The first pinch-knead-rest cycles feel awesome. I'm thinking that I might have nailed it this time. I start plotting bakery takeovers like Daniel Day Lewis... There will be Bread! I even have a bit of a crazy old prospector jig in the kitchen. (There Will Be Blood - Anyone? No?)
![]() |
| Getting closer |
And it barely rises. I give it 7 hours and it barely gets bigger. And it's starting to dry out. I know the recipe said small loaf but COME ON! Two rose higher and its half-crusty already. Bah!
I heat the oven with a small pan on the lower rack. I place deformed and dried out Dough Two on the sheet with sluggish Dough Three. When the oven is hot, I readjusted the temp,
| That's Two on the left, tiny Three is on the right. Dark photos at 9pm - sorry! |
Theories:
1) In my growing impatience and familiarity with the recipe, I mis-measured the salt. Salt kills yeast. Dead yeast=no rise.
2) My water in the beginning was too warm. Hot water kills yeast. See above.
3) The oven was too hot. It has difficulty at very high temperatures so rather than crank it up and turn it down, set it to the lower temp in the first place.
4) The hot pan for steam was too close to the bottom of the baking sheet. I should've set it on the very bottom of the oven.
Episode Four: The Reckoning
I will lick this thing if it kills me. This time, I use my wrist to determine water temperature. I measure the salt precisely before adding to the flour, of which I use just enough to arrive at that perfect tacky dough feel. I cover with a metal bowl. The pinch-knead-rest goes perfectly. Meanwhile, I have turned on the fireplace in the living room. It does its one-hour in the bowl near the fireplace in the warm living room. I transfer the dough to the lined and floured colander. This time, I place a wet tea towel over the top of the colander. It returns to its set near the fireplace.
Four hours later, it's doubled in size.
I heat the oven to 425, not 475. I place the steam pan in the bottom of the oven. I add my hot water. I move my too good to be true at this point Dough Four to the pan, which sticks to the towel a bit and mucks the top but I don't care. I cut the v's and I slide it into the oven.
Instead of a prospector jig, I'm holding my breath, like I'm defusing a nuke. (Red wire? Blue wire? Oh, no, they're all yellow!)
And it's beautiful.
And delicious.
It's a small loaf but it's a decent size if you don't want it to get stale. And I have cracked it. I own this recipe! Haha!! Back to the jig. Cue the butter!
Final comments:
1) I love that the starter is just flour and water. It relies on wild yeast. Therefore the recipe was remarkably cheap to screw up several times. Flour, water, salt, starter. That's it. Hmmm, chemistry and biology working together. Delicious and educational!
2) The book, though I have no doubt of the talents of the chef, is not written for the novice/average home baker. If I hadn't made breads from scratch before, the first few attempts would probably put me off trying again. It was MY experience with bread and Canadian flour that allowed me to tweak what was going on and not his advice. However, now that I know that the flour measure will be tremendously off, I feel confident trying other recipes from it. Find an easier recipe if you've never made bread before.
3) It makes great french toast.
Wednesday, April 18, 2012
Bread
It snowed here this weekend. Sure it was all but gone by Sunday afternoon but the return of white after every indication that spring had begun send a message to my belly. Soup. And soup requires bread.
I finally tried the Dutch Oven No-Knead Bread that had popped up in weblogs all over the better part of the last two years. It never ceases to amaze me how this
becomes this
I made a few mistakes. I a)let it rise too long since it said 12-18 hours - I think I left it 20-22; b) had my oven too hot - my independent thermometer was not on the oven rack as usual so 475 degrees was probably closer to 500 and the bottom got a little scorched; and c) I forgot to slash the top. I meant to, but when I flipped the dough into the pan, flour went everywhere, and I got distracted. I had a little flour up my nose. But the mistakes weren't a huge deal and it won't stop me from making it again.
It was the perfect, dense, chewy loaf for my chunky potato soup. And the day after with leftover soup, it was even better.
***
I cannot for the life of me manage to get a good photo or two of my new sweater which I have worn twice already. Oh the tumults of lighting and needing someone else's hands... I'll try again tomorrow.
I'm also dealing with a sore shoulder from too much knitting. The first week of playoffs have meant over 42000 stitches for my scrappy afghan. I have yarn burn on my throwing finger. Probably looking at a suspension, though there was no intent to injure so it's unlikely I'll be putting down my sticks for more than a game or two. :-) I tried to find a better pair of needles today but no one had 3.25mm circs in a length longer than 12". Amazingly, I walked into a hockey discussion at the knitting shop. The unprecedented circus of violence that has been the first round makes for a interesting debate amongst the lace weight and chunky skeins...
Thursday, October 27, 2011
I invented a pie!
No, I didn't have time to do it but I saw bonino mauro plums at the grocery store.

I also grabbed a bag of cranberries.

Used a ridiculous amount of butter.

Carly's Plum-Cranberry Pie
Filling:
3 cups plums, pitted and sliced (approx 1/2 lb)
1 cup cranberries, halved
1/2 cup icing sugar
1/2 flour
1 tsp cinnamon
1/4 tsp ginger
1/8 tsp allspice
1/8 tsp freshly ground black pepper (trust me)

Streusel:
3/4 cup flour
1/2 cup packed golden brown sugar
1 tsp cinnamon
1/4-1/3 cup butter (1/4 cup melted gives you a crunchier streusel, 1/3 cup cold and cut into dry ingredients is crumblier but more butter than you need considering the amount in the crust)
Crust:
I use Martha's Perfect Pie Crust recipe. It makes enough for a two-crust pie so there is currently a half-batch in the fridge in case I get pie-crazy again... This crust is so good; it's a little heavier than those made with lard or shortening but the taste and texture make up for it.
1 egg, beaten
Make your crust and chill an hour or so. Roll out and put in pie pan. Fancify your edge. I know some prefer to just fork around it, but I like to flute it. Brush inside and edge with egg.
I also grabbed a bag of cranberries.
Used a ridiculous amount of butter.
Washed, chopped, sliced, blended, baked.
Enjoyed.Carly's Plum-Cranberry Pie
Filling:
3 cups plums, pitted and sliced (approx 1/2 lb)
1 cup cranberries, halved
1/2 cup icing sugar
1/2 flour
1 tsp cinnamon
1/4 tsp ginger
1/8 tsp allspice
1/8 tsp freshly ground black pepper (trust me)

Streusel:
3/4 cup flour
1/2 cup packed golden brown sugar
1 tsp cinnamon
1/4-1/3 cup butter (1/4 cup melted gives you a crunchier streusel, 1/3 cup cold and cut into dry ingredients is crumblier but more butter than you need considering the amount in the crust)
Crust:
I use Martha's Perfect Pie Crust recipe. It makes enough for a two-crust pie so there is currently a half-batch in the fridge in case I get pie-crazy again... This crust is so good; it's a little heavier than those made with lard or shortening but the taste and texture make up for it.
1 egg, beaten
Make your crust and chill an hour or so. Roll out and put in pie pan. Fancify your edge. I know some prefer to just fork around it, but I like to flute it. Brush inside and edge with egg.
Sunday, August 28, 2011
No campfire? No problem!
Toothpick. Mini marshmallows. Candle. Patience.
Freshly roasted marshmallow goodness.
Please note: this is a natural beeswax candle - no colours or perfumes, with an undyed cotton wick. I wouldn't recommend trying this with a scented or petroleum-based candle with graphite/cotton wick.... I prefer my burnt sugar to be as chemical-free as possible. :-)
Freshly roasted marshmallow goodness.
Please note: this is a natural beeswax candle - no colours or perfumes, with an undyed cotton wick. I wouldn't recommend trying this with a scented or petroleum-based candle with graphite/cotton wick.... I prefer my burnt sugar to be as chemical-free as possible. :-)
Monday, July 19, 2010
Scott's Chicken Wings
This recipe was passed onto me by Scott. Scott is my good friend's sister's boyfriend. (uncle's cousin's dermatologist's paperboy - which makes us as close as Helmet and Lonestar. Spaceballs, anyone? No?) I met him once when a large number of us went carousing. But before we caroused, there was wine. And tapas. And these incredibly, ridiculously easy and delicious wings. I begged him for the recipe. Begging works.
Chicken drummettes or wing tips, or go crazy and get bothLime juice, about one cup for every 20-30 pieces of chicken (You can use the RealLime bottled stuff. It'll be okay. It's not considered cheating. But using lemon juice would be. Use the lime. Do it.)
Montreal Steak Spice.
Yup. That's the good stuff.
Marinate your chicken in the lime juice for at least a few hours, preferably overnight. We were lazy today and used ziplocs so that we could turn and flip and toss without a lot of mess. (Little did we know... Mess will find you other ways...)
Heat your oven to 350 degrees F.
Place your chicken pieces on greased or lined cookie sheets. Sprinkle liberally with Montreal Steak Spice.
Liberally! With intent. In fact, just to be sure, when you think you've added enough, turn your cookie sheet one-eighty and check there is no nekkid chicken from the other angle.
Now, I will point out that I over-crowded my chicken today. Try to only marinate as much chicken as will reasonably fit in your oven. Also, use a rimmed baking sheet, especially if you plan to over-crowd your chicken. Why? You can either cook your chicken on rimmed sheets or use one to hold the scrapings of chicken juice-turned-charcoal from the bottom of your oven. (I did say that mess finds you in other ways...)
I had made these wings before on a non-lipped sheet without incident but today..., today, I over-crowded and it bit me in the ash. We had three fans going for a half an hour and had to interrupt cooking for a quarter so just use rimmed sheets. Do it.
Bake your wings for 30-35 minutes. Flip and be a libertine once more with the steak spice. Sprinkly wantonly! Return to oven for another 30-35 minutes or until chicken is browned and beginning to crisp.
Serve with napkins.
Also goes nicely with a side of sports, particularly if your team is doing well. Go, Riders!
Subscribe to:
Posts (Atom)