Monday, July 13, 2015

Canadians Bee 2015 - August Block Tutorial: Chevron Blocks - Herringbone style

Hey there. Been awhile. 

I was teaching. It was very busy. I did not have time for the web. Sewed but photos and writing about it took too long and by the end of the day, me no write words good. Me no good read blogs too.  To unwind, there was knitting and Netflix. There was Knitflix. 

I have missed almost a year of the internet. I'm sure many people won, that memes were hatched and hashtagged and things were amaze-balls and awesome sauce. I saw a little bit of it. Not much.  I'll try to go back and skim a bit to catch up but for the first time EVER after such a long hiatus, I'm not going to read everything. I usually do but I've been gone too long and feedly only goes back thirty days... 

I did miss you, though.

Anyhoo.... August is my month for the Canadians Bee and the Queen suggested that I get the tutorial/instructions up early. So, away we go!

This scarf is the inspiration for this month.

I would like Chevron Blocks - sewn herringbone-style.

We're looking way outside my colour comfort zone and focussing mostly on the reddish family of purples. Accents include yellow, orange, dark pink, red, teal-ish-turquoise-y blue and navy.   Try to pick really saturated fabrics, tone on tone or solids, and avoid any prints with significant traces of white, grey or black. Also, skip green entirely.  Where we're going, we don't need green....  The Kona colours I pulled for examples (not mandatory...) are cerise, persimmon, cheddar, caribbean, red plum, geranium, dark violet and poppy.  I give you the names because purples are notoriously difficult to photograph.


Each 6 1/2 x 12 1/2" half is quick if you do two at a time, but if you can only manage one, I completely understand! Please leave the halves unsewn, particularly if you make identical ones. I didn't use a pattern but here's how I made them:

You need a square of purple about 4 3/4" and several strips of your purple and accent colour between 1 1/4" and 2".  Press all seams open.

Step 1:  Slice your purple square on the diagonal to give you two triangles. The diagonal becomes the top of your block half.

Step 2: Take one strip and sew to the left short side of triangle. Press seams open and trim the end off. Use the remnant of same fabric strip to sew down the right short side.  Trim the end square.

Repeat Step 2 using a different fabric each time until the block measures just over the finished height (12 1/2").   Use the same process to fill in the corners.

Step 3: Centring the triangle along the top as best you can, trim the block half to 6 1/2 x 12 1/2".


Voila!

Tips:  I found it easiest to rough-trim my block half as I went, keeping it about 7" wide to leave some wiggle room and give me an idea of where to start the next strip. That way, I never wasted the strips by leaving them way too long, nor were they ever too short to meet the full width of the block half.

I also found it easier to "pre-cut" my strips before I sewed them so I wasn't dealing with dragging long strips all over the place.

Thanks - and happy sewing!
C


Saturday, August 23, 2014

Have You Met....Mireio?

It's been the usual insanity around here but more on that later.  Right now, I need a mental respite and a touch of something pretty.  Maybe you can, too.

I've been meaning to share one of my favourite online spots for ages. I head there often for eye candy and finding a little treat...

Mireio is one of my happy places. It's the creation of my lovely friend, Wende (with whom I would probably have coffee near weekly if we weren't separated by a border crossing and many kilometres and depending on the season, 1 or 2 time zones.)

 I'm a sucker for buttons. And eye pillows. 

Her photography is soft and bright. I keep telling her she needs to do a calendar.  You should see the shots she uses on her blog.  They have such a warmth to them - if there were a brick and mortar version of the shop, you have a perfect image in your mind of what that shop would be like, and know exactly why you'd want to spend time pouring over every item.

And she has such beautiful things...

...that smell so nice.  I have her sachets in all my drawers, especially with the frillies.  Every day is better with lightly-scented frillies.  Have I mentioned my love of lavender?

I asked her if I could tell people about her shop and she graciously allowed me to not only use her gorgeous photos but even came up with a coupon!  At checkout, enter CITRICSUGAR for 20% off all the pretty things until the end of September.

If you want to get a jump on holiday shopping while supporting independent & handmade, the timing is perfect!  (And yes, I've started. I am one of those people.  If it makes you feel better, I don't tend to finish until mid-December but I usually start early.)

Anyway, while you're waiting for me to get a blogpost together, I hope you swing by Mireio and check it all the goodies Wende's got waiting for you!


Please note:  This is NOT a sponsored post. I don't do sponsored posts.  I will only ever promote businesses and products that I personally use or for which I am a customer, because that's what friends do.  We share the word about good stuff!

Wednesday, August 6, 2014

Modern Borders = Placemats

First - thanks for all the support with the bag story!  Yes, the stains mostly came out. It was pointed out to me that I kinda skipped that part. Oops!  Also, I've had quite a few no-reply commenters lately so if you didn't get a response from me directly, that is why.  I WANTED to reply to you....  Why won't all these blogging platforms play nicely together? Sheesh.

In the busy-ness of my life, I am finding time to keep up with challenges. It's become a point of pride with me to not have missed a single challenge at SaskatoonMQG.  The one due at the end of July?  Make a modern border.

How do you do that?  And who came up with this cockamamie challenge anyway? (Me. It was me.)

Fine.  I'm making a piece that is ALL borders.  That's right just one border after another.  And then I'm going to cut it up so the borders don't even go all the way around. Yeah.  Take that, challenge-comer-upper-with! (Again, me.)

I started with some shots and chambray.  Feels so luxurious in the hand. If only the shimmer of both showed up in photos...Threw in some Tsuru for good measure.

Once I had it pieced, I used the leftover shots on the back, and then grid quilted the thing to death.  That took some time.  I echoed the borders a bit with the thread colours.

Then I got out the rotary cutter. At this point, my great idea seemed a little nuts. I held my breath,  began my meditation (It's only fabric, only fabric, only fabric....ohmmmmm...) and cut away.

Now onto the binding!  It was important to me that the borders not be broken even though I'd mercilessly cut them to shreds moments before.  So, I pieced together the bindings from the leftover border pieces.  I made a separate strip for each side of each piece (what???)  I'm not so good at calculating the exact amount of fabric taken up in a binding corner so I sewed the long strips and used Linda's binding method with the mitred corners.  It's probably the best way to do a matched binding. Linda rocks.

How did I keep it matched all the way down? Good question! Three things.
1) I moved my needle one more notch to the right to account for "quilt shrinkage" - think exact 1/4" instead of scant.  On a larger piece, you'd have to measure the finished width of each chunk but this was small enough I could fudge it with my non-scant seam allowance.

2) After piecing and pressing my bindings, I ran a basting stitch 1/8"(ish) from the edge down each to secure the top and bottom together.

3) Glue. Lots and lots of glue. Wonderclips. Hot iron to set.

Once the corners were mitred, I knew there was no way I was going to be able to hand-finish these bindings with the uber-dense quilting.  Machine-binding and I have not gotten along in the past; I've always thought it turned out messy and ugly, and way less satisfying.

Solution?  More glue!  I burned through about half a Sew-line glue pen on this project but it was so worth it.  Altogether, the bindings took less time than the quilting, even if you allow for re-reading the mitre tutorial twice to remember what I did the last time. They look like more work than they were.

And there you go - placemats!  Challenge conquered.  Next challenge?  Trying to photograph the clothing-making rampage I've gone on this summer... :-)

Thursday, July 24, 2014

The Bag and The Wallet: A Tragicomedy Love Story

Still haven't finished catching up on my blog reading but this story happened a few months ago.  It's very wordy, because I love to be wordy (and had a blast writing it), so feel free to just skip to the pictures. Hah! 

Voiceover from the Trailer:
I used to love my old bag. But time had beaten it up and my needs had changed.  It was heavy and not that suitable for work. I was taking a separate tote, in addition to my purse, and that was taking its toll on my shoulder and sanity.

Act 1: Girl Meets New Bag
But I couldn't find one I liked.  Then I spotted the 
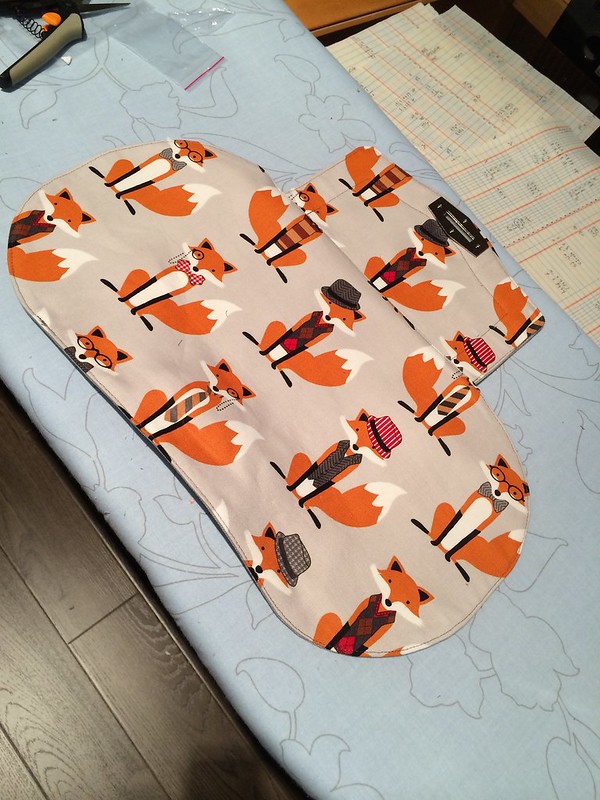
ByeByeLove Bag.  And needed to make it. It would hold all the things I wanted to hold - shopping bags, wallet, keys, sunglasses, headphones, clipboard, iPad, my pencil case of teacher supplies... yay!

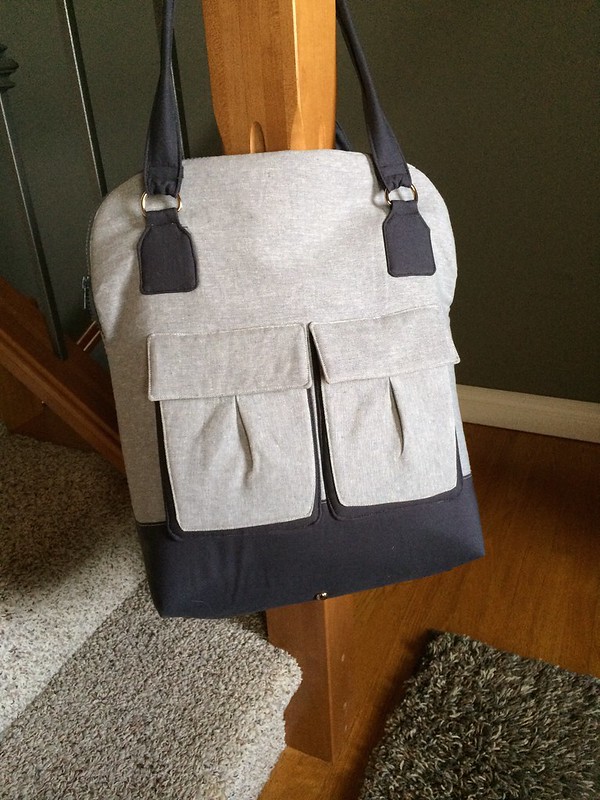
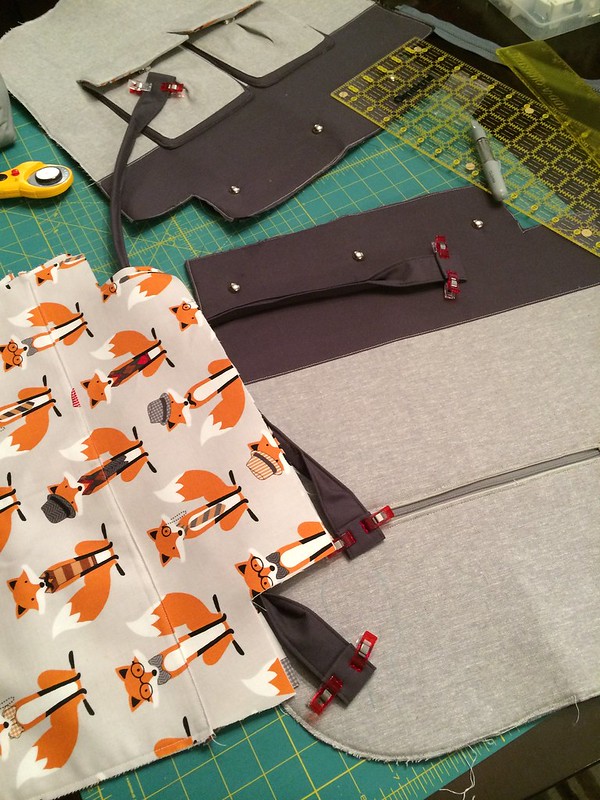
I tinkered with the pattern.

I added a darker bottom and put feet on it, just to give it a little protection from the floor, and I changed up the pocket flaps.  I'm just not a rounded pocket flap kinda girl.  You understand.

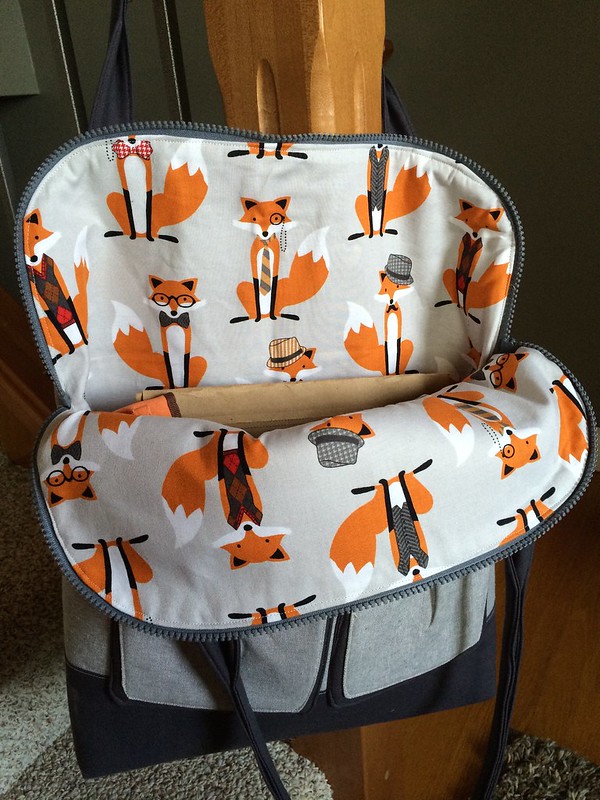
It was a marriage of linen and cotton. I lined it with foxes.

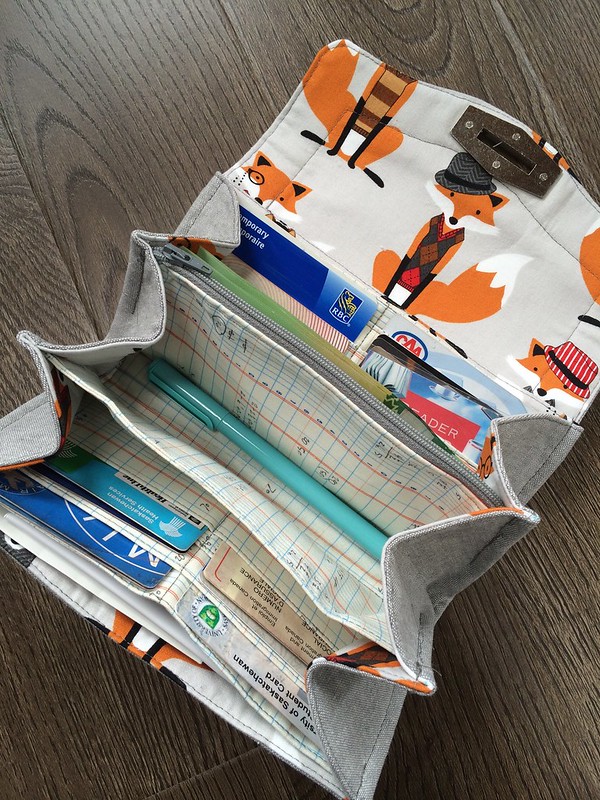
I carried the bag for a couple of weeks.  It was glorious!  It was suitable for work, it looked professional, and it also didn't seem out of place for the rest of my life, either.  I got compliments galore, folks asking where I got it, and they were floored when I proudly said I made it. All was well.

Act 2: The Accident
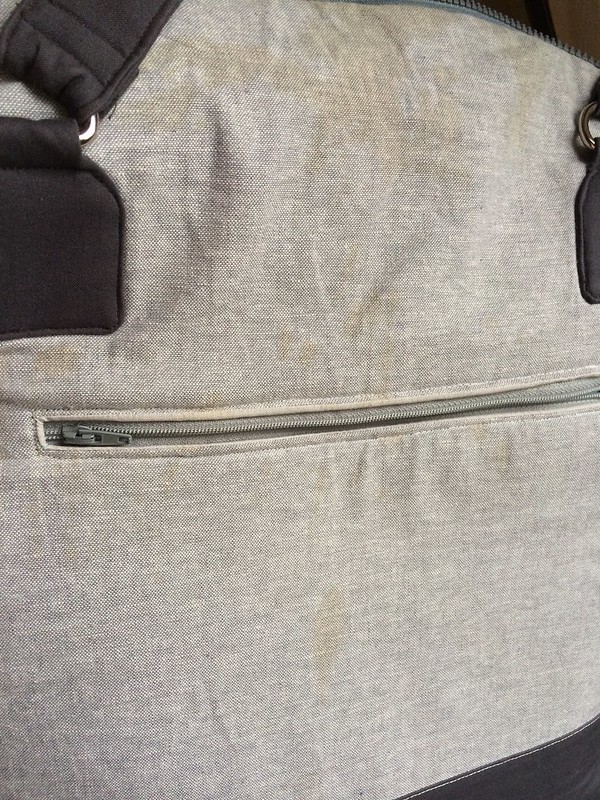
And then one morning, at work, a flustered staff member knocked her entire cream & sugared coffee all over it.  And in it.

I did the mature thing, or at least I *appeared* to do the mature thing. With students around, I didn't want to give them a poor example of how to handle a first-world problem so with said co-worker being very apologetic and even more flustered, I was calm and proceeded to dab at it with paper-towels, wiped the coffee off the floor, saying all the while, "It's okay, it's just a bag, these things happen...."  Inside I wanted to cry and was trying to figure out whether it could be washed and whether the stains would be set before I even had a chance to TRY to get them out.

The second I got home I consulted the experts. I decided I could chance washing it. I soaked it liberally with the stain remover, crossed my fingers and held my breath, pushing fears for shrinking and other calamities as far out of my mind as I could.  Oh, the subtle ironies of a pattern's name....  Bye-Bye, Bag I Loved!

Act 3: Insult to Injury
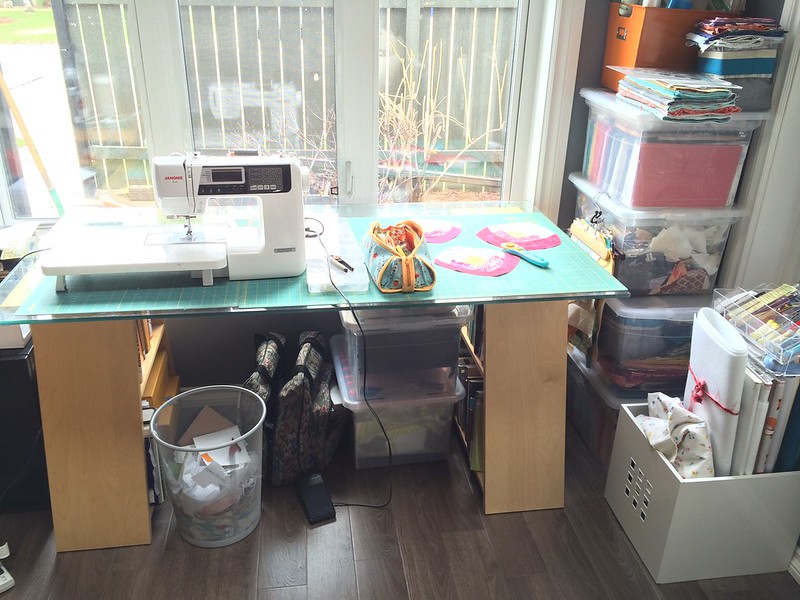
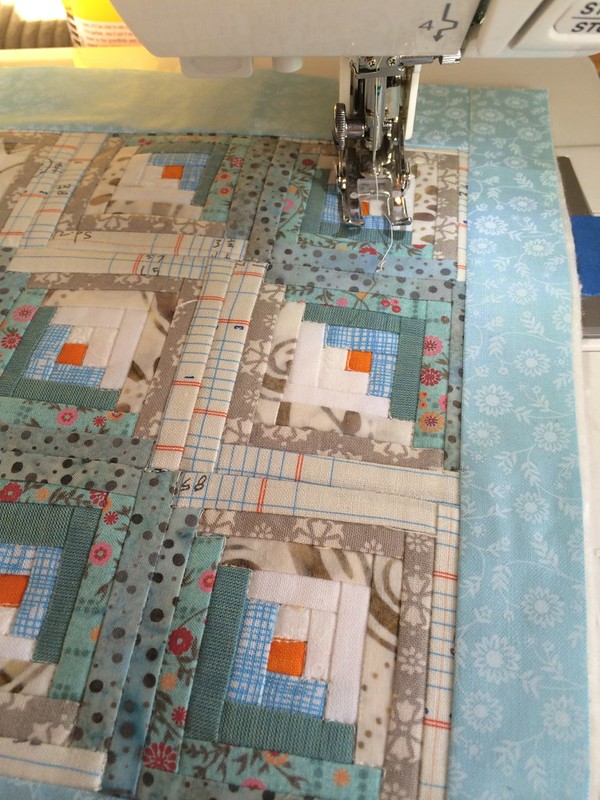
While the bag hung on the drying rack, and I waited to see if the stains had indeed been removed, I also needed to meet a deadline. I needed background and foreground for a quilt I had to finish.  I needed to plunge myself into a project to distract me from the laundry coma my beloved was lolling in...

I went to my safe haven - my Cheers, to drown my sorrows in bolts and fat quarters, carrying the wallet that matched my old bag, the one I'd forsaken, in my hand.  I ran errands, and had quite the handful by the time I'd hit the quilt shop so I'm not sure if I'd dropped the tattered green beast in the parking lot beside my car or if I'd stupidly left it on the front seat and had the door not lock properly when I hit the button.  I don't know. But I didn't have it in my hands when I went to pay.

It wasn't in the store - all the patrons and staff helped me look.

It wasn't in the car or beside the car.  It had only been twenty minutes.

Gone. (Bye Bye Wallet!) I went straight to the bank on the corner to cancel my credit card and get a temporary debit card so that I could at least pay for all the fabric I'd had cut.  I was not incredulous when, after I'd explained my missing wallet situation and tried to cancel my cards, the bank clerk asked if I had ID.  Seriously???  I do have the app on my phone (always in my back pocket, thank heavens!) so I could list off the account numbers and last transactions...

I paid for my fabric at the store with the hand-written temporary card (with that big, white, shameful label that screams to everyone "I was careless with the real one") and trundled off home, heart sinking as I made a mental list of all the ID I would have to replace, and those departments and bureaus I would have to call on Monday, and all because of a stupid cup of coffee, if not for which I'd still have my bag, wallet inside, and not missing/stolen/otherwise AWOL.

I prayed that whoever had it, merely took the money and dropped the ID in the mailbox or turned it in somewhere claiming to have found it.  The money (though I certainly can't afford to just drop money in the street) really didn't matter if I could avoid calling the ministry of health, replacing my social insurance card, my driver's license, vehicle registration....  Someone could be going through my receipts and information and stealing my identity.  Yuck.  I felt violated and icky. AND! What if they cashed in my full loyalty card at the yarn shop - nooooooooooooooo! - and made a break for Belize with my Air Miles?  (Okay, in reality, the miles wouldn't get them farther than Edmonton, but still...)

Late afternoon on the Sunday, the doorbell rang and I ran to find a man holding my ID-laden wallet in his hands.  Before either of us spoke, I nearly burst into tears, thanked him almost a thousand times, and gave him a huge hug.  I had nothing to offer him in terms of a reward, other than my gratitude.  Anything immediately valuable had been stripped, of course, including my hidden small note euros and pounds.  (I live in the hope that a spontaneous scavenger hunt or some other impromptu excursion will take me overseas where that ten pound note would save valuable time or at least avoid calamity...) They even took the pennies. Canada phased them out of currency, but they hadn't yet been phased out of my wallet.  As my conversation with the ID rescuer continued, red flags went up and I began to suspect that he might have been involved in its disappearance as well, but I dismissed the idea as unimportant, in the grand scheme.  Again, I expressed my sincere delight at having my license and certificates and health card and social insurance card and all the other little bits that would have taken ages to list and replace back in my hands with hours of phone calls and running around now off my to-do list.

Act 4: Can't Even Look At It
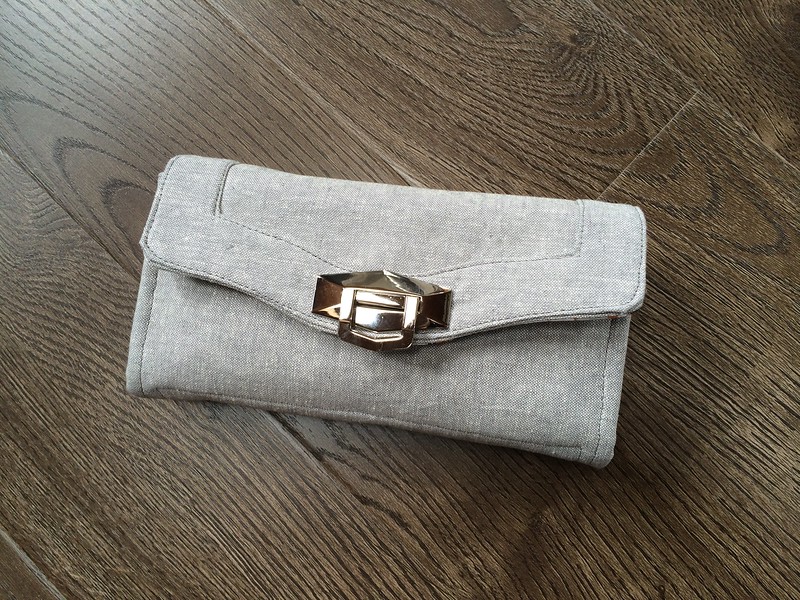
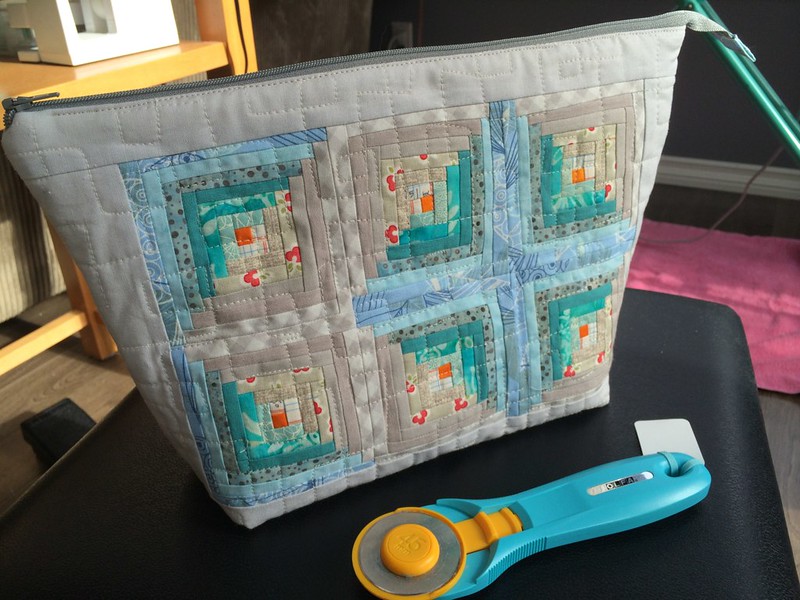
So now I have the wallet back and, while I'm relieved, it feels tainted. Someone rummaged through the whole thing. It had betrayed all my secrets and didn't even put up a fight. I can't bear to put the new temporary debit card in it, no matter how temporary and laden with the still-stinging sense of recklessness. I surrender to the awkwardness of a sandwich-sized ziploc bag to carry my cards.  The wallet's gotta go.  It's beat up anyway. It was as old as the bag it matched which was now in the bottom of the closet.  It's time for the light bulb idea that our protagonist comes up with - new bag is lonely.

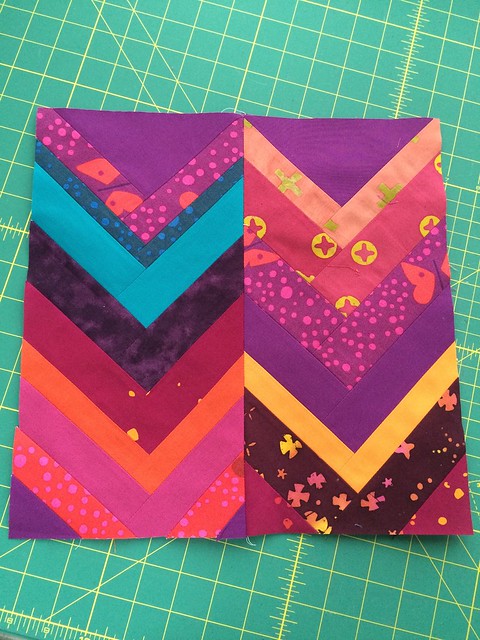
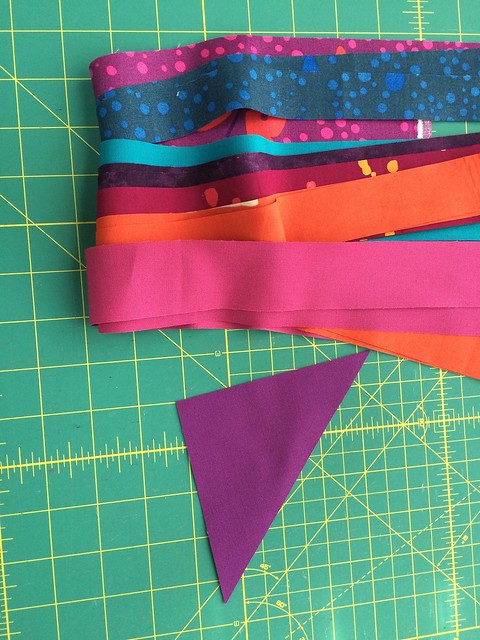
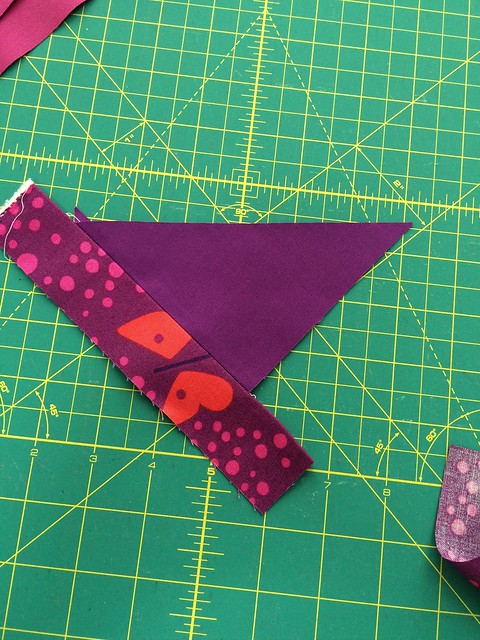
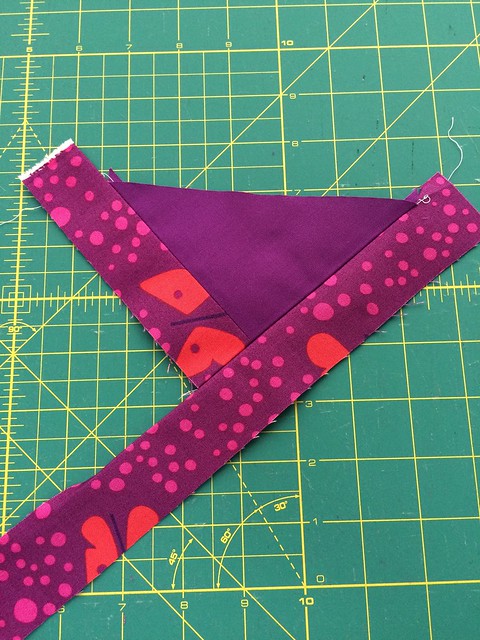
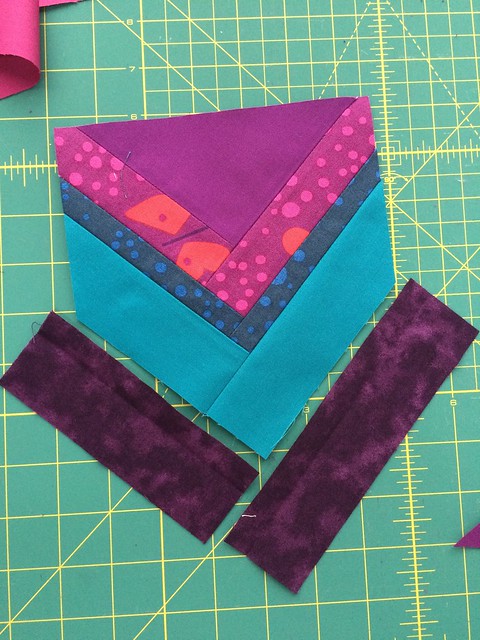
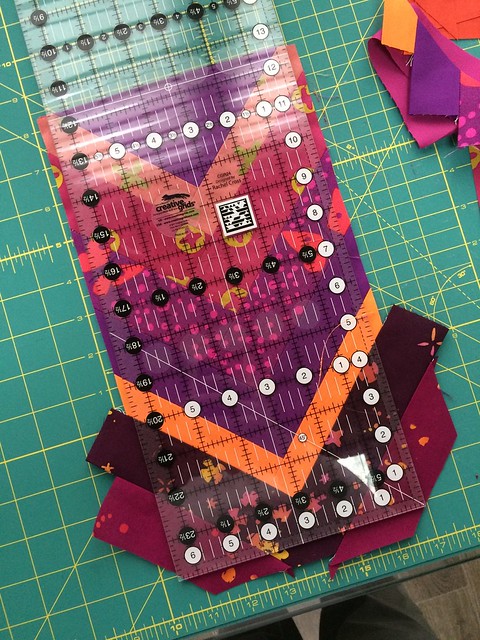
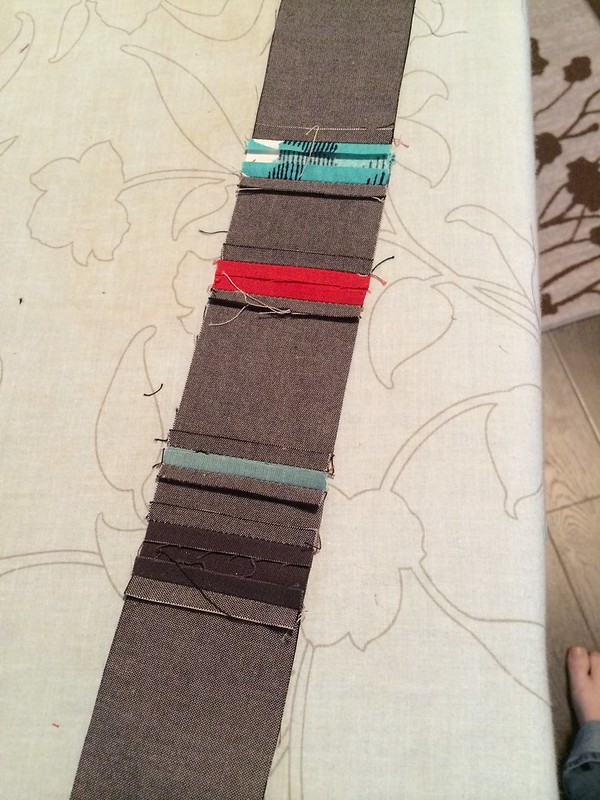
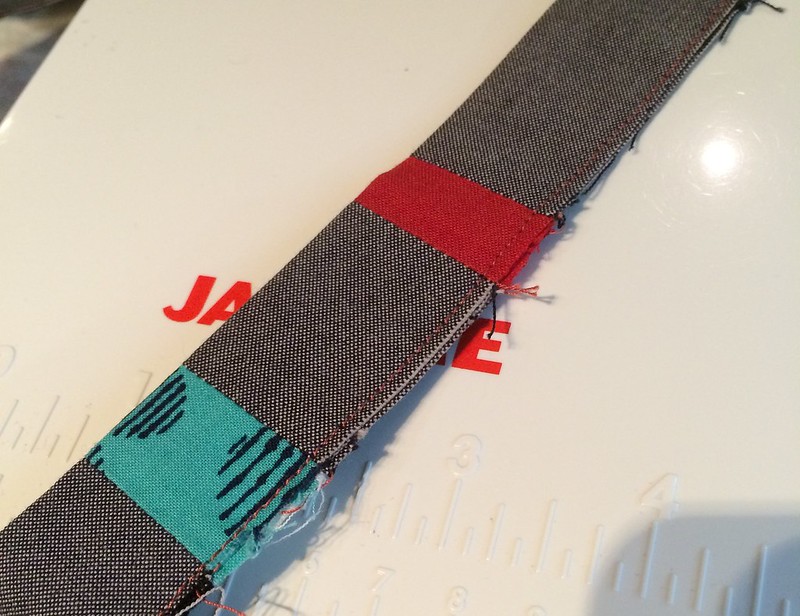
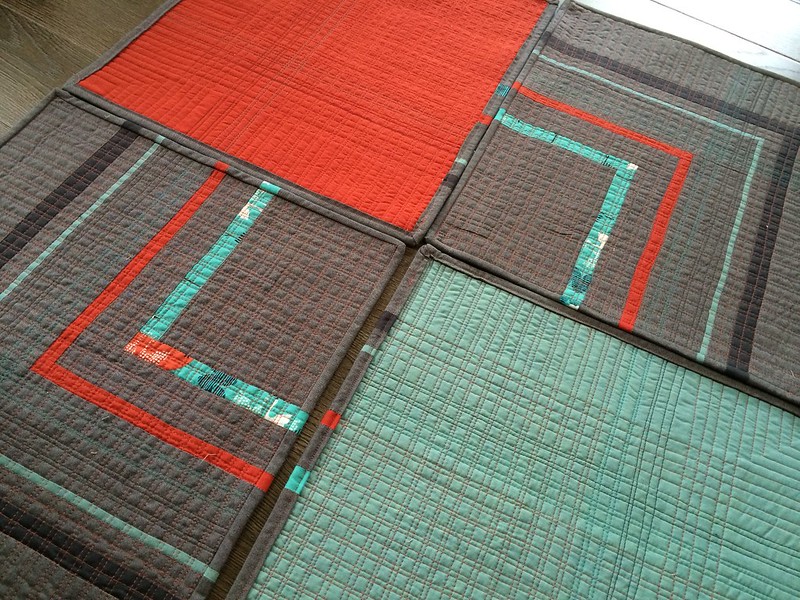
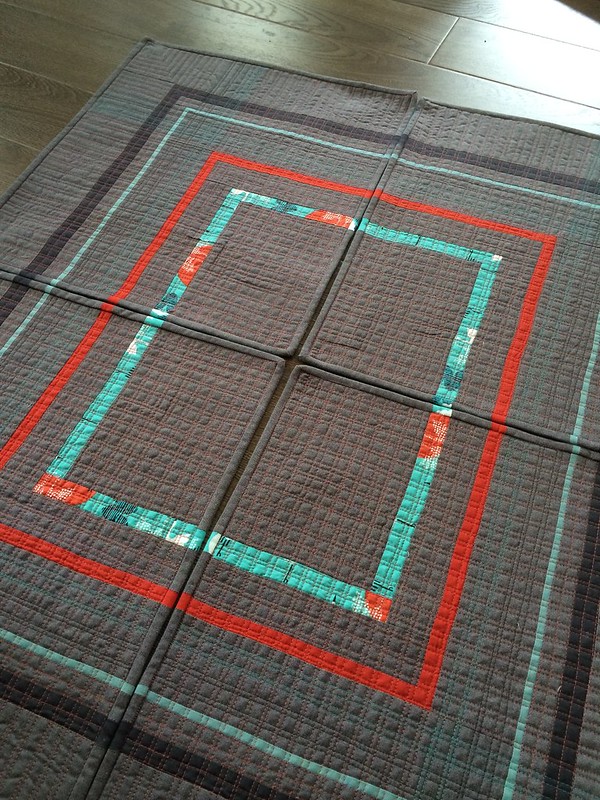
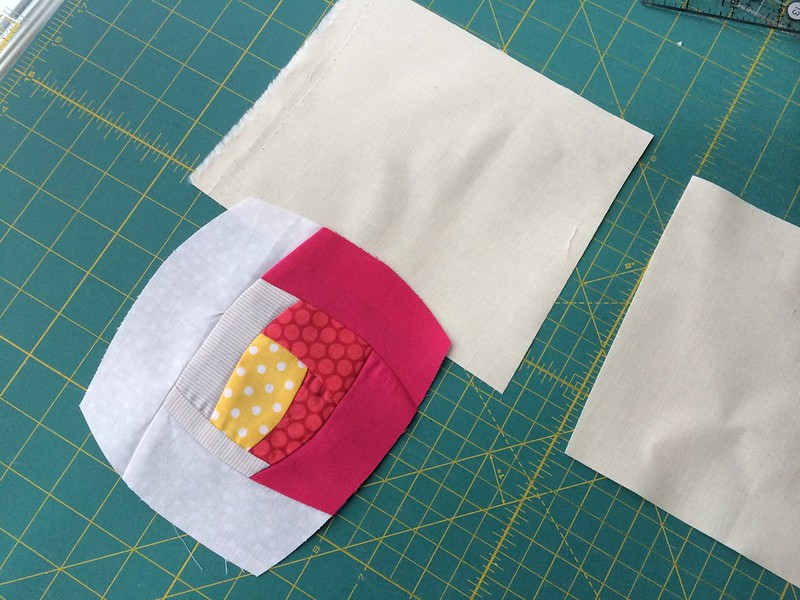
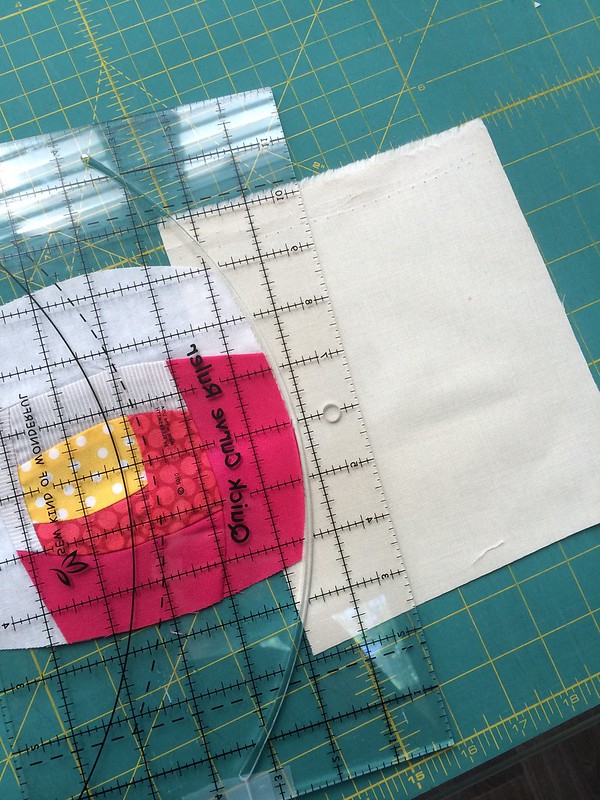
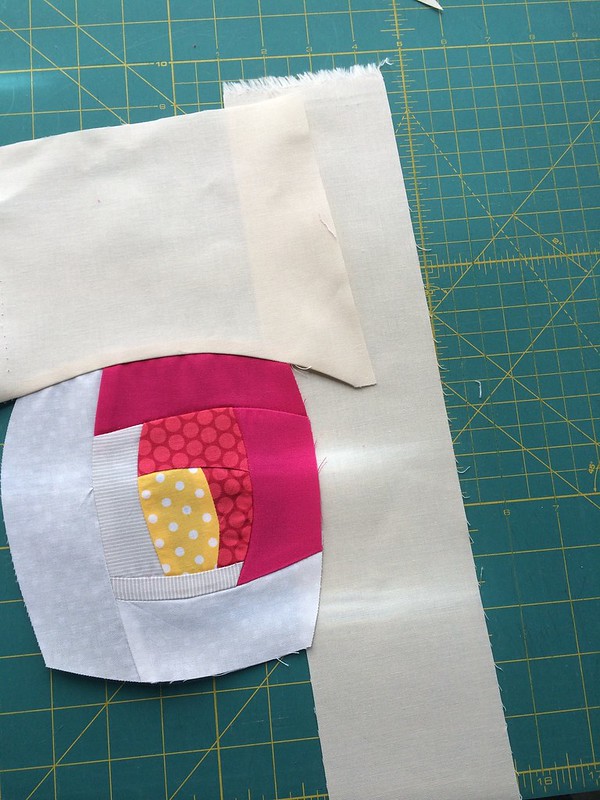
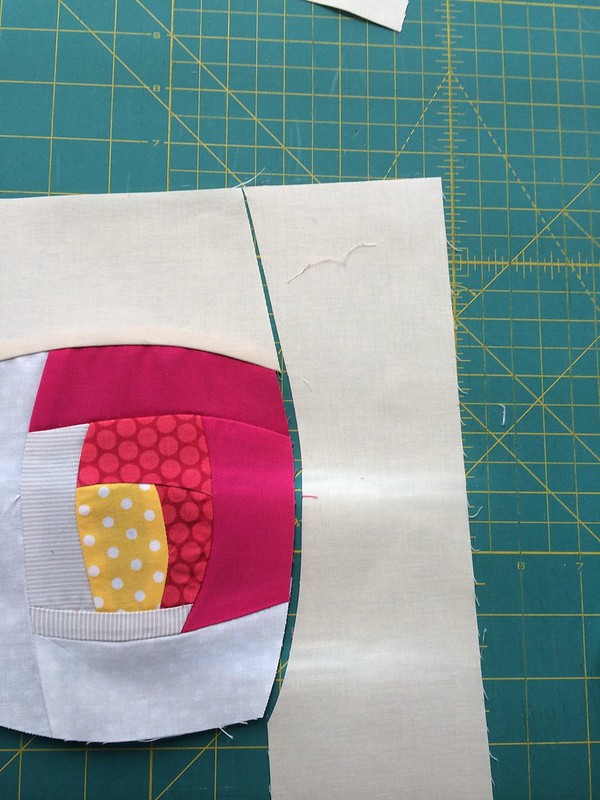
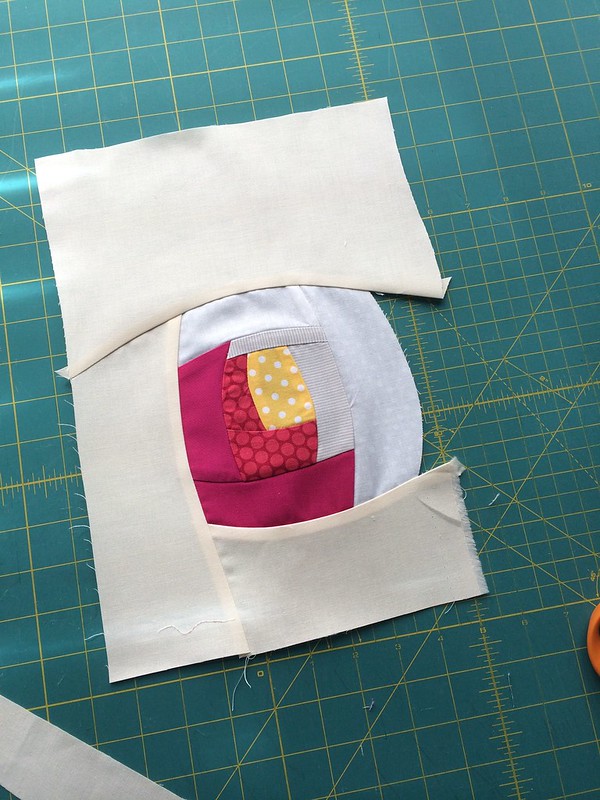
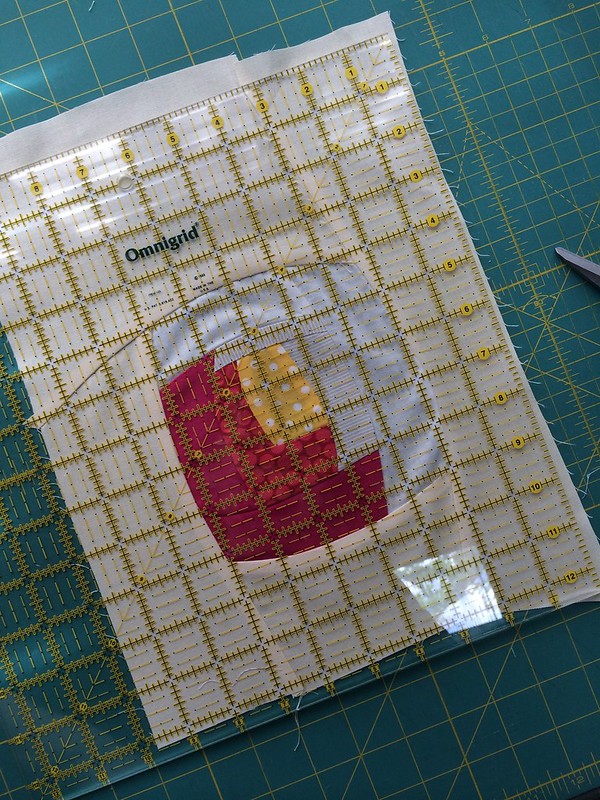
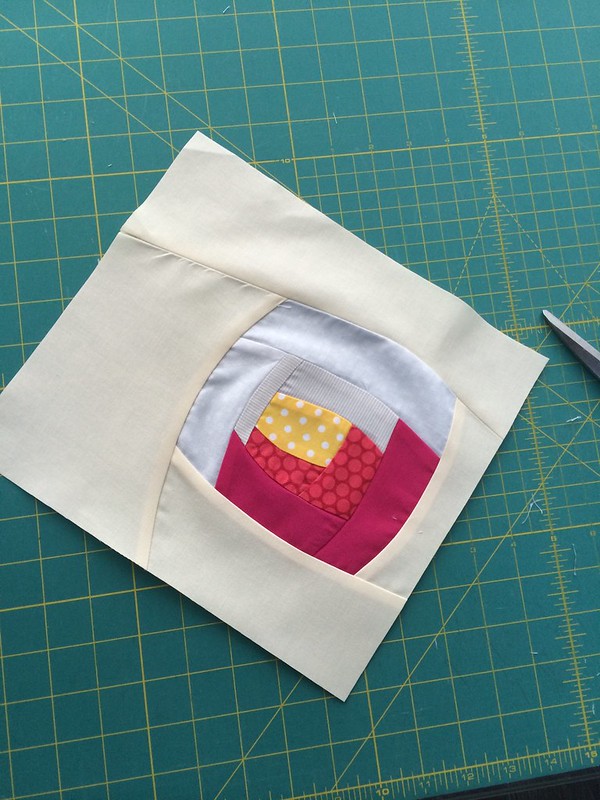
Flash to a furious digging through the notions box for hardware for a long-intended, never started project.  Cut to woman with rotary cutter and flying fabric.  Cue 80s-style sports montage or woman at sewing machine: close-up of foot pedal to the metal, iron pressed up-down-up-down, brow wipe.....

Act 5: Hello, Hello, Love!

They meet in the hallway, introduced by clunky best friend, Keys O'Lanyard.  "This is Necessary Clutch Wallet."  And you know what, these two?  Cut from the same cloth.  A matching set.  They belong together.

Add in one of those cheesy camera masks that zooms in a heart-shaped focus on the pair before the heart turns pink with the words...

The End


End Credit notes:
In all seriousness - these are great, well-written patterns, though not necessarily for beginners.  Use a denim needle and some WonderClips. Take your time and enjoy it.  And no, this isn't product-placement.  I haven't been asked or paid to put these things in my "movie." :-)

Tuesday, July 15, 2014

Framing Curved Log Cabin Blocks Tutorial

Once again, I fell off the internet.  That's life.  Especially lately.  I don't seem to be slowing down, folks.  I am making, quite intensely in fact, but stopping to blog about it seems counterintuitive somehow and when I don't blog, I don't read. However, I miss the realm.  So while I'll probably never be a regular schedule blogger, I always find my way back.  That's why there're RSS readers. :-)  Anyhoo...

Framing Curved Log Cabin Blocks:

Back in April (wow!) I posted a tutorial on making Improv Curved Log Cabin blocks.  And then I intended a follow-up on framing them. Here it is.

Grab your cabin pod, your rotary cutter, your background fabric, a straight edge ruler for squaring up, and, if desired, a curved edge ruler.  You can also freehand, and if your curves are large, you probably will need to freehand them anyway. Starch your fabrics - if you made your cabin without starch, starch it now. The larger the piece gets, the more important it is to keep a stable edge.  Bias is a tricky, shifty beast!

Cut a chunk of background fabric at least a long as one of your sides.  The width is variable and you can use strips or triangles.  Triangles work best for setting them "on point" but you can use strips and put things on point later if you choose.

** Note: This isn't a precise technique - it's based on the same principles used to make the blocks themselves, just with the goal of having straight, right-angled sides at the end.  As such, it's readily adaptable to whatever shape or size you need.  So I'm not giving exact dimensions here.   If you cut your background too narrow or too short, just add more fabric around after.  If you are using a solid, easy peasy.  I don't recommend using a fussy print that doesn't blend well at the seams.  To minimize seams, start with pieces much larger than you think you need and trim down.  Save the larger trimmings and use them to frame other pieces.

Lay your cabin pod on the background fabric so that the curve of the side is entirely on top of the background.  Using your rotary cutter (and your edge, if desired) cut along the curve of the cabin so that the cabin curve and background curve match.  Sew the background to the pod as you did for the sewing the log cabins.  Press with the seam towards the outside edge.

Cut another chunk of background long enough to cover the side of the pod, plus the new piece you've just added.  Lay the pod on the background as before but be aware of where the edge is - you'll have to angle your curve to end somewhere and you don't want it to be too sharp or straight at the end point.  Ideally, your curve will end where the top of your pod and the background fabric intersect. It doesn't always happen that way but that's what trimming and extra fabric are for!

Cut your curve as before and sew.  Press.

Repeat the process until you have background on all four sides.  Using your straight edge, square your block to the desired size, or simply trim straight.  At this point, it's easy to see if you need to add more fabric to corners or whatnot.

And there you have it.  I chose to leave my blocks irregular sizes so that I could play with the setting but have fun with it and see what you come up with!

I've added a ton of photos of this process to a flickr album so feel free to flip through if you need a little more help - I've even done some using triangles.

Okay, as usual, I have over a month's worth of blog reading to do. So I'm getting back to it starting now. :-)

Friday, June 6, 2014

The Great Sort: How I Deal(t) with Scraps

During my blogging hiatus, I was still sewing.  Usually in spurts.  While renos continued, I could only set up my space for a bit at a time, and if I got to leave it up for days!! in a row, then it was pedal to the hardwood...

In February, I had vast amounts of space to myself to fill with nothing but a makeshift studio, conveniently located near the refrigerator and coffee maker.  Also, with extra plug-ins so I could stream the Olympics on my laptop while the fabric was flying.  And flying it was!  I took the rare opportunity to spread out over two floors and organize my stash, supplies and most importantly, my scraps.  This was an "in-progress" photo of the front room as seen from the dining room/kitchen "workshop" I'd established.

Indeed. Whatever you are thinking about this photo, I agree with you.

The process took awhile.  Several evenings.  But the benefits!  I had a "eureka moment" of scrap storage idea that is incredibly useful to me (steal it if you want to) considering my lack of space and cold, cash dollahs!  Yes, necessity invented this mother of a scrap system.
Yes, the blues are out of control, as are the greys....

Hanging folders from IKEA.  Plastic filing boxes. Twelve different sections.  I can see all my small scraps and still pick from many different colours at once. I can also remove an entire colour, lay it open on the table, and the fold it back up and "refile" it. Plus, pretty.  (Ok, I'm not really thrilled about the plastic part but the need to keep things portable, stackable, and dust-free trumps my qualms. I also make sure to allow my fabric plenty of time to breathe on a regular basis. )

My large scraps were pressed and folded and sorted by colour ( I use a 12- colour category system: purples, pinks, reds, oranges, yellows, greens, blues, blacks, greys, whites, creams, browns, which is preferable to the old system of "stuff 'em willy-nilly into whatever container is closest").  Then I stacked them in a box with my baskets of various-sized squares.  Strings and selvedges also sorted by colour, in their own box. And then my stash, on comic boards, solids separated from prints. Battings, interfacings, etc in another.  To be fair, I do have a smaller stash than most - less than 150 yards on hand - with most of that earmarked for specific projects. I'm trying to get better at mindful purchasing, because let's face it, I simply don't have the money or the space, and fabric's only as valuable as it is useful.

Nope, this isn't all of it....

And now that everything is contained and organized, my space (which sometimes needs to be completely dismantled - hence the lack of shelves, no using wall space, and collapsible desk) looks like this.
Batting and interfacing box is actually kept in a different room...

And it works.
Scraps in action! Tiny tiny tiny....
Pouch for a swap
So does the scrap system.  And that makes me very happy.
Pouch for a gift.
Yay for tiny!