Showing posts with label bee. Show all posts

Tuesday, April 29, 2014

Curved Improv Log Cabin Tutorial

Hiya! Yeah, I know...  How've ya been? Me...? It's been busy and chaotic with a side of crazy monkey banana pants.  More on that some other time. I'm going to ease back into the the interwebs slowly.... with a tutorial.

I'm a very happy member of Canadians Bee - a group that formed after the first round of Simply Solids.  These ladies are intensely talented and totally amazing. In fact, I'm lucky enough to be in the Saskatoon Modern Quilt Guild with 3 of them!  It was those three that I ran this block idea by and they all said they were game to try it so that's what I'm going with.
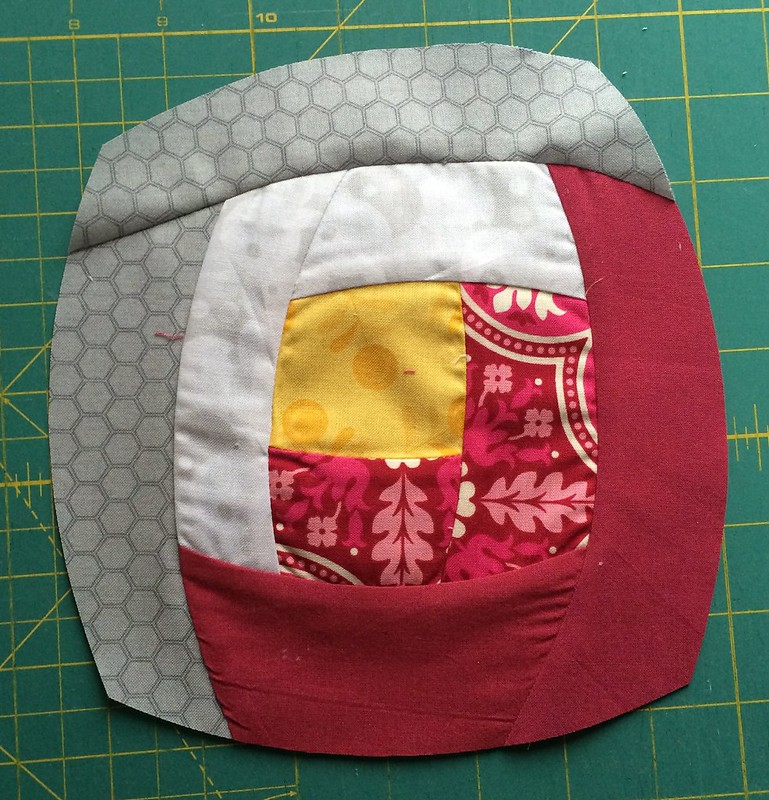


This tutorial is the basic technique and I'll add specifics for the bee in the flickr thread.

This is a very flexible technique and can be used as you wish.   For a traditional(ish) log cabin, alternate light and dark fabrics.

Here we go!

CURVED IMPROV LOG CABINS

You might need these supplies in addition to your regular sewing gear:

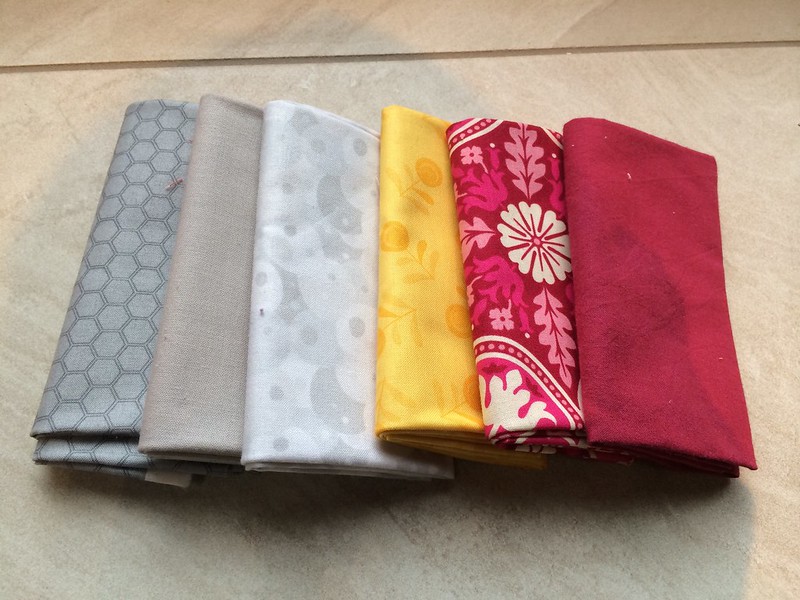
5 or more various fabrics in your chosen colour palette:  This technique can use jelly roll strips easily enough but  you can use wider. You can also use scraps.  I started with a 3" square in the middle and some of my outer strips were roughly 3" but it's not exact, nor does it need to be.  You can go smaller or bigger.  Add more rounds as you please.  I made two different blocks in my examples.  I used yellow for both centers (A), then in one B&D were dark colours, C&E light.  The other block had B&D light colours with C&E dark. 
Rotary cutter: This would be a tedious process with scissors.

Starch:  This is handy for sewing curves.  If you give your fabrics a light starch before you cut the curves, I find they cut cleaner, sew smoother and lie flatter.  I forgot to starch my fabrics at first and had a little wrinkling - which will all go away once I quilt the sucker but once I remembered to starch, everything went a lot smoother.

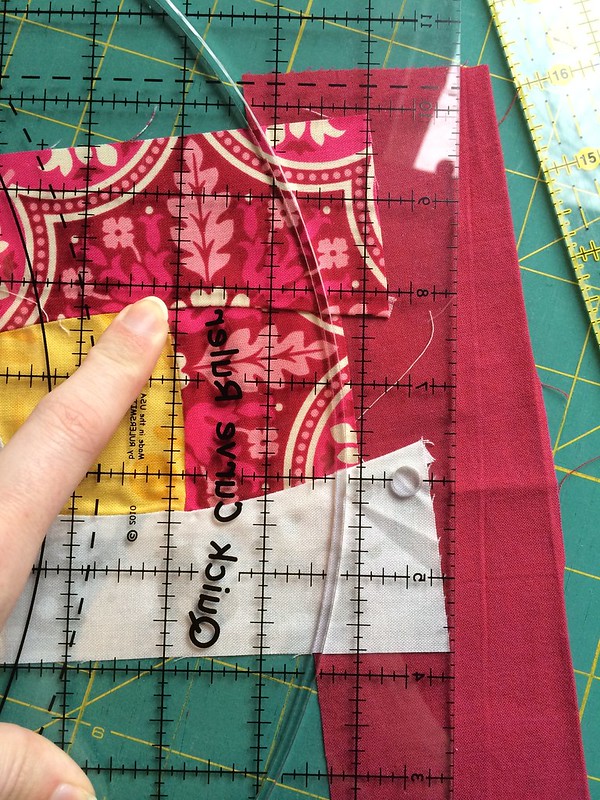
A curved edge:  I used the Quick Curve Ruler and the old "no-ruler-eyeball-it-freehand" method for cutting the curves but you can also use a pie plate, an oval casserole dish, , a french curve, an old charger from your Christmas table settings that you've since decided you hate....or nothing.  It doesn't have to be a perfect circle or oval - it just needs to have a curved side you can put against your rotary cutter.  It doesn't even need measurements!  But it's easier to use if you can see through it.

1/4" foot:  I find it tons easier to piece curves without using pins by using my 1/4" foot.  We'll get to that later...

TECHNIQUE:

1) Choose a fabric for your center.  For ease of instructions, we'll call it Fabric A.  I used a 3" square here but you can also use a rectangle.  Measurements aren't important here - since you'll be cutting away the edges, having perfectly straight cuts to start with isn't necessary.
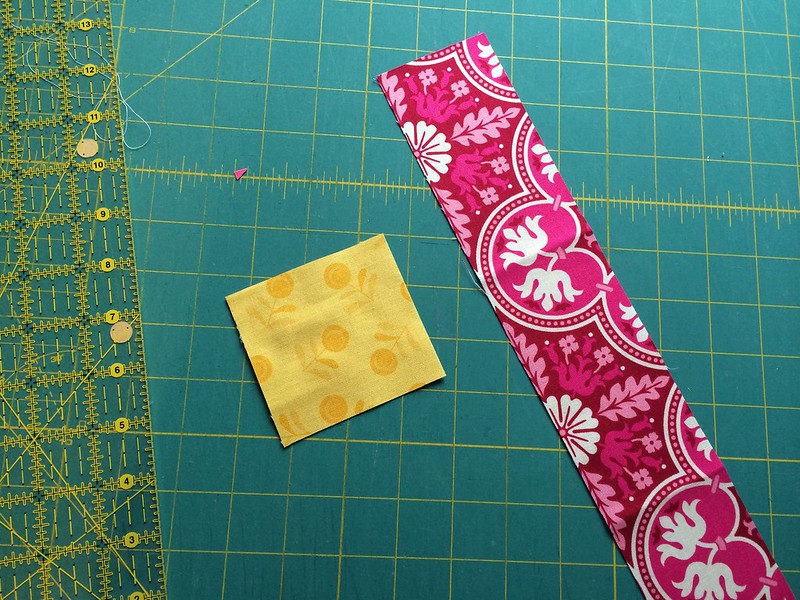
Take a strip of your next fabric (B)  - I used a roughly 2.5"strip - and layer your center piece over it just a little - right sides up.
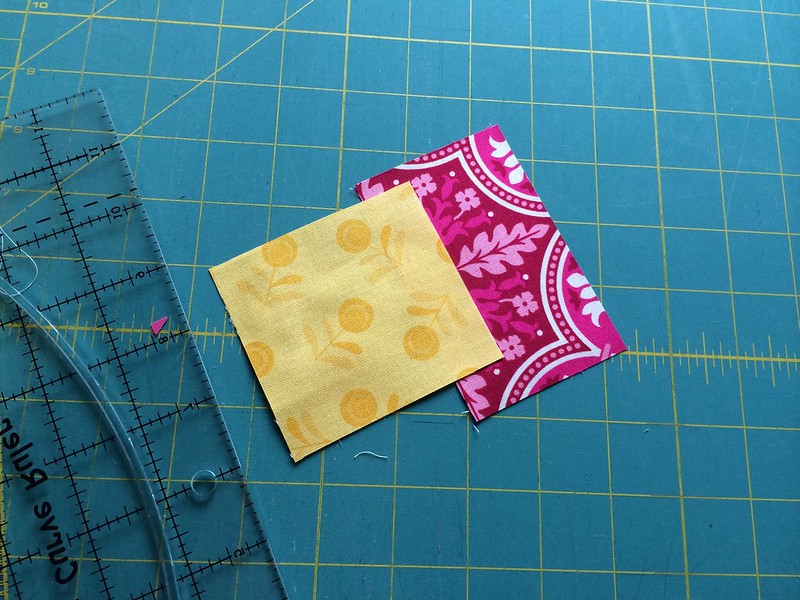
You can trim the needed bit off the strip so you're working with smaller pieces. There should be a slight overlap.
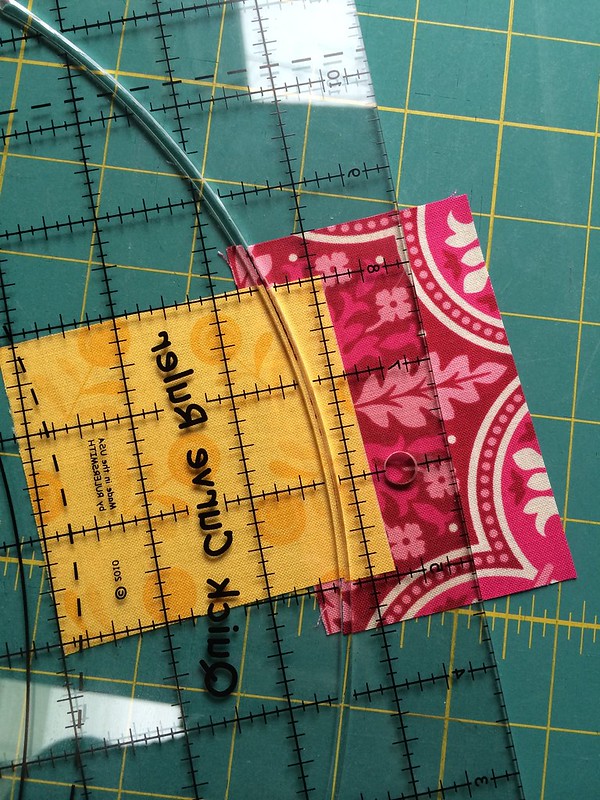
Place your curved edge (or use your fabulous sense of freeform adventure!) on the overlap.  The only thing to be aware of here is that the curve should start where the two fabrics meet at the edge on the bottom and end where they meet at the top.  At all times, the curve should pass through BOTH fabrics.  This way, you make a matching pair of curves.
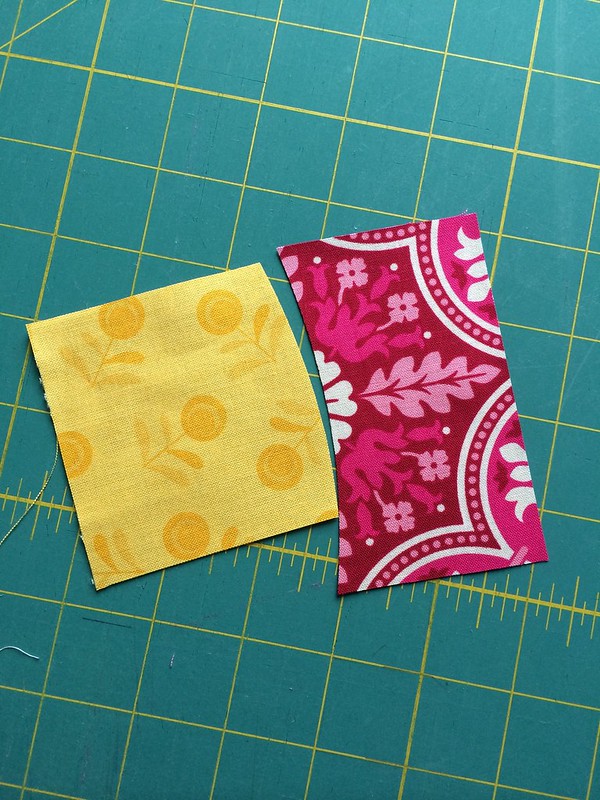
Fabric A curves out and Fabric B has a nice dent for A to fit into.  Remove the excess fabric so you're just looking at out-curved A and in-curved B.  Place them right sides together, matching at the top of the curve.

2) Using your 1/4" foot, place your RST curves underneath your presser foot and take a few stitches.    I like to put the out-curve on the bottom and the in-curve on the top. Then holding your fabrics apart as you sew, guide the bottom piece with your right hand and the top piece with your left hand, bringing them together using the 1/4" fence as a guide.
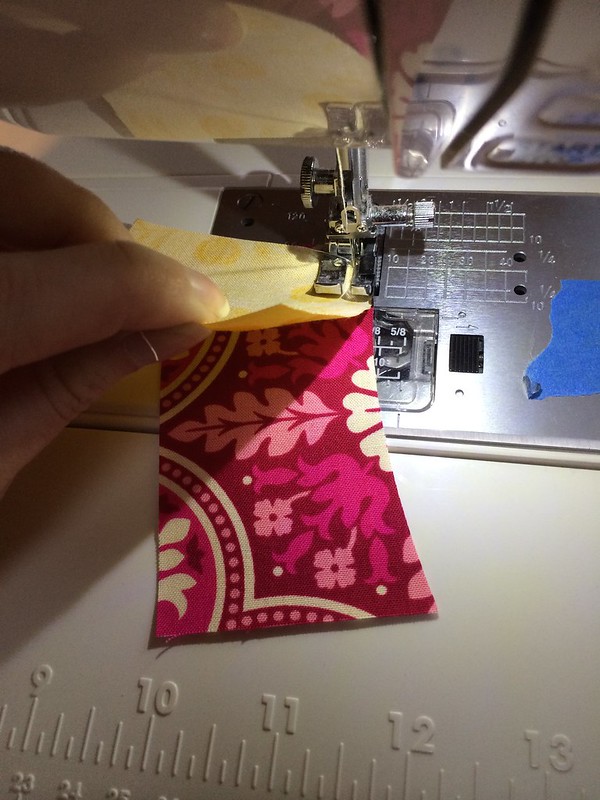
Try not to pull or stretch as you sew.   There are a couple of videos on sewing curves without pins out there if you need to see it.  This one is great!

3) Press to the side of least resistance - in or out, depending on your fabric.  There isn't a bulk issue here so direction isn't important. The seams lay fairly flat if you use the no-pins method.

4) Lay down another strip of B.
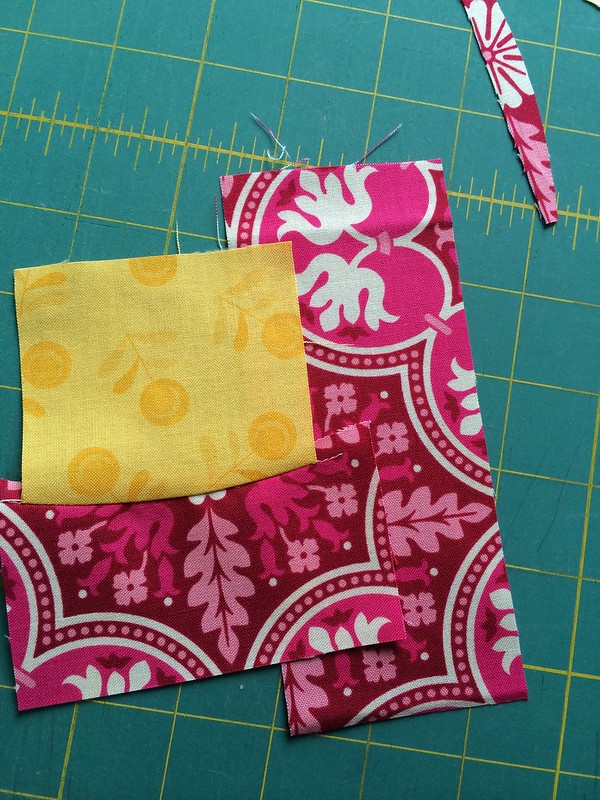
Layer your A/B center unit onto the B strip, keeping the B part of the A/B centre at the bottom.  In order to keep the traditional log cabin look coming through in this modern version, always orient the center piece so that the strip you just sewed is in the same position.  Always on the top  OR always on the bottom.  You choose - just keep it consistent for each pod/block.
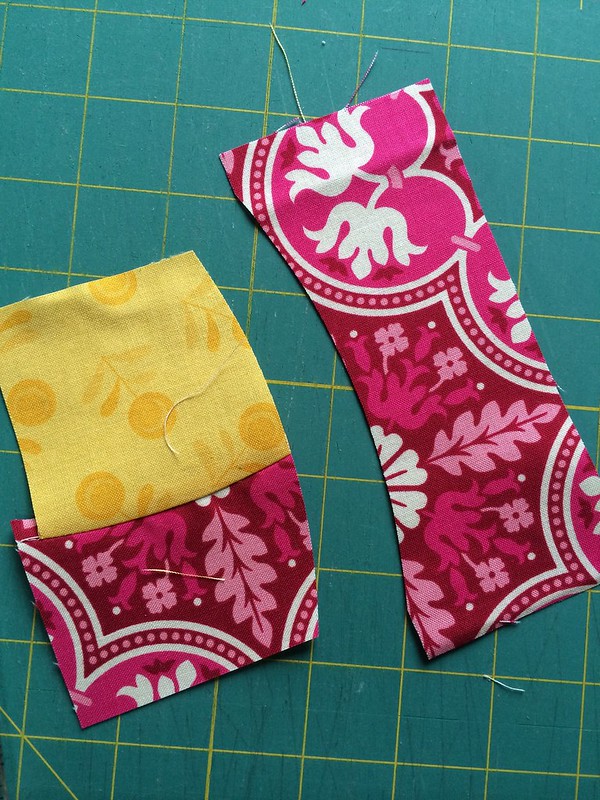
Make your curved cut same as you did in Step 1.   You can play around with angling your center so that the width of the strips changes from piece to piece. It can be wider or narrower, sharper or softer curves, whatever appeals to you.  The idea is that this will take on its own shape and not be uniform. Each little cabin will be unique.

5) Sew your curves same as in Step 2.

6) Repeat the steps using Fabric C, then again with each D and E. And beyond if desired!


When it's the size you want, use your curved edge to curve up the sides.
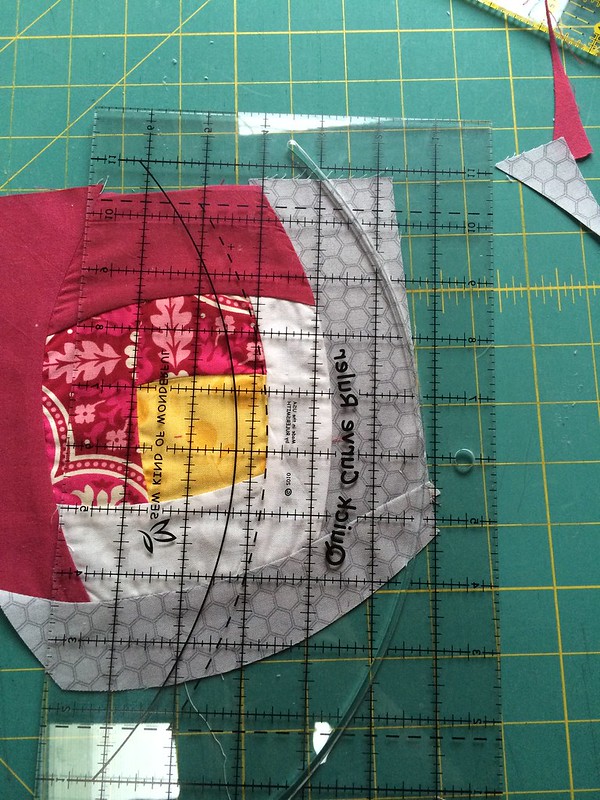
You now have a log cabin pod!

Coming next month, once I start getting bee blocks in the mail, I'll do another tutorial on how to frame them out into full blocks.  Hint:  It's very similar to what we've just done here but with larger chunks of fabric and squared outside edges. :-)

Let me know if you have questions or if you try this technique out!  I will get back to you as soon as I can (which is right after I catch up on a great deal of back emails and blog reading!)  Please make sure you're not a no-reply blogger or I can only answer questions in the comment thread.

Thanks for reading - hope you enjoy it!


Wednesday, May 15, 2013

Round One: Done.

Oops!  Been awhile, eh?  Well, I doubt you're surprised. After all, I did warn you that playoffs were starting...  (I even skipped a guild meeting to watch the Leafs-Bruins Game 7, which no one saw coming!  No, it didn't go my way but I'm really proud of how they played so I'm looking on the bright side. After all, they got two more games in the win column than the Habs and three more than the Nucks so that's bragging rights. It just hurt that it was the two teams I love most at each others throats. Oh, the agony!)

Anyway, sewing!  There have been a few days where the sewing machine has seen intense use....

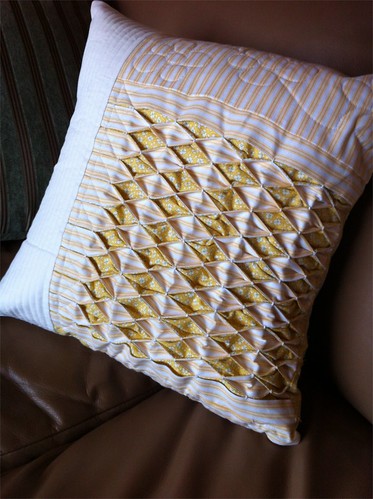
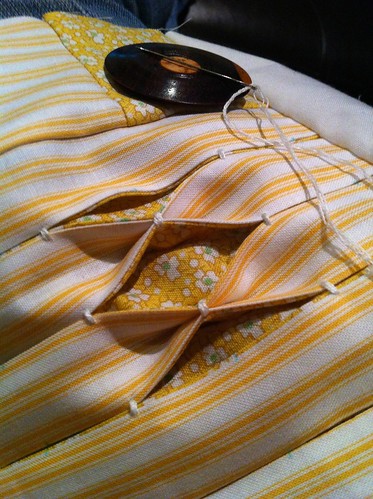
I finished our last challenge for the Saskatoon Modern Quilt Guild.  We had to draw two crayons sight-unseen from a toque and use only those colours (plus neutrals if we felt like it).  I had yellow and white.  Seester has a yellow living room and a new pillow.
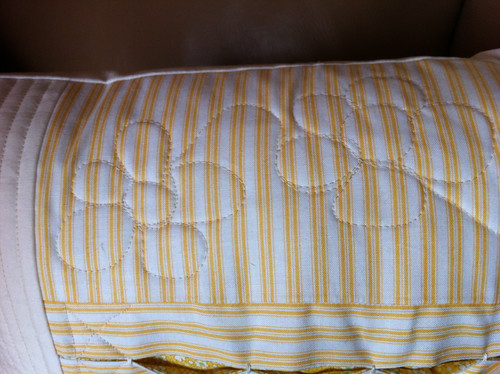
Things learned: 1) Sew and quilt the top BEFORE smocking.  I had wanted to be sure that the smocking would work first but then I had to deal with puckers from hell. 2) Sometimes, that 2" less than the size of your pillow form rule doesn't apply.  Super puffy forms mean that it would have been just fine with an same-sized cover.

I also managed to finish the challenge at the end of the month.  Patti @ retiredtoquilt generously donated a FQ bundle for our members to use making 2 - 12.5" blocks to go into quilts for local babes and kids who need a little extra cheer. Rules:  One block has to use a technique we've discussed at guild, the other is quilter's choice. We can only add coordinating solids or more of the same line.

I chose stacked improv curves in a rail fence-ish setting and surprised myself.  They went together really easily. And curves terrify me.  Hunh.  I also threw together an improv wonky log cabin.  I'm getting very comfortable with improv as I go on.  I think sewing with a toddler on your lap helps you to not overthink things. We had fun with the scraps from this challenge!

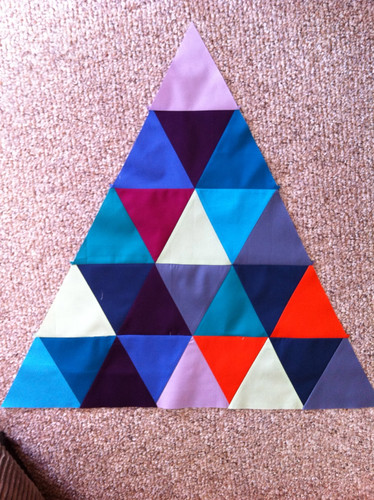
For the Simply Solids Bee, Principiessa sent us triangles to randomly create a larger triangle - so fun! - and challenging.  Points, points, points, points....

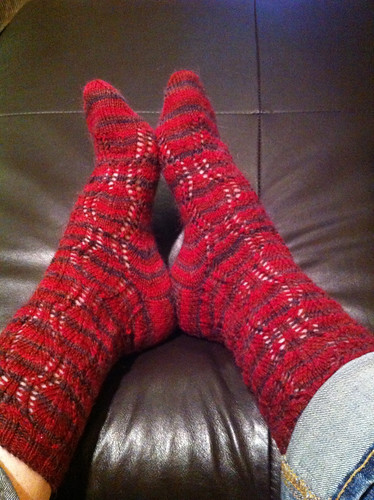
And the socks I wasn't going to finish during playoffs because they were too complicated? Perfect for clearing things off the PVR. :-)  Misty Alpaca.  Super comfy, but not in dress shoes.
Medallion Lace Socks - pattern found here

I've been working away at other things, too, but my schedule has been crazy so it's spend an hour sewing OR spend an hour reading/blogging. Yeah. When you're battling brain fatigue, sewing it is.

Well, I've got some things to get done and a over-stuffed RSS reader to deal with so I'll talk to you soon!

Thursday, April 4, 2013

Still kickin'

Well, it's been real... lol.  I find that in the spring, I need a little more downtime than the rest of the year due to the season-shift and the migraine-related consequences that come with it.  This year, with its whack-tastic weather has proved to be a little more difficult than usual and results in the frequent disappearing act.  It's not that I don't miss reading blogs and keeping up on the haps but this last little while, I kinda skipped the glare of the internet - my laptop sat abandoned - and my sewing machine gathered more dust from disuse than lint from overuse.  It's Easter break so I've had the week off but while I had big plans, I crashed hard instead. My productivity was more of the passive kind - I cleared tons off the PVR and watched almost the entirety of Game of Thrones(I was also holding my breath approaching the NHL trade deadline... Phew! Dodged an unneeded goalie-sized bullet there!)
This was the first day of Spring 'round these parts.... Chest height snow. After the first two melts.  Yeah.
So, I'm a week behind on everyone's blogs if you've been missing my comments or hits on your site. Sorry, I'll get there. :-) (Oh, so very Canadian....)

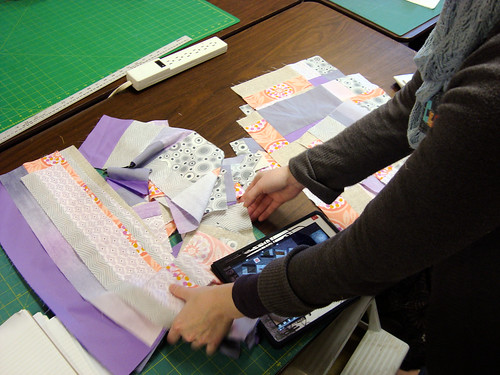
I am working on a tutorial for the random piecing demo I did at the Saskatoon Modern Quilt Guild at our last meeting and I'm hoping to get it up before the end of the weekend.

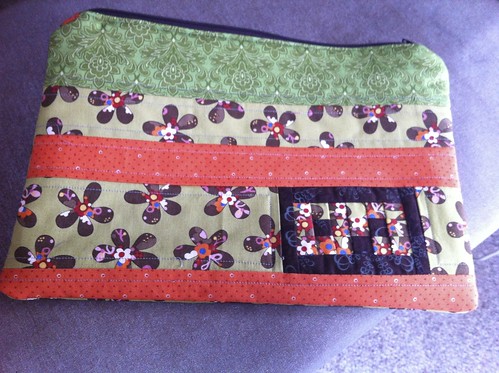
The guild has a couple of challenges going at all times.  The one we just finished was the Ugly Fat Quarter Challenge.  We all brought an ugly FQ, dropped it into a pillowcase and took turns pulling one out. What did I get? A green/brown floral monstrosity.  I went pouch because I was mentally blocked and after experimenting unsuccessfully with some FMQ and mock-trapunto, I was running out of fabric.  I did manage to quickly design my own gnome-y accent for it though and it makes me happy.  My sister thought the pouch was cute and it now lives with her.
'Scuze the shaky photos - took them months ago.

Our current challenge is a Two-Colour Crayon Challenge.  You pull two crayons from a magical toque and those are the colours you're stuck with.  You can use only those colours, and neutrals if you really feel you need them.  I pulled yellow and white.  And as much as I'm happy with how it's going, it will also be living at Seester's.

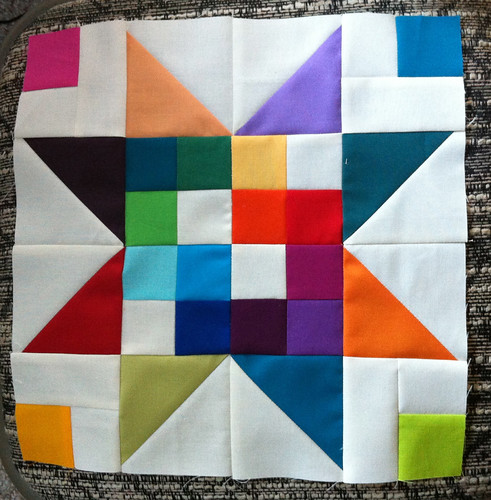
I managed to get my Simply Solids Bee block finished.  Karen @ BungalowBayQuilts asked for Scrap Jar Stars and I was thrilled that I had tons of scraps so I could make it really colourful for her. Hopefully, colour was what she wanted because, boy, there's a ton in there!

The major project I had planned for the break was the quilting on a quilt that's sat waiting, basted and ready, since the middle of January. Well, folks, it's already the end of Thursday and this is how far I got.
10 minutes in...
But when HotWheels interrupt your projects, it's really hard to be annoyed at a lack of progress.  Nephew's learning about why we don't keep pushing the button with the scissors on it...

And since you may have noticed this, I'm not on Crackbook, I don't pin anything, I don't use Twitter or Instagram, and am kinda lame and inept at using Flickr.  Therefore, please understand how very difficult it was for me to do the following.   I am resentfully claiming my blog on Bloglovin'. (I am a curmudgeon, yes, I get that.)


Follow my blog with Bloglovin

Yeah.  I have no plans to use it - I'm happy with Reeder - but I know that I keep a pretty low profile and thought it might make it easier to find me, if you're looking.

Now - I'm going to send some overdue emails and get back to reading.... Have a lovely one!

Sunday, January 20, 2013

Wanted: A Clever Post Title

So if you think of one, let me know. :-)

The tree came down last weekend and my desk returned to its place in the corner, but along the other window this time, which has freed up some space.  I'm still in the process of getting organized but I'm getting there. Given that this new setup has led to long, uninterrupted stretches of sewing, I have taken full advantage.

My nephew's 2nd birthday was on the 5th and while I did give him a bunch of Hot Wheels, I hadn't finished the other half of his gift until this past Wednesday:  the bag to put them in.
See my oops? :-)

I found the paper-piecing patterns on Fandom In Stitches - totally free - and then I framed the results with a lovely little traffic print, lined it with the leftover solid from Seester's quilt and added two ribbons to act as drawstrings. It finished about 12x15".  He was thrilled. "Oh!  MAY-turr...!"  Happy boy, happy auntie.

The other advantages of gaining back the workspace is that I was able to cross off a goal by organizing my scraps.  I went from this...


...to this...


...and finally this:
Ooooh, that's one fingerprint-y desktop...

Neat and tidy. Well... they're contained, anyway.  I would like to organize further but right now, they're sorted by size. Crumbs and short strips in the orange bin, everything else sorted in large ziplocs, etc, in the white laundry hamper.

The sort also allowed me to do something I swore I didn't have time for...

I drank the kool-aid.

For the record, I don't do instagram.  I wasn't exposed to this virus through instagram.

Nope, it was y'all.

Within a two week period, it seemed that almost every feed in my RSS reader was throwing Scrappy Trips at me.  I'm not generally a joiner in the "everyone's doing it" sense (I still haven't seen Titanic, and don't intend to) but they were so pretty! And EVERYWHERE.  It was a bombardment; I was hiding in my "I don't have time" bunker but being shelled within an inch of my quilting sanity.  I came out waving my white flag. Of scraps.  That was my one rule for myself:  I had to use only scraps for these blocks.  What will happen with the back and binding? Don't know.  But for now, I'm pleased (and sickeningly shocked) that I made 36 blocks without cutting into yardage.  That's a sizeable dent in the old scrap heap, eh?

And then there's my first ever bee block for the Simply Solids Bee.  Never done a bee before but it was on my quilting bucket list, so...  Lethargic Lass asked for asterisk blocks - and they were much more fun than I thought they'd be; the fabrics she sent were different than what I usually use, too, so that was very enjoyable!  I threw it in the mail last week so she should have it soon.

Believe it or not, I actually got MORE sewing than that done last week and I have the iron-steam burns to prove it. But why spend all my projects on one post...?  :-)

Have a stellar week!