Showing posts with label Tutorial. Show all posts

Monday, July 13, 2015

Canadians Bee 2015 - August Block Tutorial: Chevron Blocks - Herringbone style

Hey there. Been awhile. 

I was teaching. It was very busy. I did not have time for the web. Sewed but photos and writing about it took too long and by the end of the day, me no write words good. Me no good read blogs too.  To unwind, there was knitting and Netflix. There was Knitflix. 

I have missed almost a year of the internet. I'm sure many people won, that memes were hatched and hashtagged and things were amaze-balls and awesome sauce. I saw a little bit of it. Not much.  I'll try to go back and skim a bit to catch up but for the first time EVER after such a long hiatus, I'm not going to read everything. I usually do but I've been gone too long and feedly only goes back thirty days... 

I did miss you, though.

Anyhoo.... August is my month for the Canadians Bee and the Queen suggested that I get the tutorial/instructions up early. So, away we go!

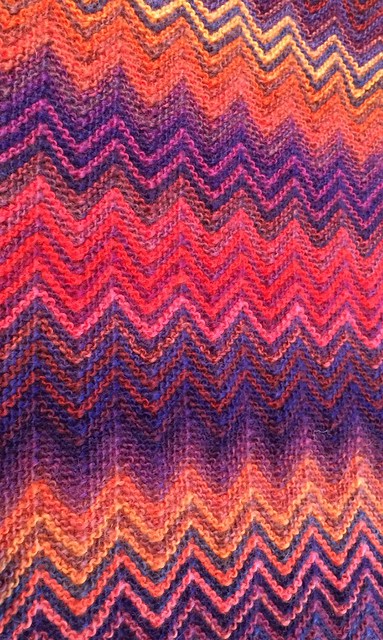
This scarf is the inspiration for this month.
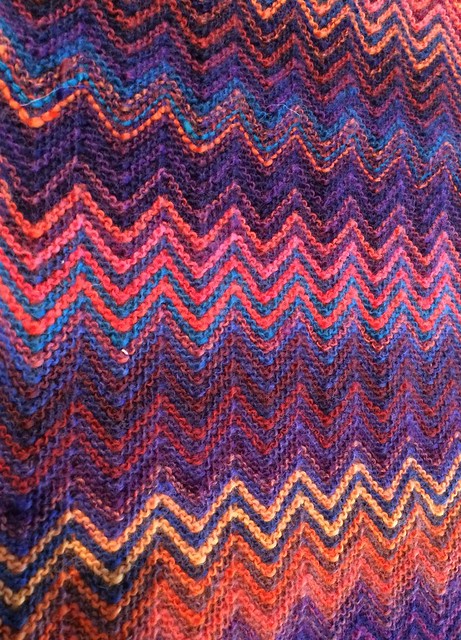
I would like Chevron Blocks - sewn herringbone-style.

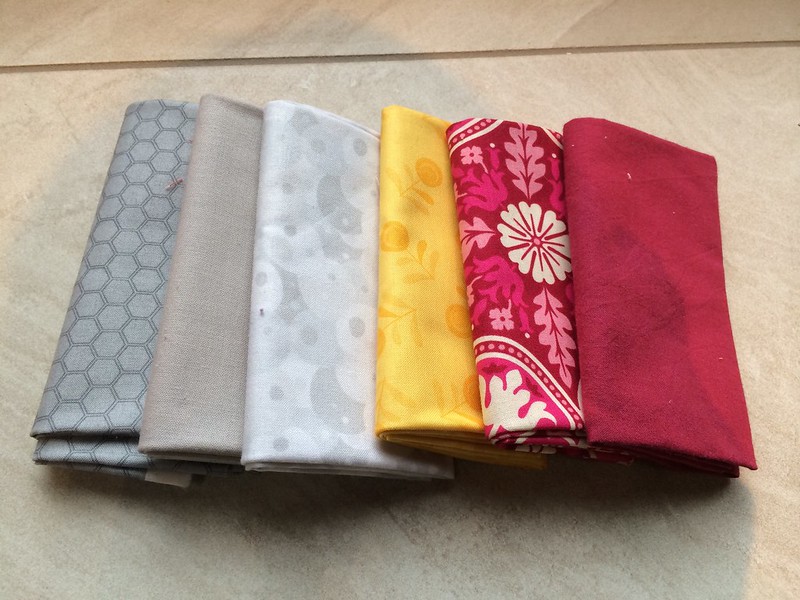
We're looking way outside my colour comfort zone and focussing mostly on the reddish family of purples. Accents include yellow, orange, dark pink, red, teal-ish-turquoise-y blue and navy.   Try to pick really saturated fabrics, tone on tone or solids, and avoid any prints with significant traces of white, grey or black. Also, skip green entirely.  Where we're going, we don't need green....  The Kona colours I pulled for examples (not mandatory...) are cerise, persimmon, cheddar, caribbean, red plum, geranium, dark violet and poppy.  I give you the names because purples are notoriously difficult to photograph.
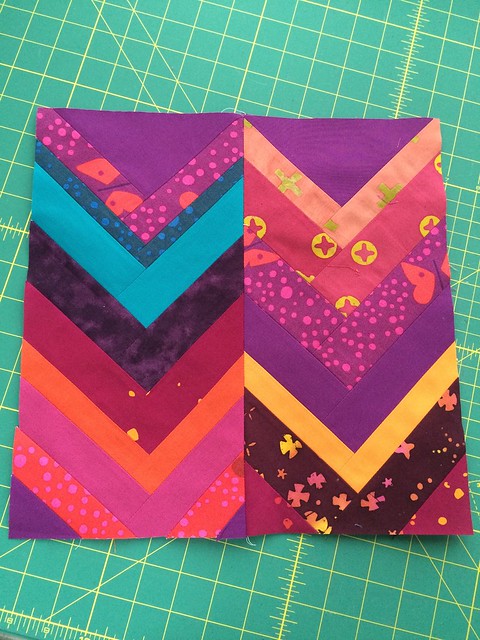

Each 6 1/2 x 12 1/2" half is quick if you do two at a time, but if you can only manage one, I completely understand! Please leave the halves unsewn, particularly if you make identical ones. I didn't use a pattern but here's how I made them:

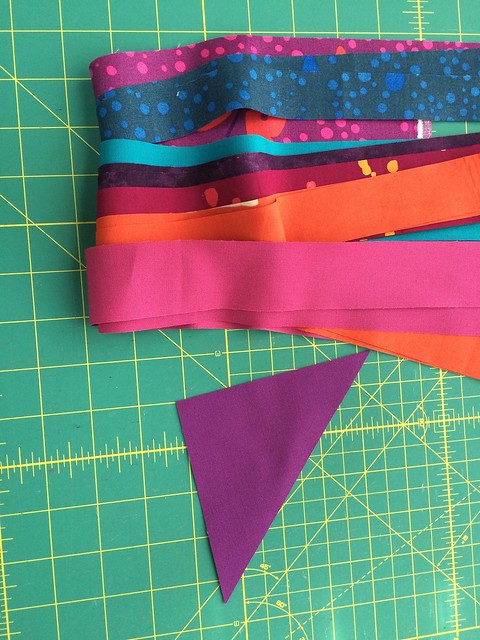
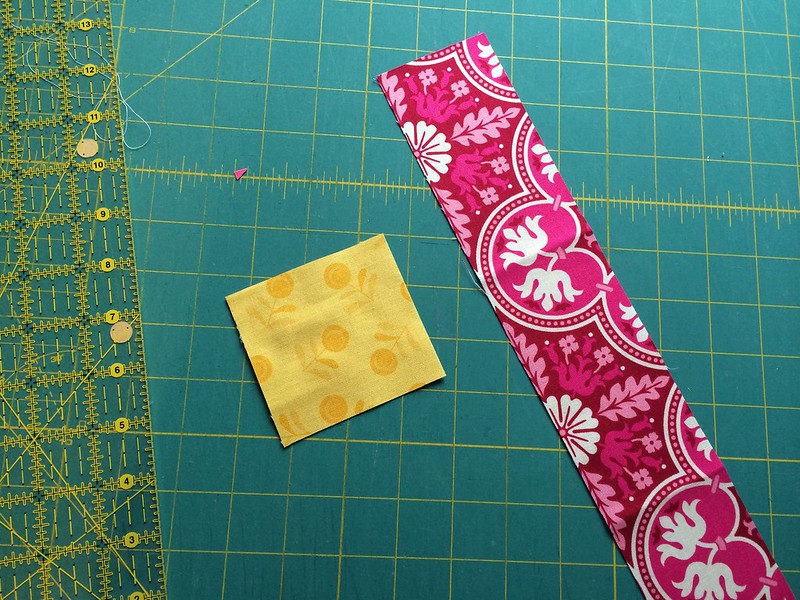
You need a square of purple about 4 3/4" and several strips of your purple and accent colour between 1 1/4" and 2".  Press all seams open.

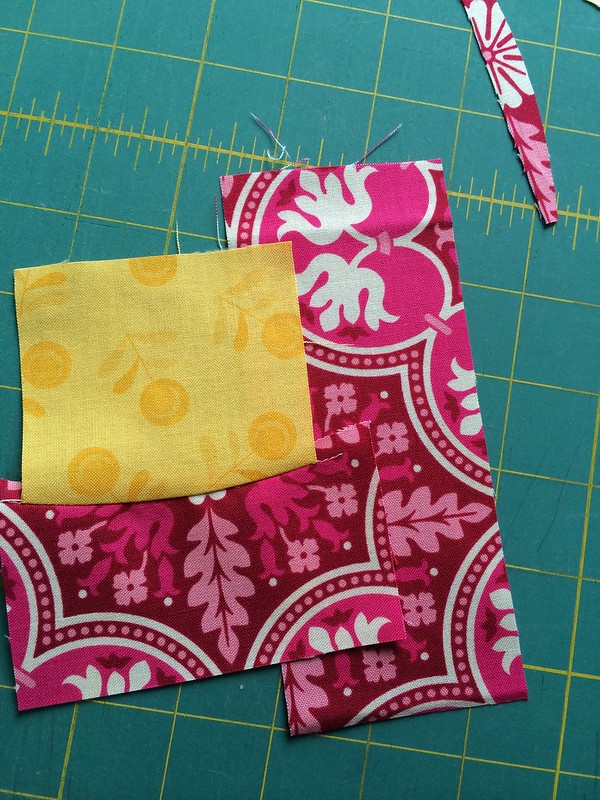
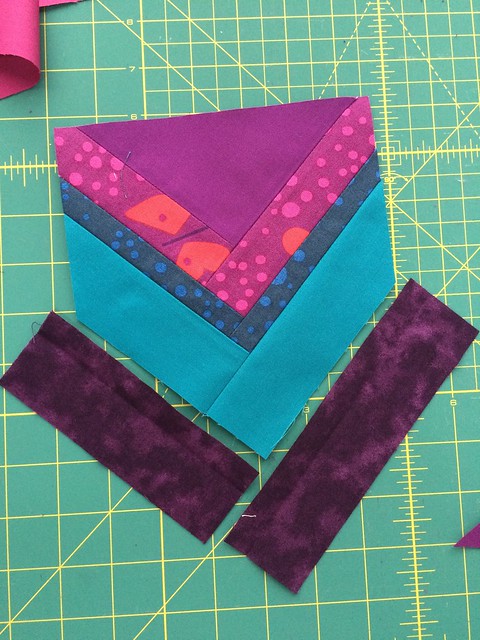
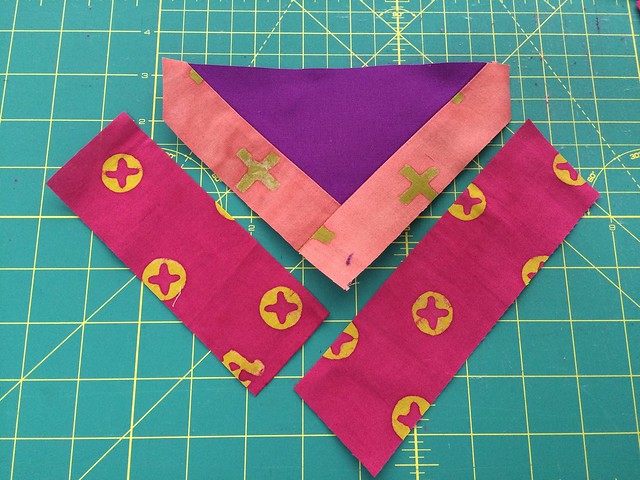
Step 1:  Slice your purple square on the diagonal to give you two triangles. The diagonal becomes the top of your block half.
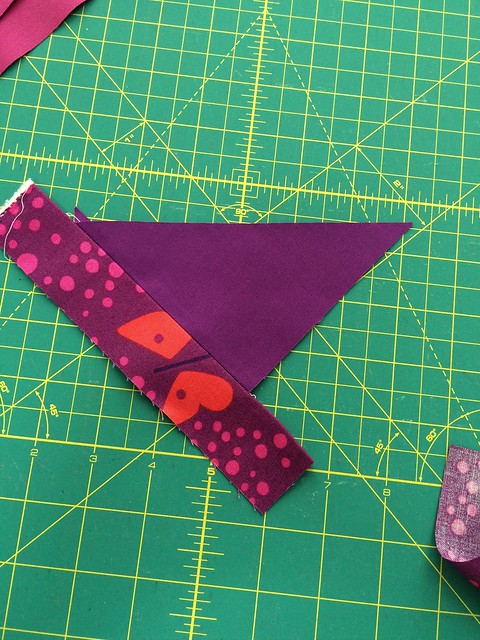
Step 2: Take one strip and sew to the left short side of triangle. Press seams open and trim the end off. Use the remnant of same fabric strip to sew down the right short side.  Trim the end square.
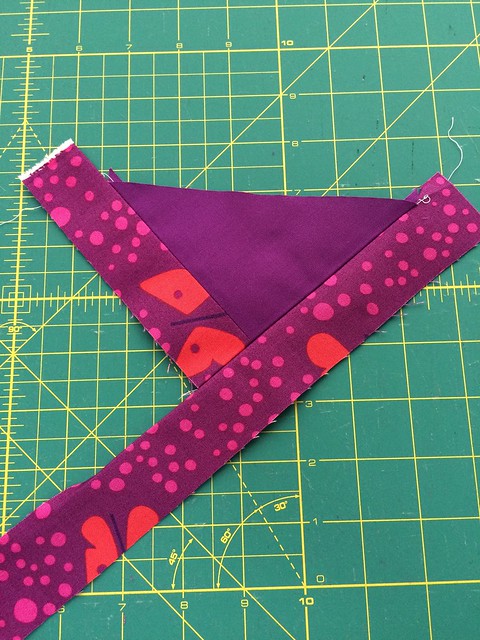
Repeat Step 2 using a different fabric each time until the block measures just over the finished height (12 1/2").   Use the same process to fill in the corners.
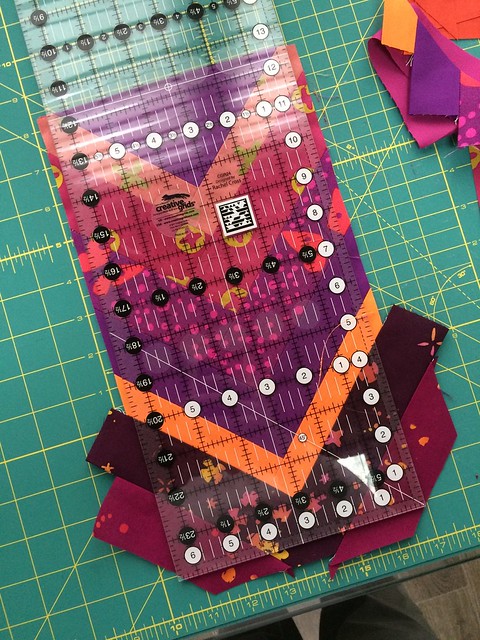
Step 3: Centring the triangle along the top as best you can, trim the block half to 6 1/2 x 12 1/2".

Voila!
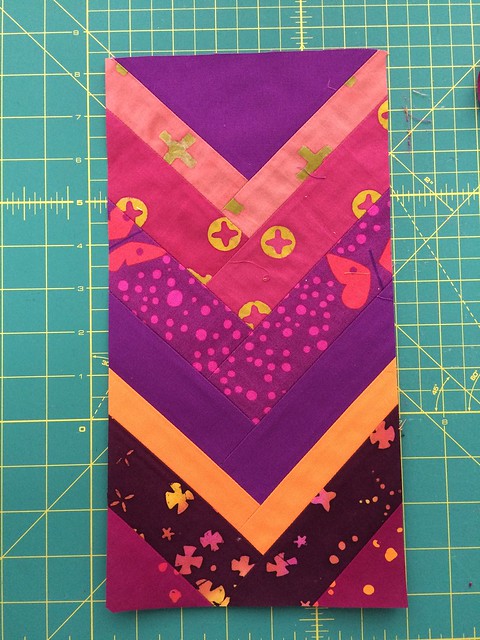
Tips:  I found it easiest to rough-trim my block half as I went, keeping it about 7" wide to leave some wiggle room and give me an idea of where to start the next strip. That way, I never wasted the strips by leaving them way too long, nor were they ever too short to meet the full width of the block half.
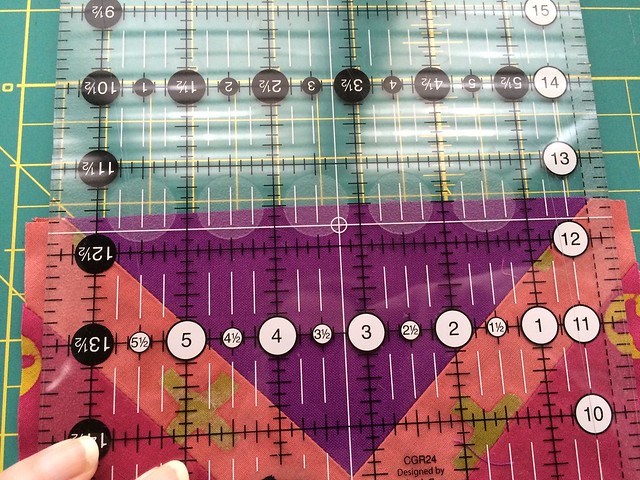
I also found it easier to "pre-cut" my strips before I sewed them so I wasn't dealing with dragging long strips all over the place.
Thanks - and happy sewing!
C

Tuesday, July 15, 2014

Framing Curved Log Cabin Blocks Tutorial

Once again, I fell off the internet.  That's life.  Especially lately.  I don't seem to be slowing down, folks.  I am making, quite intensely in fact, but stopping to blog about it seems counterintuitive somehow and when I don't blog, I don't read. However, I miss the realm.  So while I'll probably never be a regular schedule blogger, I always find my way back.  That's why there're RSS readers. :-)  Anyhoo...

Framing Curved Log Cabin Blocks:

Back in April (wow!) I posted a tutorial on making Improv Curved Log Cabin blocks.  And then I intended a follow-up on framing them. Here it is.

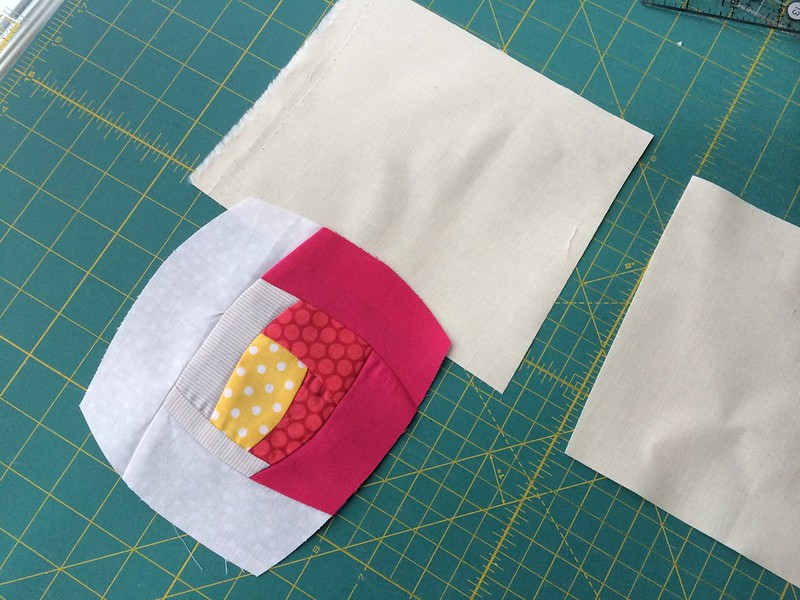
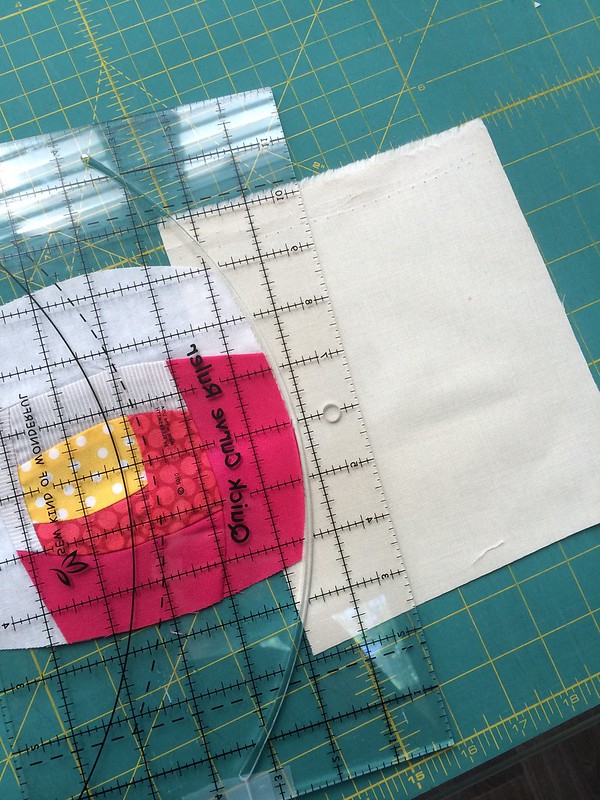
Grab your cabin pod, your rotary cutter, your background fabric, a straight edge ruler for squaring up, and, if desired, a curved edge ruler.  You can also freehand, and if your curves are large, you probably will need to freehand them anyway. Starch your fabrics - if you made your cabin without starch, starch it now. The larger the piece gets, the more important it is to keep a stable edge.  Bias is a tricky, shifty beast!

Cut a chunk of background fabric at least a long as one of your sides.  The width is variable and you can use strips or triangles.  Triangles work best for setting them "on point" but you can use strips and put things on point later if you choose.

** Note: This isn't a precise technique - it's based on the same principles used to make the blocks themselves, just with the goal of having straight, right-angled sides at the end.  As such, it's readily adaptable to whatever shape or size you need.  So I'm not giving exact dimensions here.   If you cut your background too narrow or too short, just add more fabric around after.  If you are using a solid, easy peasy.  I don't recommend using a fussy print that doesn't blend well at the seams.  To minimize seams, start with pieces much larger than you think you need and trim down.  Save the larger trimmings and use them to frame other pieces.

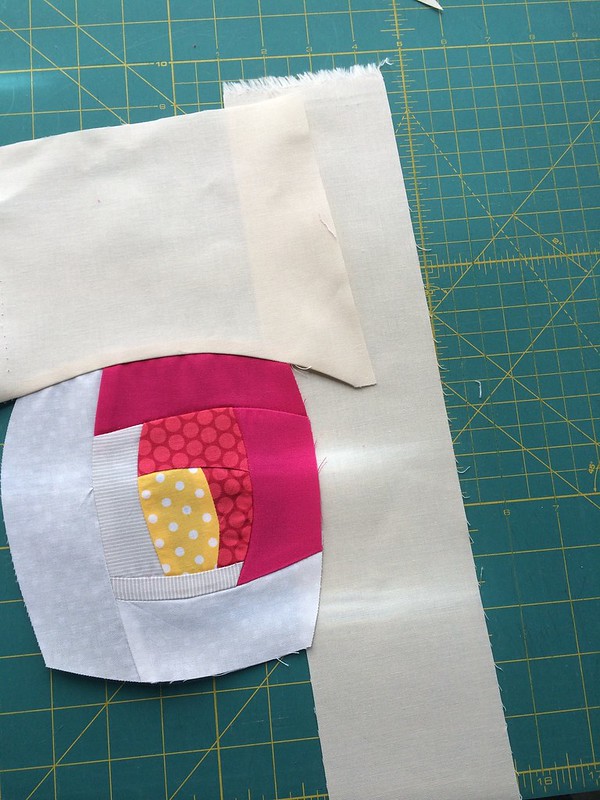
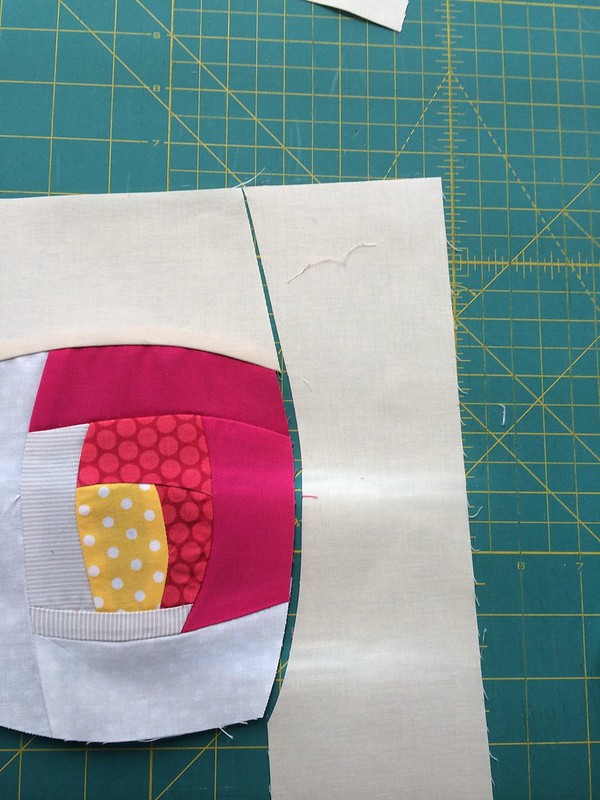
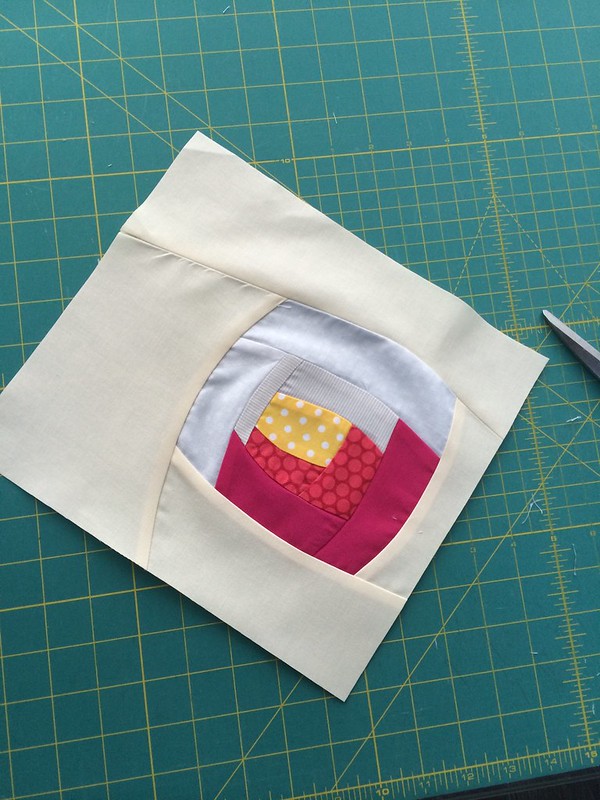
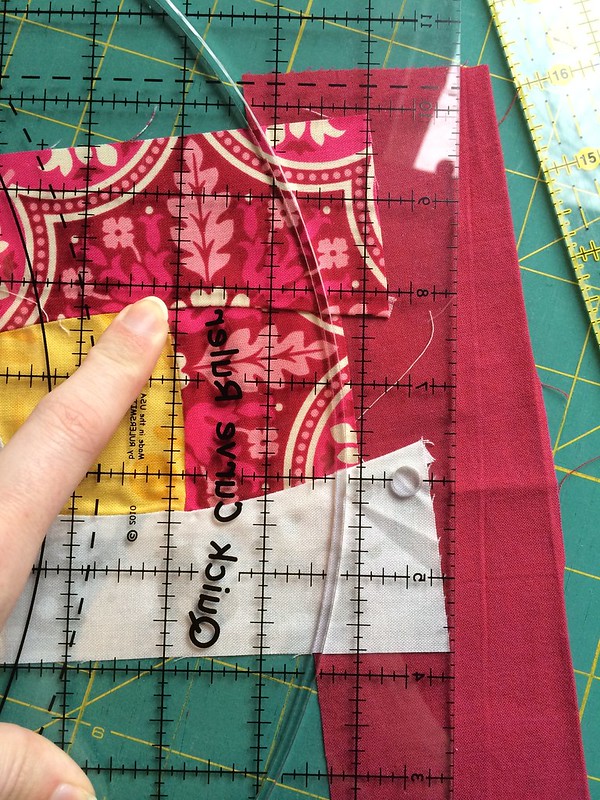
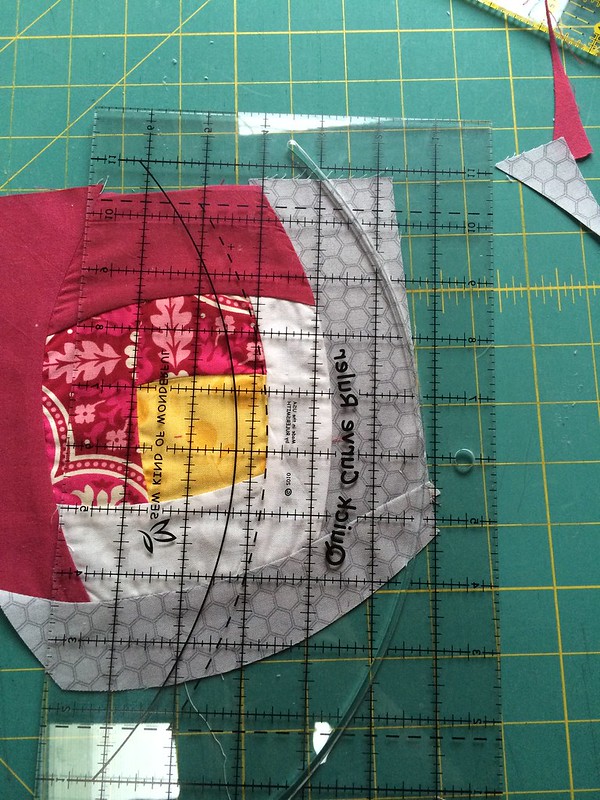
Lay your cabin pod on the background fabric so that the curve of the side is entirely on top of the background.  Using your rotary cutter (and your edge, if desired) cut along the curve of the cabin so that the cabin curve and background curve match.  Sew the background to the pod as you did for the sewing the log cabins.  Press with the seam towards the outside edge.

Cut another chunk of background long enough to cover the side of the pod, plus the new piece you've just added.  Lay the pod on the background as before but be aware of where the edge is - you'll have to angle your curve to end somewhere and you don't want it to be too sharp or straight at the end point.  Ideally, your curve will end where the top of your pod and the background fabric intersect. It doesn't always happen that way but that's what trimming and extra fabric are for!

Cut your curve as before and sew.  Press.

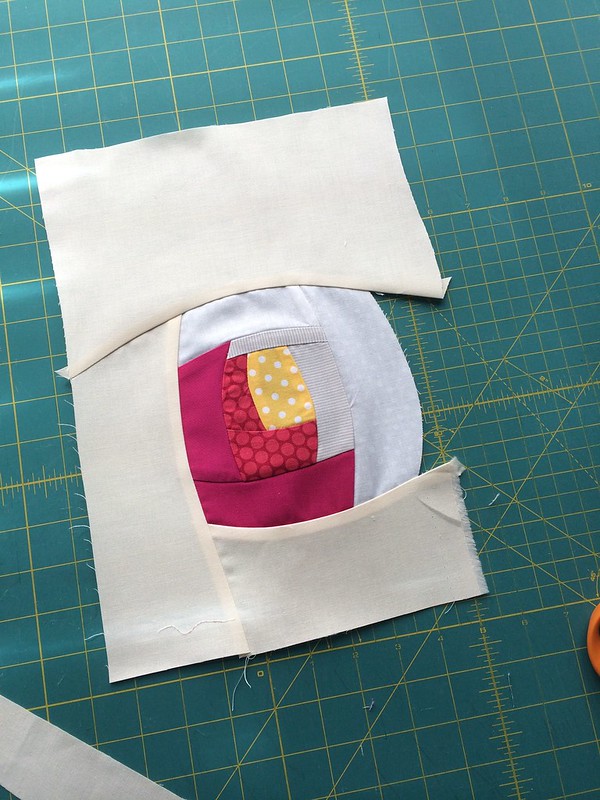
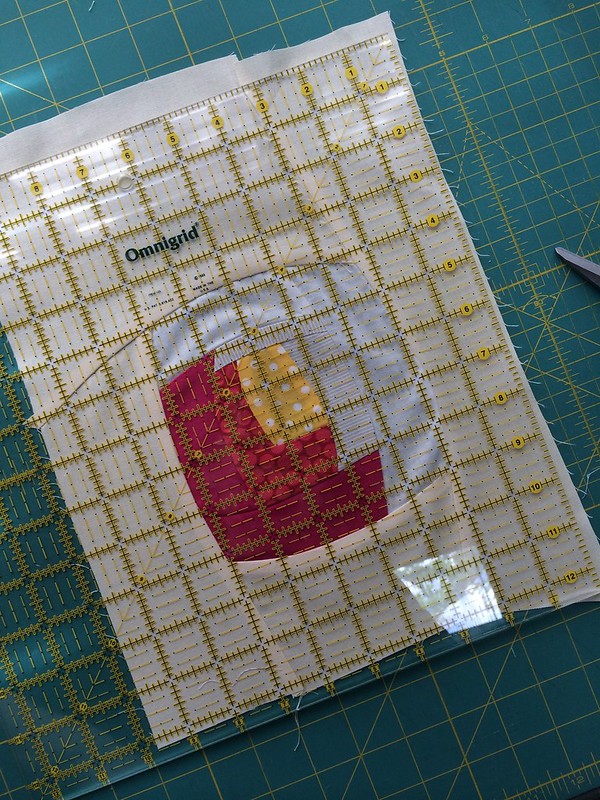
Repeat the process until you have background on all four sides.  Using your straight edge, square your block to the desired size, or simply trim straight.  At this point, it's easy to see if you need to add more fabric to corners or whatnot.

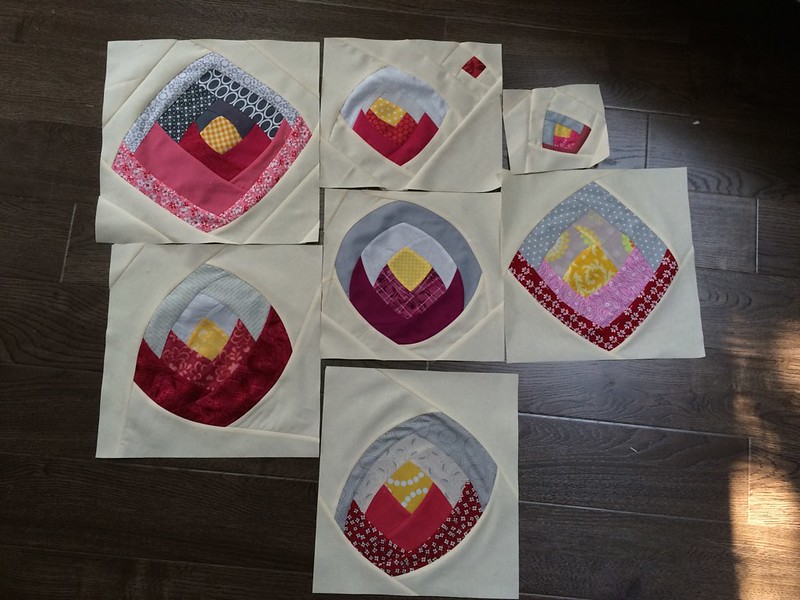
And there you have it.  I chose to leave my blocks irregular sizes so that I could play with the setting but have fun with it and see what you come up with!

I've added a ton of photos of this process to a flickr album so feel free to flip through if you need a little more help - I've even done some using triangles.

Okay, as usual, I have over a month's worth of blog reading to do. So I'm getting back to it starting now. :-)

Tuesday, April 29, 2014

Curved Improv Log Cabin Tutorial

Hiya! Yeah, I know...  How've ya been? Me...? It's been busy and chaotic with a side of crazy monkey banana pants.  More on that some other time. I'm going to ease back into the the interwebs slowly.... with a tutorial.

I'm a very happy member of Canadians Bee - a group that formed after the first round of Simply Solids.  These ladies are intensely talented and totally amazing. In fact, I'm lucky enough to be in the Saskatoon Modern Quilt Guild with 3 of them!  It was those three that I ran this block idea by and they all said they were game to try it so that's what I'm going with.


This tutorial is the basic technique and I'll add specifics for the bee in the flickr thread.

This is a very flexible technique and can be used as you wish.   For a traditional(ish) log cabin, alternate light and dark fabrics.

Here we go!

CURVED IMPROV LOG CABINS

You might need these supplies in addition to your regular sewing gear:

5 or more various fabrics in your chosen colour palette:  This technique can use jelly roll strips easily enough but  you can use wider. You can also use scraps.  I started with a 3" square in the middle and some of my outer strips were roughly 3" but it's not exact, nor does it need to be.  You can go smaller or bigger.  Add more rounds as you please.  I made two different blocks in my examples.  I used yellow for both centers (A), then in one B&D were dark colours, C&E light.  The other block had B&D light colours with C&E dark. 

Rotary cutter: This would be a tedious process with scissors.

Starch:  This is handy for sewing curves.  If you give your fabrics a light starch before you cut the curves, I find they cut cleaner, sew smoother and lie flatter.  I forgot to starch my fabrics at first and had a little wrinkling - which will all go away once I quilt the sucker but once I remembered to starch, everything went a lot smoother.

A curved edge:  I used the Quick Curve Ruler and the old "no-ruler-eyeball-it-freehand" method for cutting the curves but you can also use a pie plate, an oval casserole dish, , a french curve, an old charger from your Christmas table settings that you've since decided you hate....or nothing.  It doesn't have to be a perfect circle or oval - it just needs to have a curved side you can put against your rotary cutter.  It doesn't even need measurements!  But it's easier to use if you can see through it.

1/4" foot:  I find it tons easier to piece curves without using pins by using my 1/4" foot.  We'll get to that later...

TECHNIQUE:

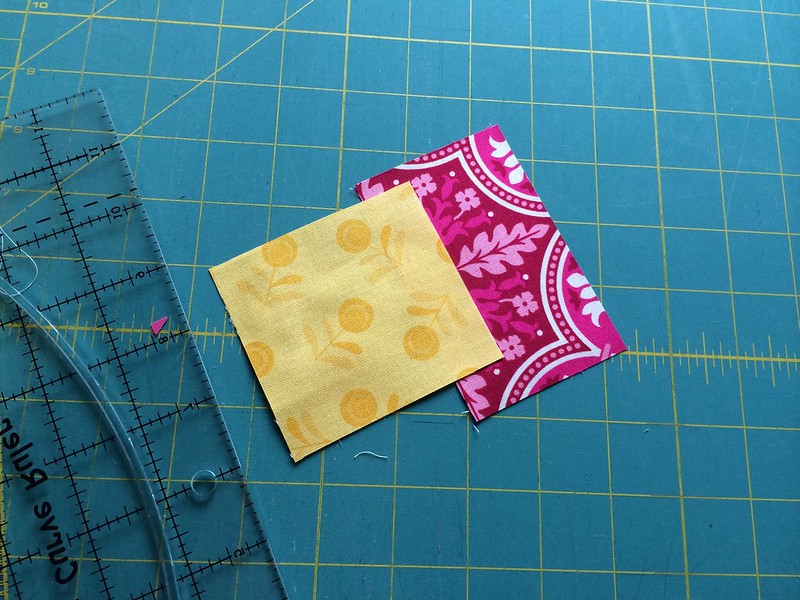
1) Choose a fabric for your center.  For ease of instructions, we'll call it Fabric A.  I used a 3" square here but you can also use a rectangle.  Measurements aren't important here - since you'll be cutting away the edges, having perfectly straight cuts to start with isn't necessary.

Take a strip of your next fabric (B)  - I used a roughly 2.5"strip - and layer your center piece over it just a little - right sides up.

You can trim the needed bit off the strip so you're working with smaller pieces. There should be a slight overlap.

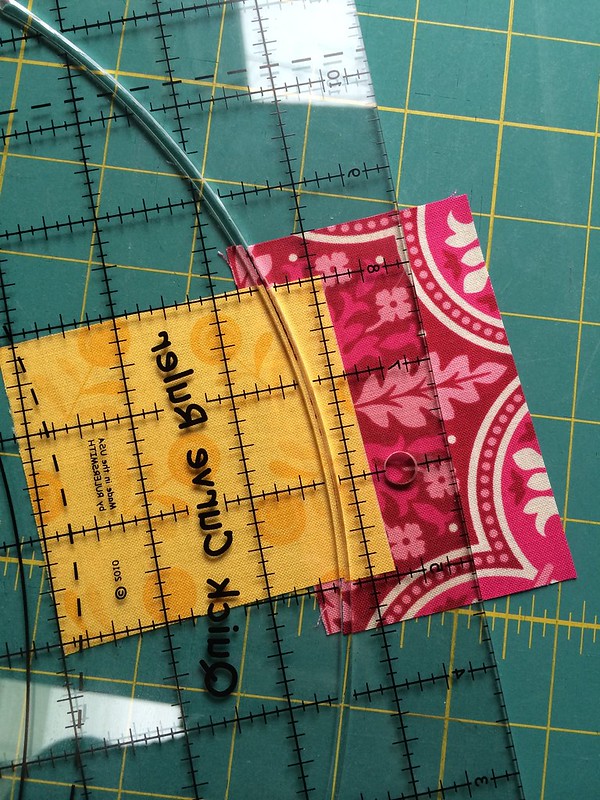
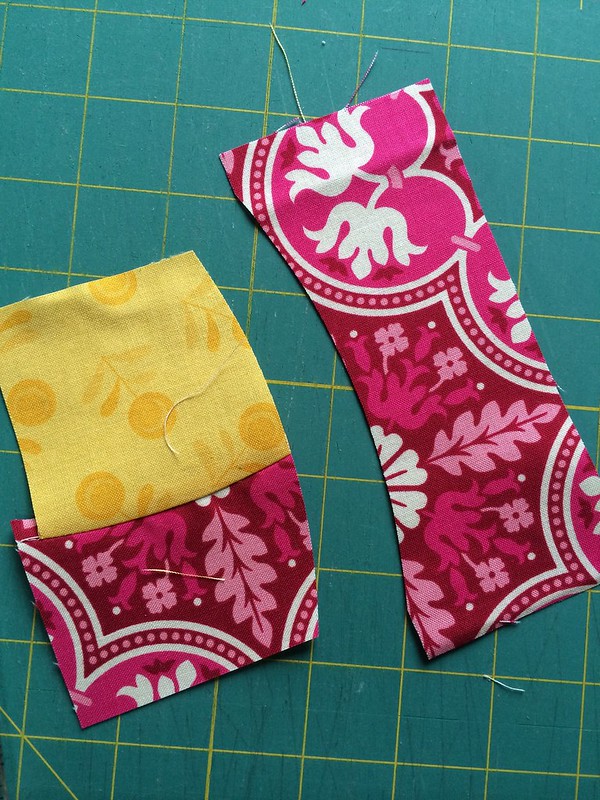
Place your curved edge (or use your fabulous sense of freeform adventure!) on the overlap.  The only thing to be aware of here is that the curve should start where the two fabrics meet at the edge on the bottom and end where they meet at the top.  At all times, the curve should pass through BOTH fabrics.  This way, you make a matching pair of curves.

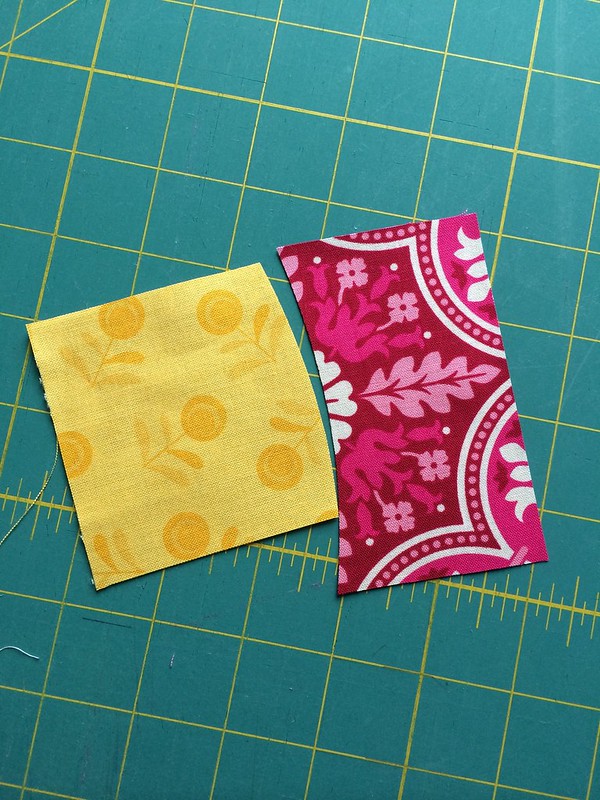
Fabric A curves out and Fabric B has a nice dent for A to fit into.  Remove the excess fabric so you're just looking at out-curved A and in-curved B.  Place them right sides together, matching at the top of the curve.

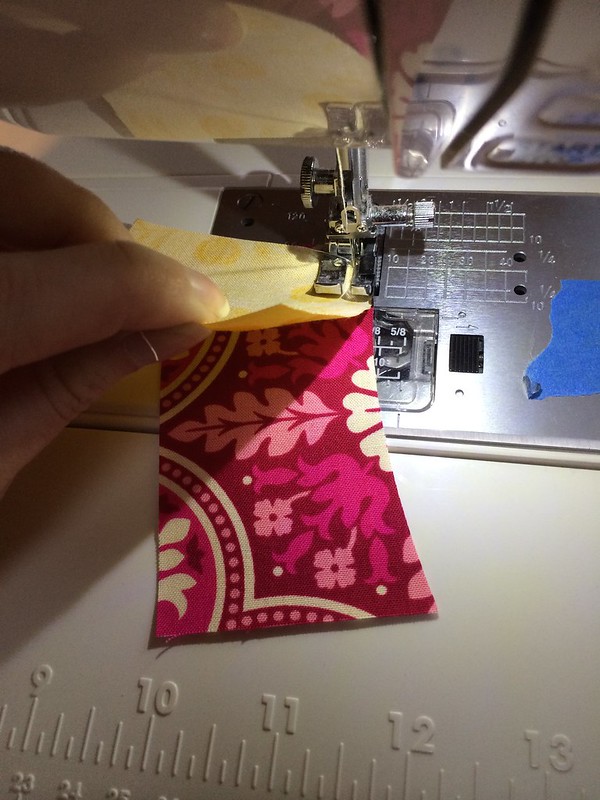
2) Using your 1/4" foot, place your RST curves underneath your presser foot and take a few stitches.    I like to put the out-curve on the bottom and the in-curve on the top. Then holding your fabrics apart as you sew, guide the bottom piece with your right hand and the top piece with your left hand, bringing them together using the 1/4" fence as a guide.

Try not to pull or stretch as you sew.   There are a couple of videos on sewing curves without pins out there if you need to see it.  This one is great!

3) Press to the side of least resistance - in or out, depending on your fabric.  There isn't a bulk issue here so direction isn't important. The seams lay fairly flat if you use the no-pins method.

4) Lay down another strip of B.

Layer your A/B center unit onto the B strip, keeping the B part of the A/B centre at the bottom.  In order to keep the traditional log cabin look coming through in this modern version, always orient the center piece so that the strip you just sewed is in the same position.  Always on the top  OR always on the bottom.  You choose - just keep it consistent for each pod/block.

Make your curved cut same as you did in Step 1.   You can play around with angling your center so that the width of the strips changes from piece to piece. It can be wider or narrower, sharper or softer curves, whatever appeals to you.  The idea is that this will take on its own shape and not be uniform. Each little cabin will be unique.

5) Sew your curves same as in Step 2.

6) Repeat the steps using Fabric C, then again with each D and E. And beyond if desired!


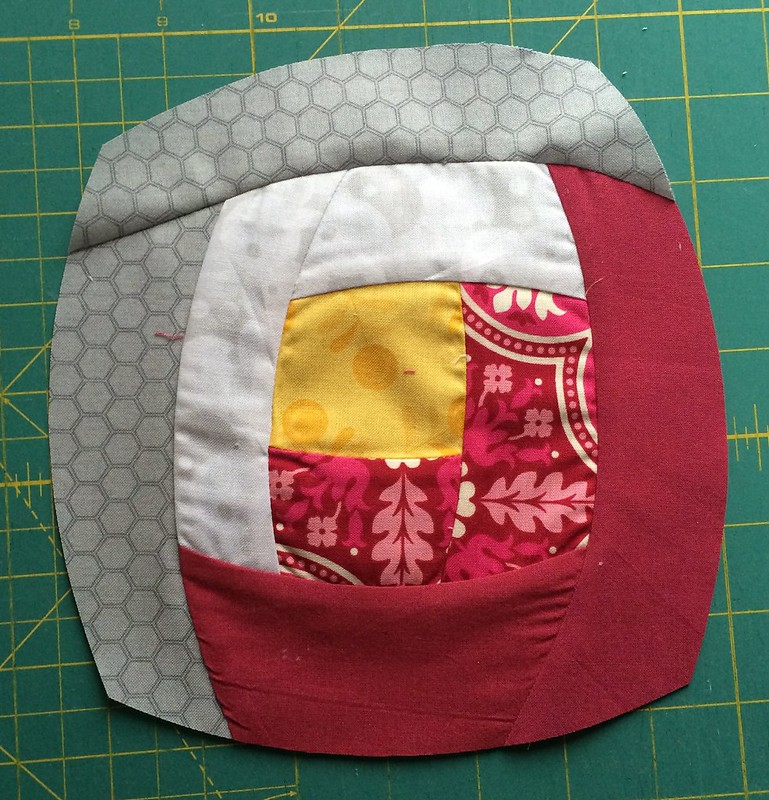
When it's the size you want, use your curved edge to curve up the sides.

You now have a log cabin pod!

Coming next month, once I start getting bee blocks in the mail, I'll do another tutorial on how to frame them out into full blocks.  Hint:  It's very similar to what we've just done here but with larger chunks of fabric and squared outside edges. :-)

Let me know if you have questions or if you try this technique out!  I will get back to you as soon as I can (which is right after I catch up on a great deal of back emails and blog reading!)  Please make sure you're not a no-reply blogger or I can only answer questions in the comment thread.

Thanks for reading - hope you enjoy it!


Sunday, April 14, 2013

Tutorial: Random Piecing

Hello!

I'm over at the Saskatoon Modern Quilt Guild site today with a tutorial on random piecing.  It's more of a guide to a technique that falls between patten-based and improv-based piecing.  I've used it in a number of projects and think it's a great way to ensure your work is unique.  I'd love to know what you think and if you try it out, please let me know!


For the tutorial, just click here and you'll be taken to the SMQG site!  Enjoy!


Wednesday, January 30, 2013

The QAYG Guild Bag: Tutorial

Our guild participated in the Madrona Road Challenge.

The rules were we could add more of the same line or solids.  And we preferred that whatever it was be quilted.

I needed a bag to take all my guild stuff to and from meetings in so the idea of using Madrona Road for it made sense to me. To make sure I kept it within the "rules", I made it quilt-as-you-go-style, which actually lent a lot of support to the sides and bottom.  Works for me!  The pocket design was inspired by that fabulous herringbone print.

It's got two exterior pockets, an inside zippered pocket, a large notebook or tablet pocket, and a divided pocket for little things and pens. There's plenty of room for my binder, clipboard and various supplies.  It's been working really well so far and keeps my all my guild stuff in one place. Handy!

I didn't follow a pattern - just a sketch I did quickly before I started. I've posted a tutorial  for the bag on the Saskatoon Modern Quilt Guild page, if you'd like to check it out!

Monday, September 24, 2012

Back! And Forth...; Tying Bows with Forks

Holy moly, I was on hiatus for a while there....  I am back and will be returning to my (ir)regular posting routine of once or twice a week.

I will have a bigger catch-up post tomorrow but... 

TODAY is special.  I am featured at Mireio Designs today.  Excited?  Heck, yeah!

If you haven't come across Wende around the blog block yet, you've been missing out.  She's truly one of my favourite people in this world and a dear friend.  She writes with a refreshing sincerity and takes really lovely photos (often of really lovely stuff that she has in her really lovely shop!) In short, she inspires me.

When she asked me to contribute to a new thing she was starting, Teach Me Something, I immediately said yes.  And then I immediately started to panic.  Teach what???  And then I remembered that I had a little known skill that could be used to save hundreds, nay, thousands...! (...of seconds on wrapping gifts or decorating various items...)

Basically, I can tie a bow using a turkey lifter fork.  And you can, too!  Just pop on over to Mireio and watch the video tutorial. So, go! Go forth!

Bonus Diet Coke Drinking Game:  Take one sip for every time I inexplicably pause or um in the video.   Take a big gulp of Diet Coke if I try to same two words at the same time and have them come out as a third, possibly related word.

Wednesday, August 26, 2009

A Drip-Free Drink - Fountain Drink Sleeve Tutorial


I'll admit it - I drink more pop than I should. A lot more. I love a nice cold fountain drink. What I HATE is sweaty, scuffed up (from multiple washes and refills), puddle-making, coaster-sticking, slippery fountain cups. I lost a beautiful ceramic coaster when it stuck to the bottom of my cup, and travelled with me, unnoticed, to the kitchen, where it promptly let go and kissed the floor. I have spilled drinks that slipped from my hand due to the condensation. And I have experienced the horror of a mouthful of rootbeer (my aversion to it is a long story....) when I could not correctly identify which drink was mine. If you have experienced similar minor misfortunes (or simply love both your furniture and fountain pop), read on....

Here is the solution: A Super Big Gulp Cozy!

You will need:
-Two small pieces of fabric (I used old sheets - a pillowcase would give you plenty) For the sake of clarity, I used a different fabric for lining.
-A small piece of thin batting or felt
-The cup of choice
-Markers in two different colours and a pencil
-Thread to match
-Needle and pins
-Scissors
-Craft paper (or is is kraft?)
-Ruler
-Seam allowance guide (I used a quilter's curve)

And your sewing machine.

1) MAKE YOUR PATTERN PIECES:

Mark a line on your cup so you can tell where you started. Carry in over the bottom a bit. You should be able to see it through the inside of the cup.


Place your cup on the paper and using a pencil, mark the starting point and trace along the cup as you roll. Stop when you reach your mark again.

Do the same thing following the top of the cup - make sure to keep the cup from shifting off your bottom roll line when tracing the top!

Using your ruler, draw a straight line from the top to bottom on each side between your starting and ending marks.


Trace your outline in your first marker colour (blue).


Using your guide and your pencil, add a seam allowance the bottom and side of the cup outline on the OUTside. To get your top seam allowance, place your guide on the INside of the outline.

Why?

Because you don't want the cozy/sleeve to reach all the way to the top - it would interfere with the lid.

Trace the bottom of the cup and add your seam allowance to the outside of it as well.

Trace the seam allowances in a different marker colour (red).


Your finished pattern will look like this:


Cut out your pattern on the red line.


2) CUT YOUR FABRIC AND BATTING: ( You may want to pre-wash your fabrics so that it doesn't shrink if you throw it in the laundry to get rid of sticky soda or slushie drips.)

Cut one of each pattern piece for lining fabric, one each for outer fabric and one each of batting.


Stack your lining fabric on top of your batting, right side up. Fold side edge to side edge, with right sides together and pin.


3) START SEWING!

Sew the side seam, backstitching at both ends. Repeat process with outer fabric (without batting, of course). Press (or just pin if you're lazy) the seam allowance to one side - pick the opposite side for the outer.

This is a really good time to check against your cup for fit!!


Layer bottom lining on top of bottom batting. Pin in place in bottom of lining 'tube' and sew around, backstitching at the ends.

Yep, this is the fiddly bit.

Don't worry too much about making it fancy. It's not like you're going to bust out the "good" cup covers for company, now are you?


Trim away excess batting on both sides of the bottom seam.

Flip lining so that the right side of lining is on the outside.


Slide outer fabric over top of lining so that right sides of both outer and lining are together.


Pin in place and sew around top.

Trimming batting around top isn't necessary but do what makes you happy. Lining seam and outer seam should be facing in opposite directions.


Pull lining away from outer - the whole thing will now look inside-out. Pin bottom outer in place and sew 2/3 to 3/4 of the way around, backstitching at both ends.


Using the 1/4 to 1/3 you left unsewn at bottom as a turn space, turn the outer right-side out and smooth down over lining.


Straighten top along seam. Pin and edge stitch around top of sleeve.


4) FINISHING


Pull sleeve over your cup and set cup upside down on your work surface. Using the turn space for access, tuck the seam allowances down the sides of cup and away from the bottom.


Finish the seam by hand using a hidden stitch. (Some call it a ladder stitch. I call it a hidden stitch. Uh huh.)Slingblade, anyone? No?


5) SUCCESS!!!

Go get your refill and enjoy your logo-free, slightly insulated, drip-free drink.

If you're wondering if that is Optimus Prime on the straw, I can assure you that it is....

Yes, I'm a dork. But I don't need a coaster. :-)