Framing Curved Log Cabin Blocks:
Back in April (wow!) I posted a tutorial on making Improv Curved Log Cabin blocks. And then I intended a follow-up on framing them. Here it is.

Grab your cabin pod, your rotary cutter, your background fabric, a straight edge ruler for squaring up, and, if desired, a curved edge ruler. You can also freehand, and if your curves are large, you probably will need to freehand them anyway. Starch your fabrics - if you made your cabin without starch, starch it now. The larger the piece gets, the more important it is to keep a stable edge. Bias is a tricky, shifty beast!
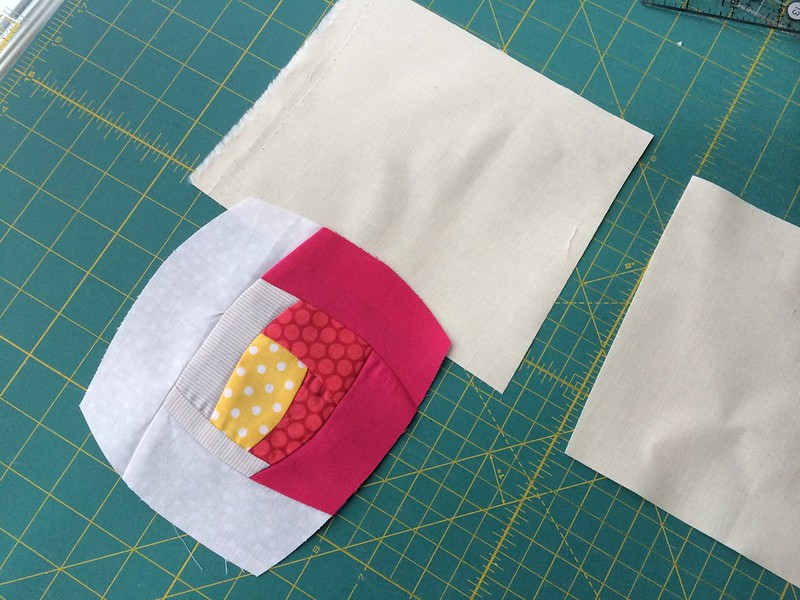
Cut a chunk of background fabric at least a long as one of your sides. The width is variable and you can use strips or triangles. Triangles work best for setting them "on point" but you can use strips and put things on point later if you choose.
** Note: This isn't a precise technique - it's based on the same principles used to make the blocks themselves, just with the goal of having straight, right-angled sides at the end. As such, it's readily adaptable to whatever shape or size you need. So I'm not giving exact dimensions here. If you cut your background too narrow or too short, just add more fabric around after. If you are using a solid, easy peasy. I don't recommend using a fussy print that doesn't blend well at the seams. To minimize seams, start with pieces much larger than you think you need and trim down. Save the larger trimmings and use them to frame other pieces.
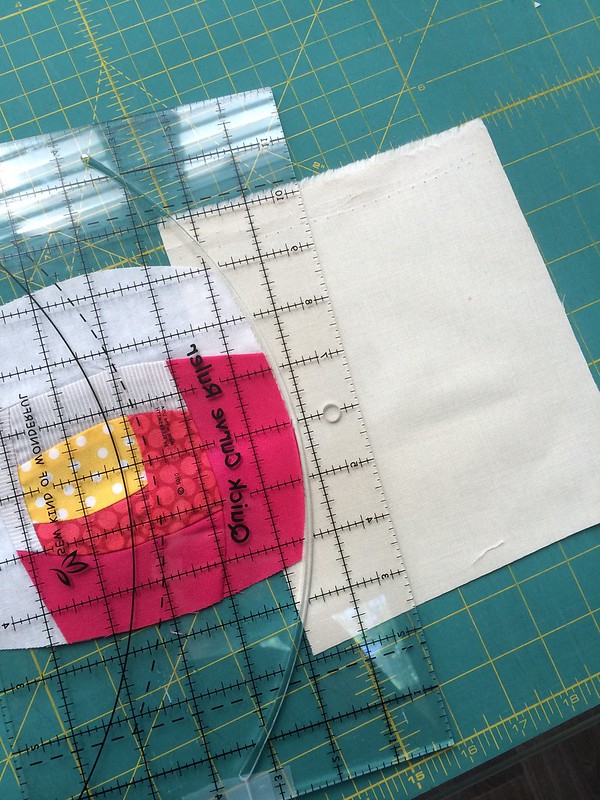

Lay your cabin pod on the background fabric so that the curve of the side is entirely on top of the background. Using your rotary cutter (and your edge, if desired) cut along the curve of the cabin so that the cabin curve and background curve match. Sew the background to the pod as you did for the sewing the log cabins. Press with the seam towards the outside edge.
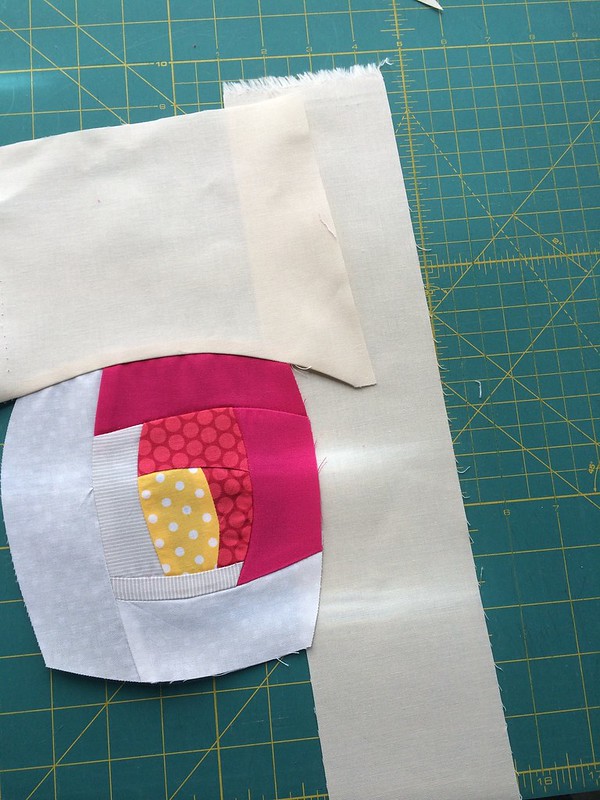
Cut another chunk of background long enough to cover the side of the pod, plus the new piece you've just added. Lay the pod on the background as before but be aware of where the edge is - you'll have to angle your curve to end somewhere and you don't want it to be too sharp or straight at the end point. Ideally, your curve will end where the top of your pod and the background fabric intersect. It doesn't always happen that way but that's what trimming and extra fabric are for!
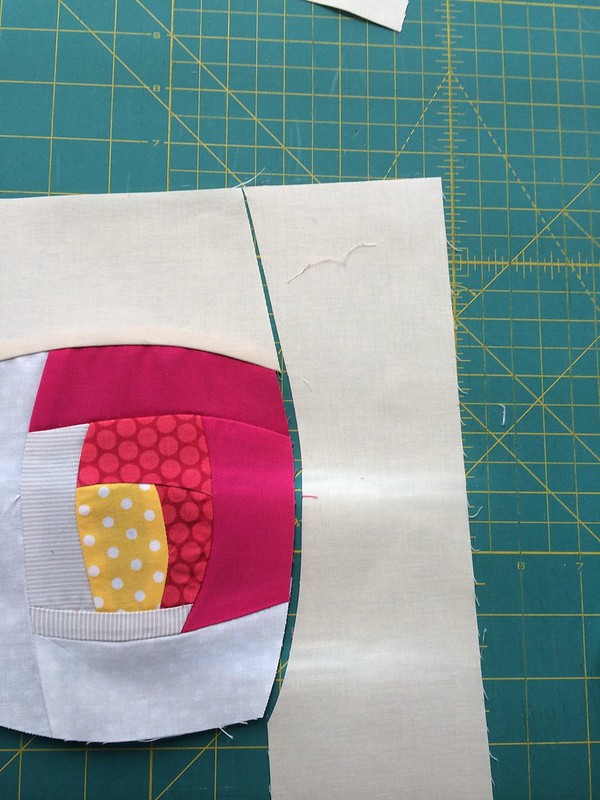
Cut your curve as before and sew. Press.
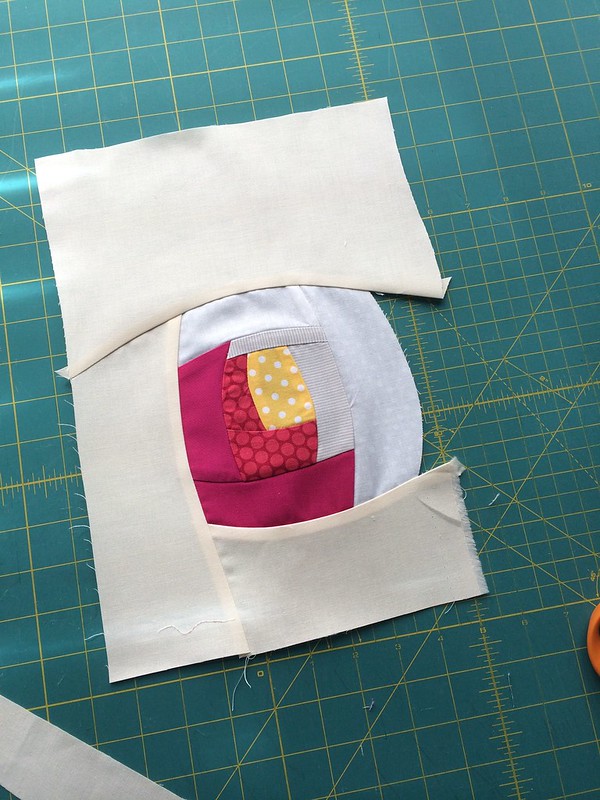
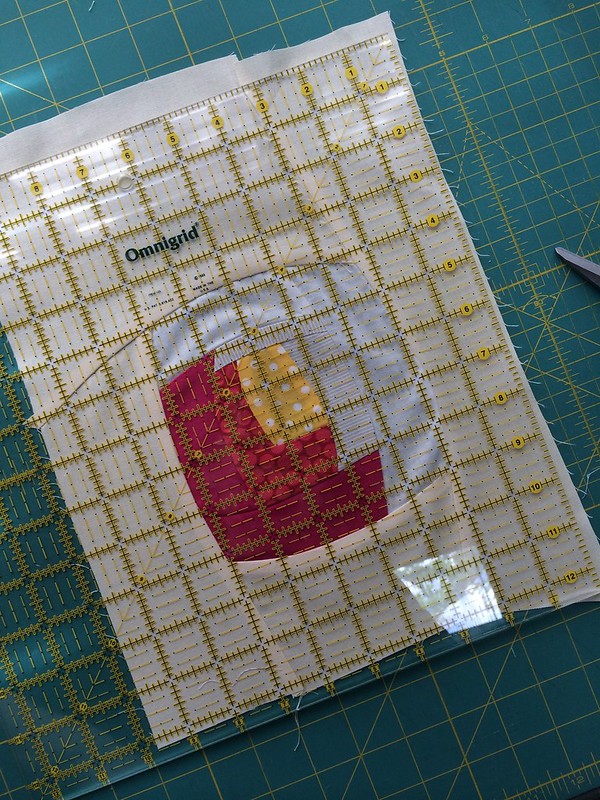
Repeat the process until you have background on all four sides. Using your straight edge, square your block to the desired size, or simply trim straight. At this point, it's easy to see if you need to add more fabric to corners or whatnot.
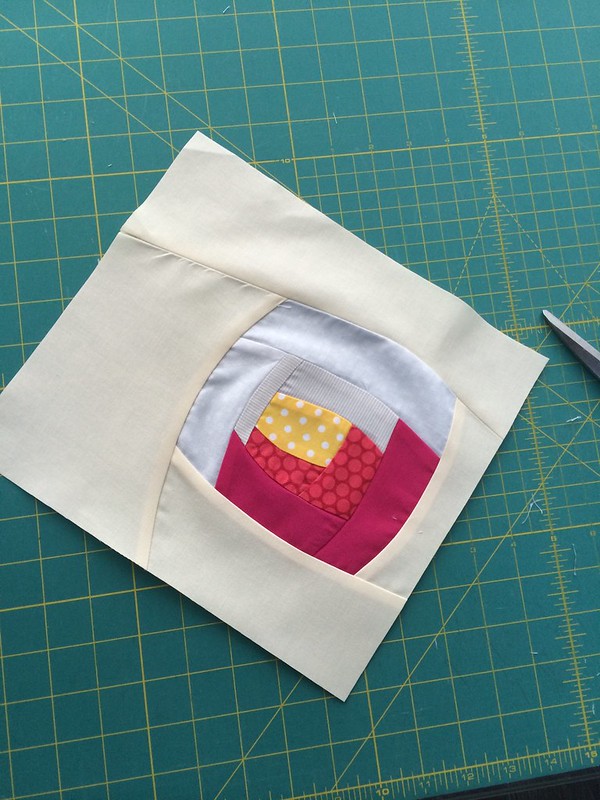
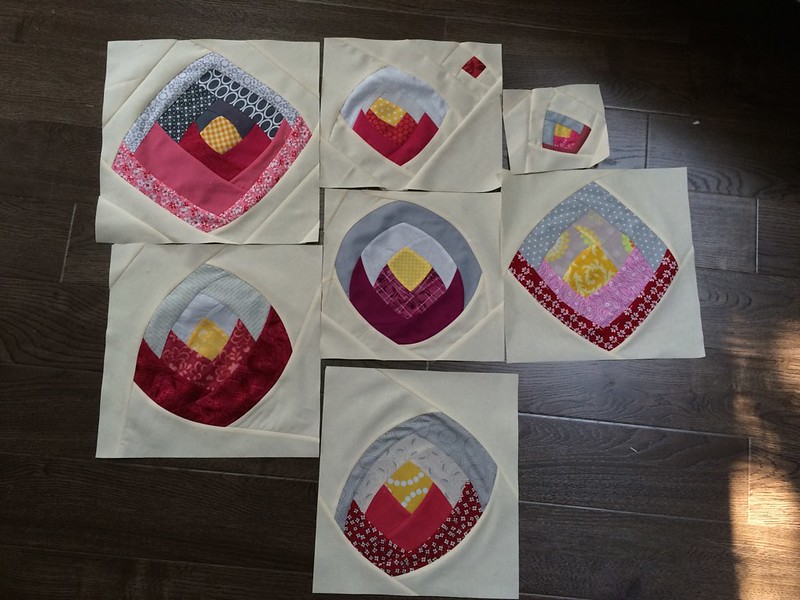
And there you have it. I chose to leave my blocks irregular sizes so that I could play with the setting but have fun with it and see what you come up with!

I've added a ton of photos of this process to a flickr album so feel free to flip through if you need a little more help - I've even done some using triangles.
Okay, as usual, I have over a month's worth of blog reading to do. So I'm getting back to it starting now. :-)
Hi Carly! This looks great! Beautiful blocks and lovely colours! I think next I need curve ruler. Now I'm making different impr. blocks - some colours with more low volumes. Have a great day! x Teje
ReplyDeleteThese are all very cool. What a fabulous quilt they will make.
ReplyDeleteLooks great. It's definitely not a terrible thing to be spending time away from the internet. Welcome back!
ReplyDeleteOh so cool, Carly! I'm constantly falling off the blogger grid! Miss the contact with you, though. We need to get better about that. Hope your summer is going well!
ReplyDeleteloving your work as always, carly x
ReplyDeleteIt's nice to have you back Carly!!! I'm like you in that when I don't blog, I don't read...and miss them both. Trying to get back in the swing on things ;-)) Thanks for sharing your tutorial. Curves still scare me though.
ReplyDelete