In the busy-ness of my life, I am finding time to keep up with challenges. It's become a point of pride with me to not have missed a single challenge at SaskatoonMQG. The one due at the end of July? Make a modern border.

How do you do that? And who came up with this cockamamie challenge anyway? (Me. It was me.)
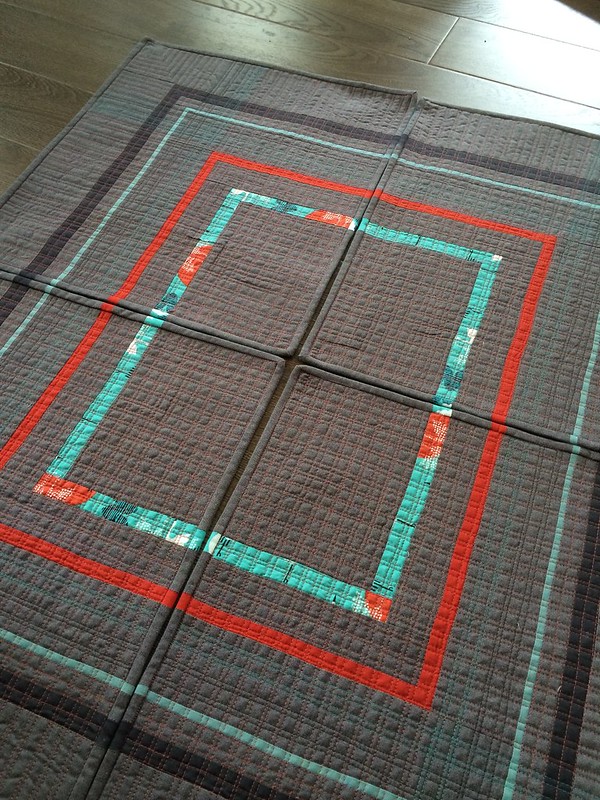
Fine. I'm making a piece that is ALL borders. That's right just one border after another. And then I'm going to cut it up so the borders don't even go all the way around. Yeah. Take that, challenge-comer-upper-with! (Again, me.)

I started with some shots and chambray. Feels so luxurious in the hand. If only the shimmer of both showed up in photos...Threw in some Tsuru for good measure.
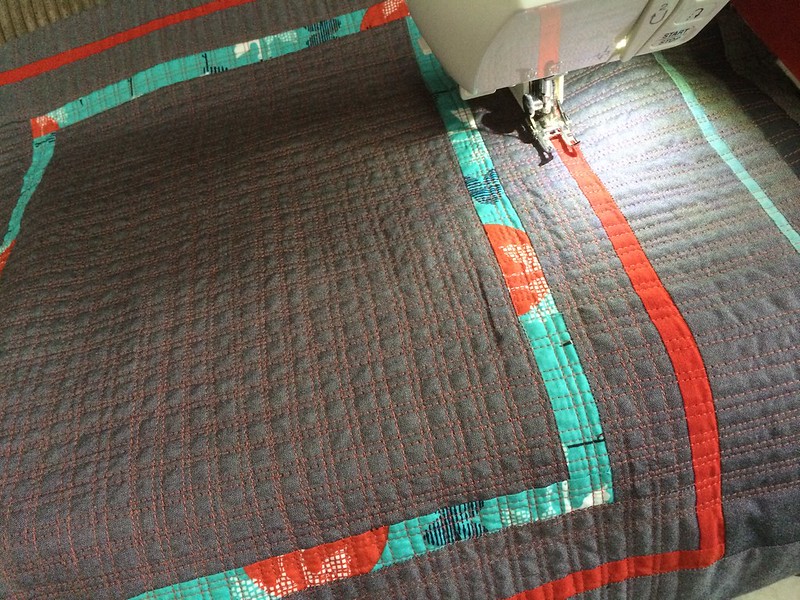
Once I had it pieced, I used the leftover shots on the back, and then grid quilted the thing to death. That took some time. I echoed the borders a bit with the thread colours.

Then I got out the rotary cutter. At this point, my great idea seemed a little nuts. I held my breath, began my meditation (It's only fabric, only fabric, only fabric....ohmmmmm...) and cut away.
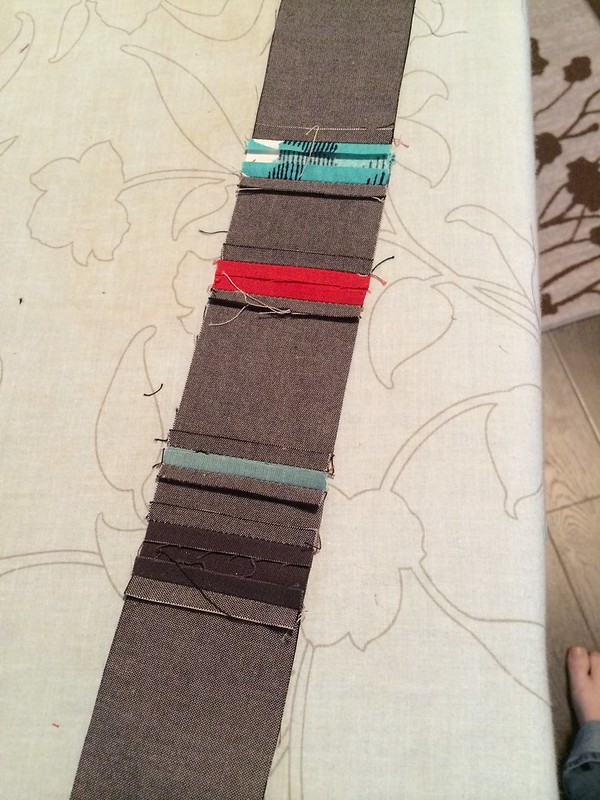
Now onto the binding! It was important to me that the borders not be broken even though I'd mercilessly cut them to shreds moments before. So, I pieced together the bindings from the leftover border pieces. I made a separate strip for each side of each piece (what???) I'm not so good at calculating the exact amount of fabric taken up in a binding corner so I sewed the long strips and used Linda's binding method with the mitred corners. It's probably the best way to do a matched binding. Linda rocks.
How did I keep it matched all the way down? Good question! Three things.
1) I moved my needle one more notch to the right to account for "quilt shrinkage" - think exact 1/4" instead of scant. On a larger piece, you'd have to measure the finished width of each chunk but this was small enough I could fudge it with my non-scant seam allowance.
2) After piecing and pressing my bindings, I ran a basting stitch 1/8"(ish) from the edge down each to secure the top and bottom together.
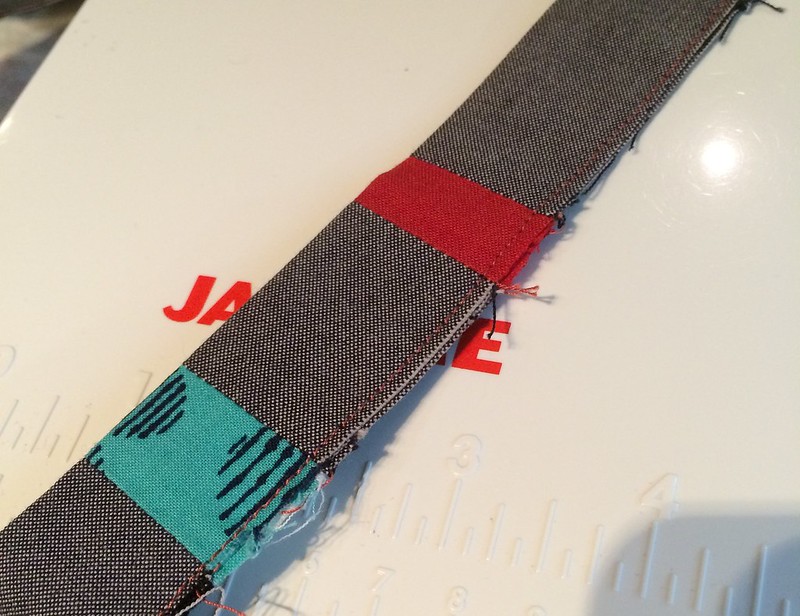
3) Glue. Lots and lots of glue. Wonderclips. Hot iron to set.

Solution? More glue! I burned through about half a Sew-line glue pen on this project but it was so worth it. Altogether, the bindings took less time than the quilting, even if you allow for re-reading the mitre tutorial twice to remember what I did the last time. They look like more work than they were.
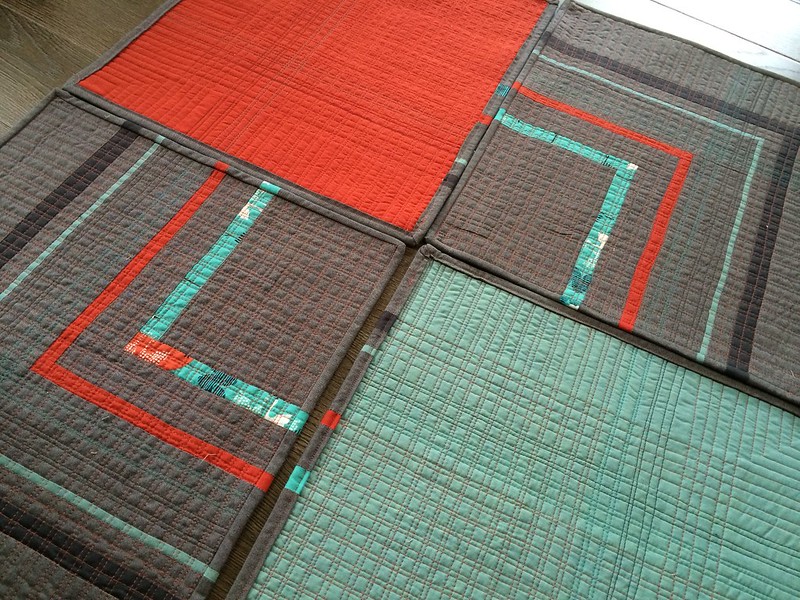
And there you go - placemats! Challenge conquered. Next challenge? Trying to photograph the clothing-making rampage I've gone on this summer... :-)
Wow! The quilting on these is gorgeous! I love how they form a quadtych when they're all together.
ReplyDeleteThose look really lovely. I'd be pleased to use them. And what does your guild give away for challenge prizes?
ReplyDeleteCarly, these placemats ROCK! Love the design, the quilting and that fantabulous binding. Really. Totally smitten with these. Talk about a challenge smack-down! ;o)
ReplyDeleteThey are fantastic!
ReplyDeleteoh wow, that quilting is fab! what a great idea!
ReplyDeleteHoly wow, Carly!! Those are absolutely fabulous - I am NOT a place mat fan, there I said it. . . but these - I'd actually use something like this!! Everything about these is pleasing - I think it was absolutely brilliant to make the piece and cut it apart. SO clever!! And don't even get me started on the quilting - WOW! Beautifully done! :) Judy
ReplyDeleteok. I love these! The design, the fabric choices, and oh boy the quilting! REALLY really nice!
ReplyDeleteWow, what a great idea for placemats that look like they belong together as part of a whole! The binding really makes them.
ReplyDeleteLove it!! The quilting is fantastic. Also, I'm excited to see the clothing.
ReplyDeleteHolly crap!! These are absolutely amazing!!!!!
ReplyDeleteFab-u-lous, Carly! Love everything about these placemats. You'll show that challenge setter! ;)
ReplyDeleteI love that your hand is in the first photo, because that is my first reaction...reach out and touch 'em! Wonderful job on these!
ReplyDeleteSo incredibly awesome!!!! Really really awesome!
ReplyDeleteOoo. I adore these placemats. And what an ingenious way to make them! My mind is churning with ways to make a whole of a design, and then cut it up to make it asymmetrical. Hmm. That MQG bias tape challenge. Thanks for the shout-out about my binding method. I think ALL quilters should bind quilts this way, and I haven't figured out yet why they don't. Glad it worked for you. Hey, YOU rock rockers!
ReplyDeleteLike I said on Flickr--perfection. Modern, simple design, striking. These check all the right boxes : )
ReplyDeleteGreat interpretation of the challenge , love the placemats and your quilting !
ReplyDeleteI love the placemats and how you uniquely constructed them and the quilting is fabulous!
ReplyDeleteLove these! You totally rocked that challenge.
ReplyDeleteThese are excellent!!
ReplyDeletethis project is so flippin' genius! I love every single detail. And the binding!? Just stop!
ReplyDeleteBrilliant! And way to show that challenge person! ;) Usually I'm not a quilted placemat fan either. But these are fantastic. And the whole binding thing will be looked into in more depth. Thanks for sharing your talents. I always learn something.
ReplyDeletethey are fab placemats. I love matched binding though I'm pretty sure I couldn't do it myself!
ReplyDeleteMan! That's fantastic! I love the attention to the details and insistence on perfection.
ReplyDeleteI'll glue some fabric in a hot minute. It's kind of brilliant right?? :)
These are stunning!! And that binding . . . just wow!!!
ReplyDeleteI saw your placements when they rolled through my Bloglovin a few days ago. They must have left a great impression on me cuz I have thought about them a bit since. I do not have a dining room table anymore (sure miss using linens!), so I wont be making any, but I love this concept. I thought if you made the pieced top bigger, you could cut your binding strips off the edges before you sandwich it and they would be perfectly aligned already. Then I thought this may actually be a good technique for creating binding strips for a quilt too...
ReplyDeleteI think you could do well to pattern your placemats :-)
Totally impressive!!! That binding??? Amazing!
ReplyDeleteLOVE LOVE LOVE! Especially the quilting but the binding is fantabulous also. Good job, girlfriend!
ReplyDeleteUmmm? Wow. Can I buy some patience from you? How much do you think you would charge me? Those are gorgeous, you are so talented. I can't believe the binding matches the strips....my head fell off when I realized what you had done.
ReplyDeletechuffing genius!
ReplyDeleteWow! Just WOW! You met the challenge for sure.
ReplyDeleteAwesome fabulous placemats! My vocabulary deserts me I'm so impressed. You die an impressive job and should win you challenge competition. You should be very proud.
ReplyDeletelove this idea and love your placemats!
ReplyDeletepositively brilliant and gorgeous! love!
ReplyDelete