Showing posts with label improv. Show all posts

Saturday, May 17, 2014

Bloggers' Quilt Festival: Broken Windows

AmysCreativeSide.com

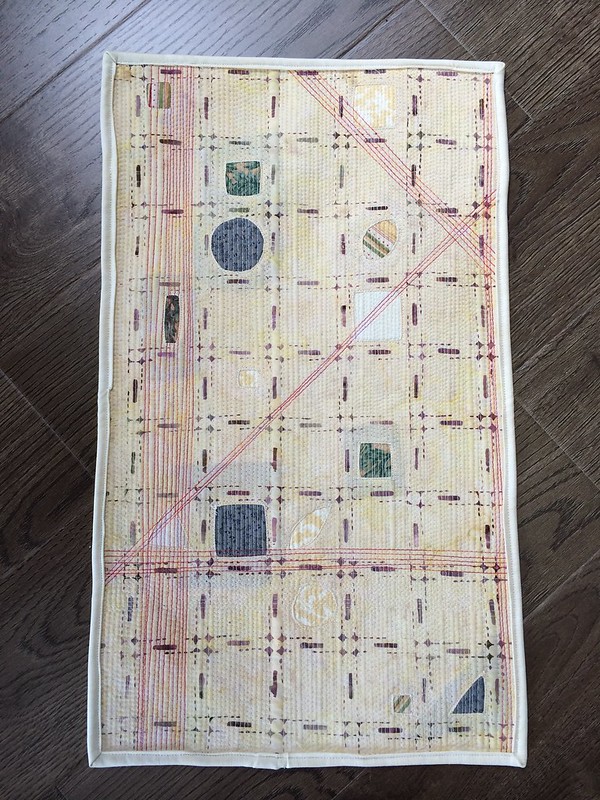
So the BQF totally snuck up on me this year. It was only a month or so after the last one that I fell off the internet and while I have been making and sewing, I was feeling like I didn't have anything I wanted to enter. However, there are a few things I haven't shared yet. Like this one...

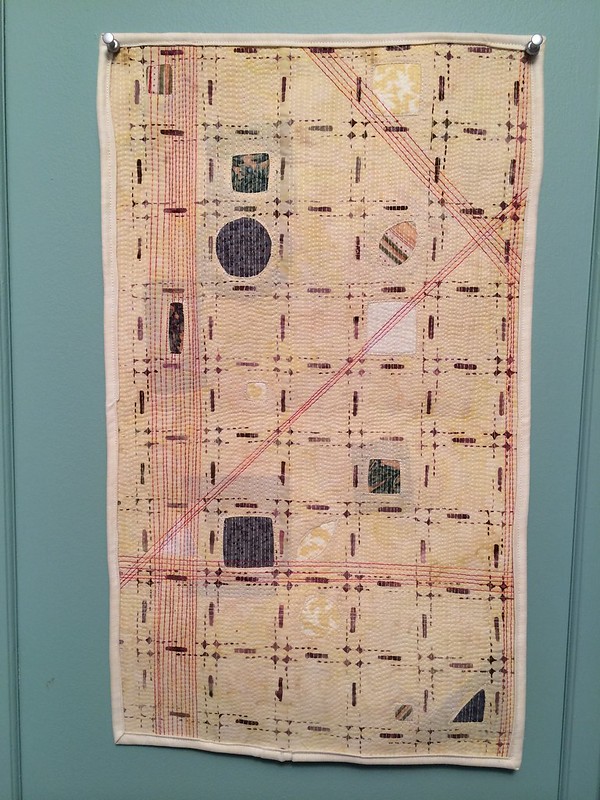
As a mini with fabrics I would never choose, this piece was a little out of the box for me. And I dealt with it a little in the box, too.  At Saskatoon Modern Quilt Guid, we had a challenge to use a bag of someone else's scraps. I got Erin's and she actually enjoyed handing over the ugliest bag of scraps ever seen in Saskatoon.  She even taunted us as she threw the bag in the mix.  Fabrics? Not modern. Colours? Non-descript.  Size? Larger than your average scrap. Hmmm.... Workable?

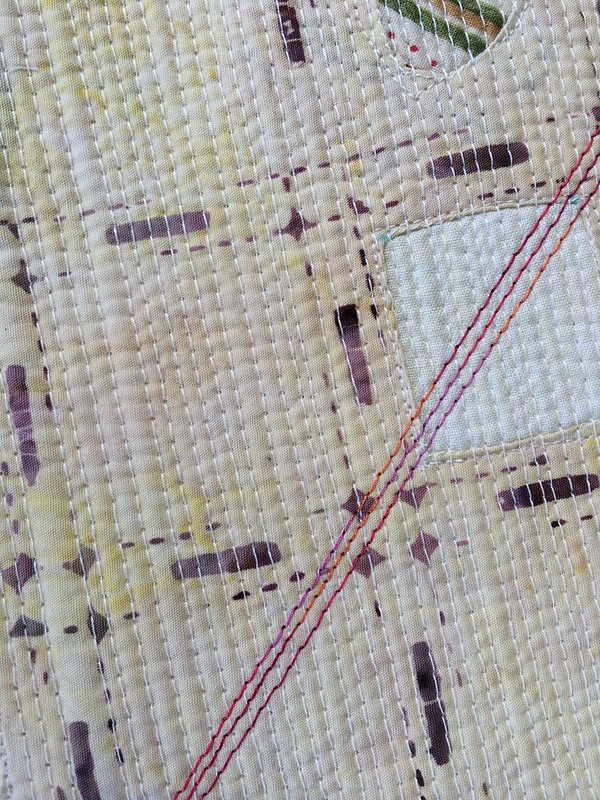
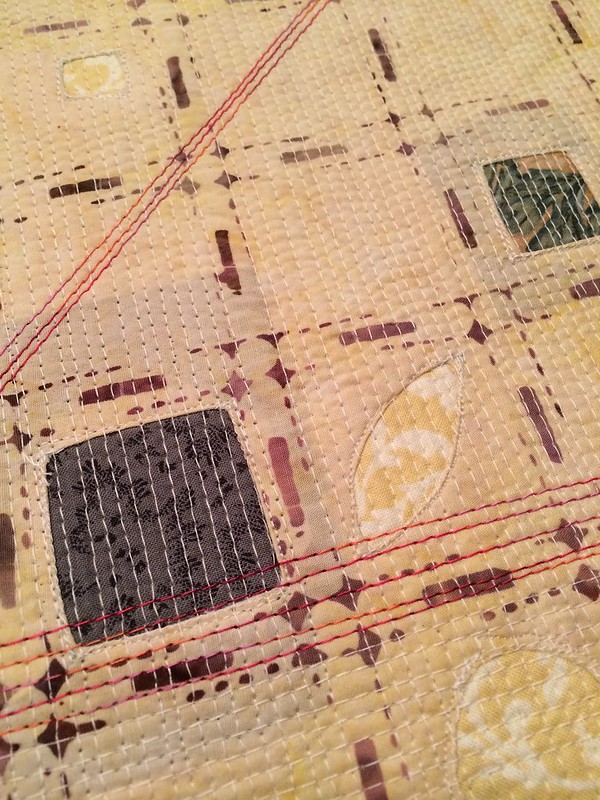
I embraced the messy!  I started with the batik. Some folks love 'em, some hate 'em and I'm somewhere in the middle. I use them, sparingly, and not on their own.  But this one had nice little boxes in a regular pattern, like frames.  I freehanded some shapes,  stay-stitched the lines, trimmed the excess and folded the seam allowance back. Then I backed each opening with a little piece of one of the horrid little scraps, and reverse appliquéd it to the batik.

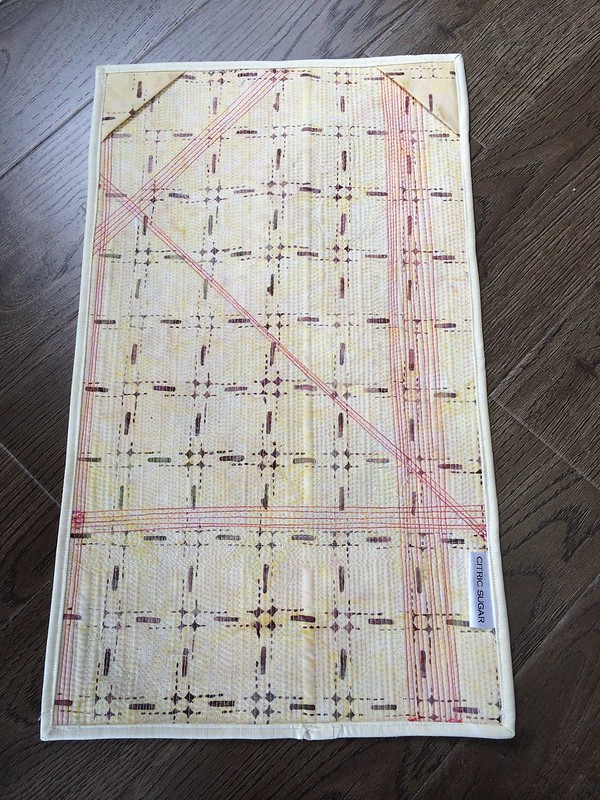
Then I quilted it within a sixteenth of an inch of its life.  I started with a neutral cream colour and decided it needed red!

The binding was made from another one of the scraps. I knew it was going to be difficult and there was no way I'd be able to hand-finish it with the density of quilting on the back - I even debated ways I could get a way with leaving unfinished.  Once it was trimmed, I felt I lost a lot of the rustic, broken quality I was getting so I recaptured it by attaching the binding to the back and stitching it down unevenly along the front.

This is the first quilt I've actually hung on my walls and I'm happy with how it turned out.

Title: Broken Windows
Size: 18x11"
Category:  Small quilts?
Pieced and Quilted by me.

Thanks so much to Amy and the sponsors, everyone who stops by, and everyone who shares their work with the rest of us to make this festival so much fun! Can't wait to see what everyone's been up to!


Thursday, May 15, 2014

The Whirlwind of Classes and Talks

It's no secret that I've been a busy girl as of late.  I'm decent at spacing out my commitments and making sure I don't have too many things pressing at the same time. My calendar usually looks well-balanced and responsible. However, I often forget to leave room for the incidentals and unschedule-able things, like illness, vehicular issues, and Acts of Nephew, among other things good and bad. A particularly crappy inclement spring has seen more barometric changes than the weather network* and left me with less energy and fighting spirit than usual. Renovations have meant my sewing corner has moved, rotated and/or been inaccessible since January - tricky when keeping up with two guilds and two bees! And then, of course, there's been hockey. Glorious hockey. Junior, Olympic, NHL, KHL, AHL, WTH?... I will admit that while I sometimes drop the ball on keeping up in quilting blogland, I never go more than two days without checking in on the hockey blogs. In fact, I was caught at a guild meeting streaming a game during a presentation.  I was LISTENING, of course, to the presenter and looked at all her slides, but I also didn't want to miss any changes in the score.  That being said, if I'm the presenter and you are in the audience, feel free to live-stream sporting events.  Just keep me updated on the score!  (NOTE: this does NOT apply in the scholastic setting - secondary students are required to pay attention in class, even if I'm boring.  Therefore, if you by any strange chance or coincidence are a high school student who has me as their classroom teacher at any time, I will not accept any excuses of "But Ms. M..... !You said on your blog....". So there. You have been warned. Also - how did you find this blog, anyway? Get off the internet, go outside and/or do your homework, please and thank you!)

Speaking of giving talks, classes and presentations...

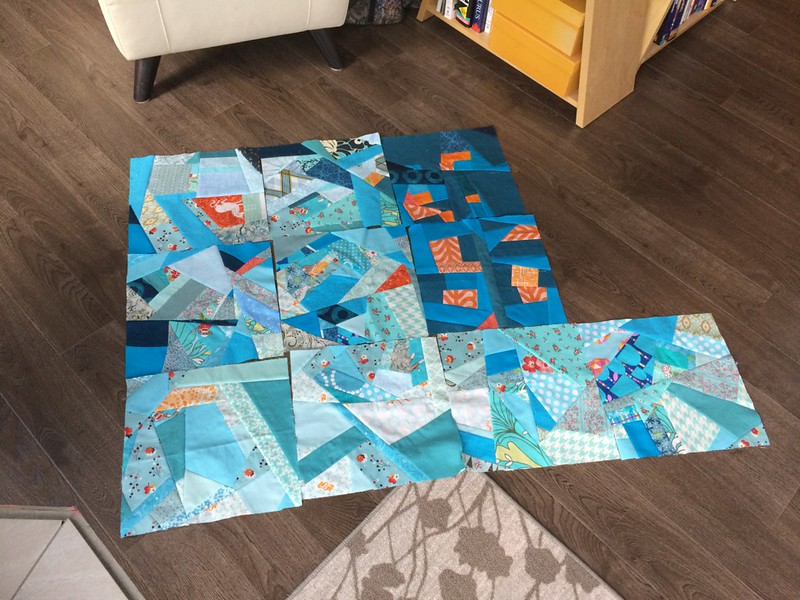
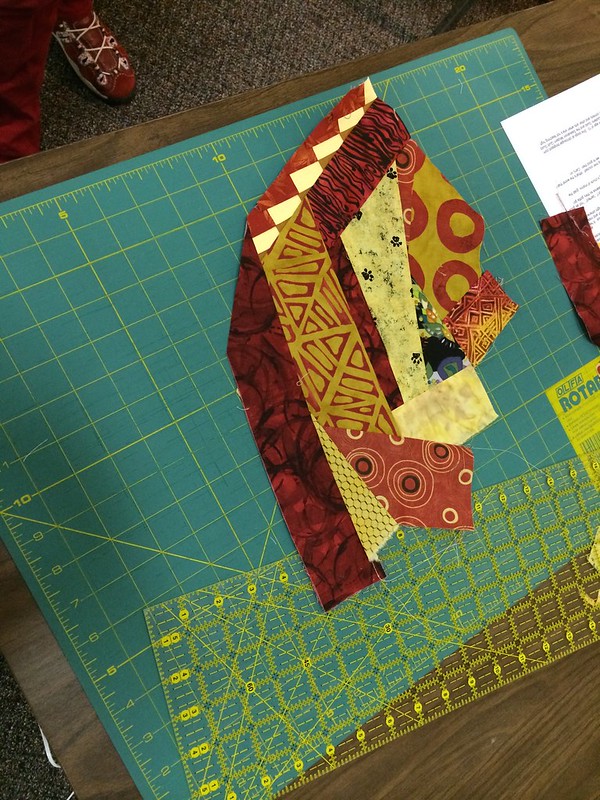
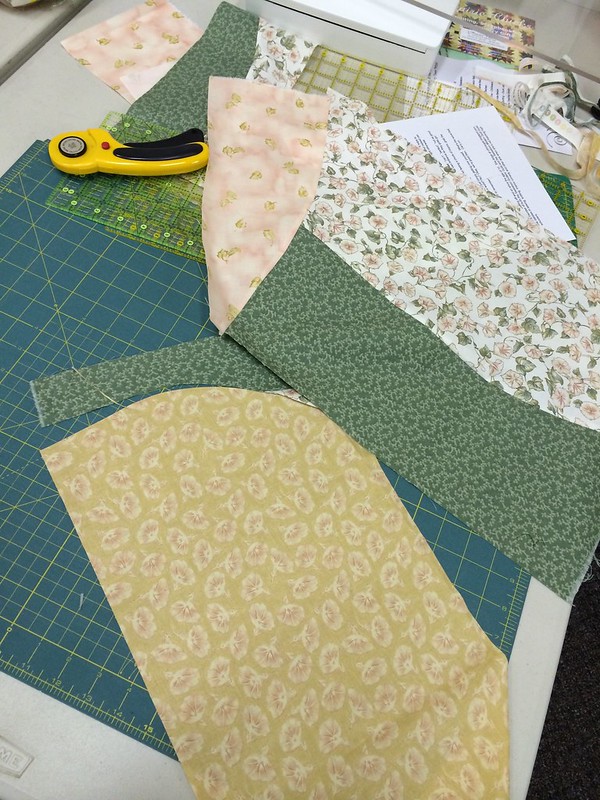
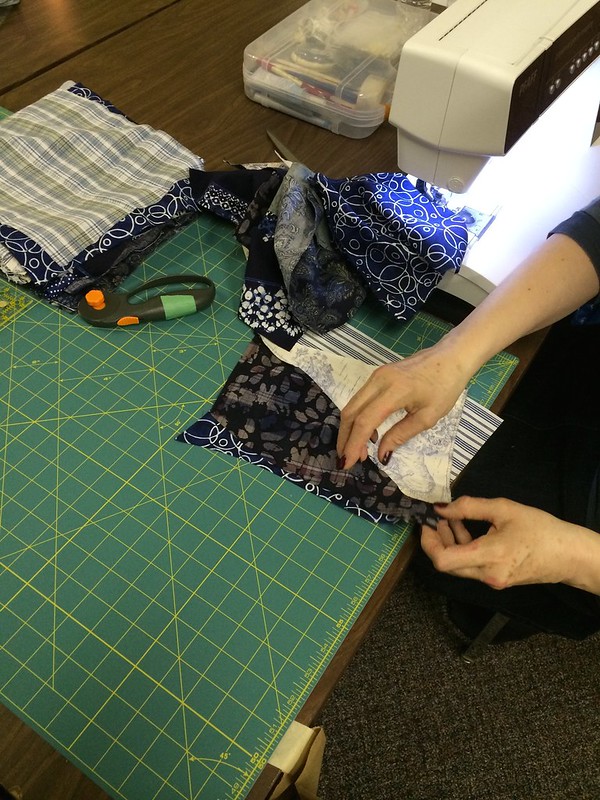
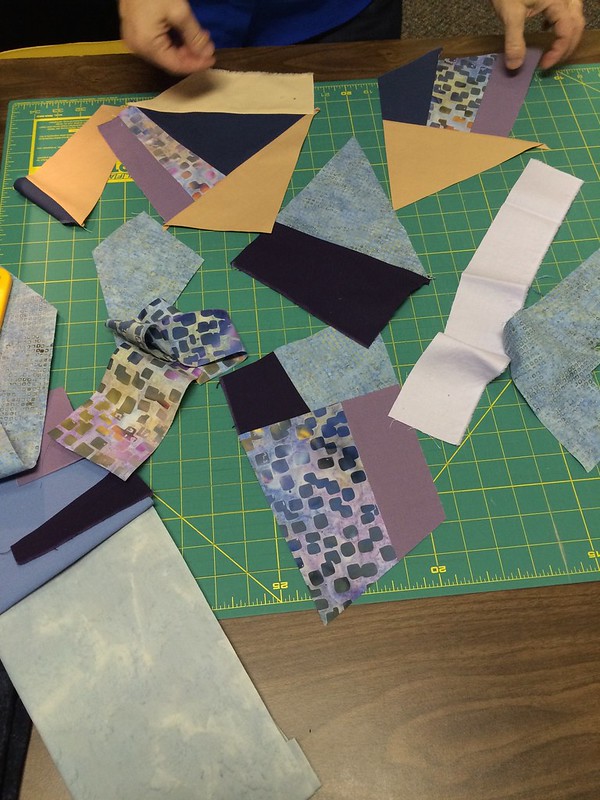
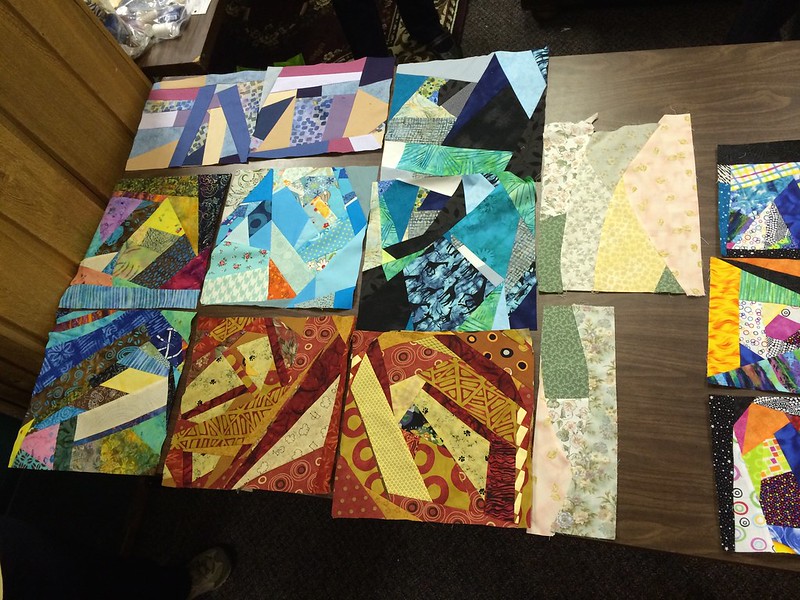
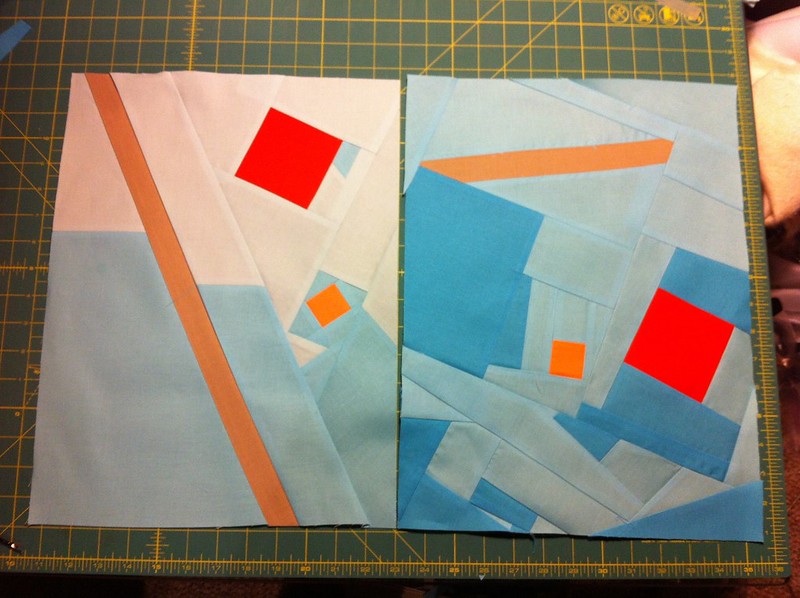
I had the distinct pleasure of leading a workshop on improv piecing at Saskatoon Quilters' Guild spring retreat at the end of April. I do a lot of improv piecing (crazy piecing, free-piecing, what have you) These were the samples that I made up plus more that I made during/after the workshop:
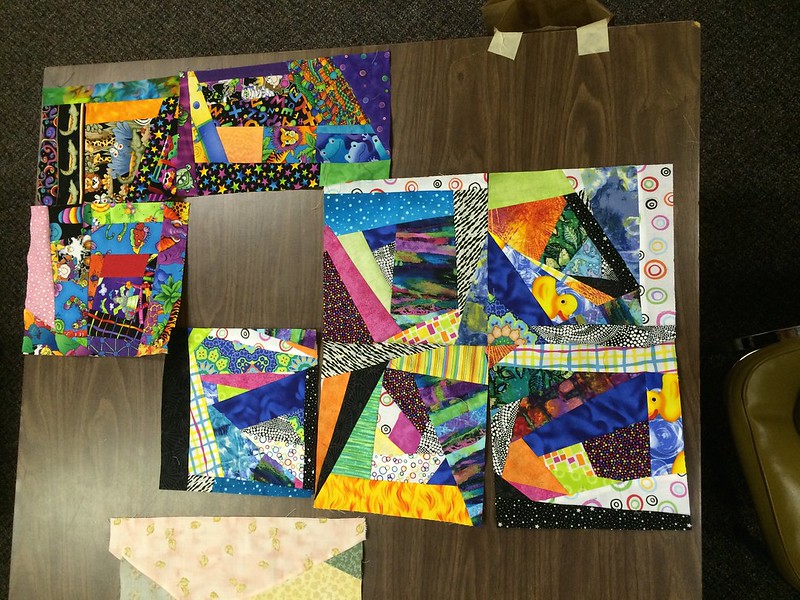
Most of my job was just to give encouragement and provide a little guidance on making such unusual pieces cohesive. Here is all the beautiful work they did!
I was a proud, proud teacher, (though truly I think an improv workshop leader is really more of a permission giver and 'can't' preventer than instructor.) They all had such different styles; not surprising since they've all been quilting for years. Having never given that workshop before, I was quite pleased with how it went. The gals gave me some great and constructive feedback, too.

At the last meeting of Saskatoon Quilter's Guild, I got to see some of their work continued but wasn't able to snap a pic. I had the privilege that night to give a talk on modern quilting. Of that, I have no photos but since no one fell asleep, I think it went well, too. Put a mic in my hand and I can talk, boy!  Only trouble?  When you're the speaker - you can't stream the hockey game...


*As one of many folk around here with climate migraines, I can say that spring is not a great time of year, especially with the yo-yo of sun/snow/sun/snow/rain/snain/snow/sun/rain we've had this go-round. If these manned missions to Mars advertised a permanently consistent air pressure in all compartments, ships and colonies, migraneurs would risk experiencing every bad thing that's ever happened in a scifi film.... Aliens, schmaliens!

Tuesday, April 29, 2014

Curved Improv Log Cabin Tutorial

Hiya! Yeah, I know...  How've ya been? Me...? It's been busy and chaotic with a side of crazy monkey banana pants.  More on that some other time. I'm going to ease back into the the interwebs slowly.... with a tutorial.

I'm a very happy member of Canadians Bee - a group that formed after the first round of Simply Solids.  These ladies are intensely talented and totally amazing. In fact, I'm lucky enough to be in the Saskatoon Modern Quilt Guild with 3 of them!  It was those three that I ran this block idea by and they all said they were game to try it so that's what I'm going with.


This tutorial is the basic technique and I'll add specifics for the bee in the flickr thread.

This is a very flexible technique and can be used as you wish.   For a traditional(ish) log cabin, alternate light and dark fabrics.

Here we go!

CURVED IMPROV LOG CABINS

You might need these supplies in addition to your regular sewing gear:

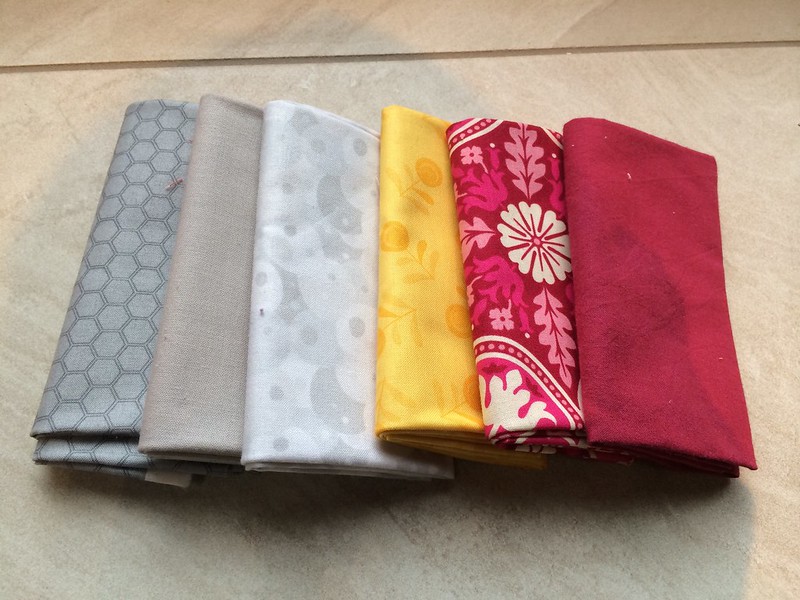
5 or more various fabrics in your chosen colour palette:  This technique can use jelly roll strips easily enough but  you can use wider. You can also use scraps.  I started with a 3" square in the middle and some of my outer strips were roughly 3" but it's not exact, nor does it need to be.  You can go smaller or bigger.  Add more rounds as you please.  I made two different blocks in my examples.  I used yellow for both centers (A), then in one B&D were dark colours, C&E light.  The other block had B&D light colours with C&E dark. 

Rotary cutter: This would be a tedious process with scissors.

Starch:  This is handy for sewing curves.  If you give your fabrics a light starch before you cut the curves, I find they cut cleaner, sew smoother and lie flatter.  I forgot to starch my fabrics at first and had a little wrinkling - which will all go away once I quilt the sucker but once I remembered to starch, everything went a lot smoother.

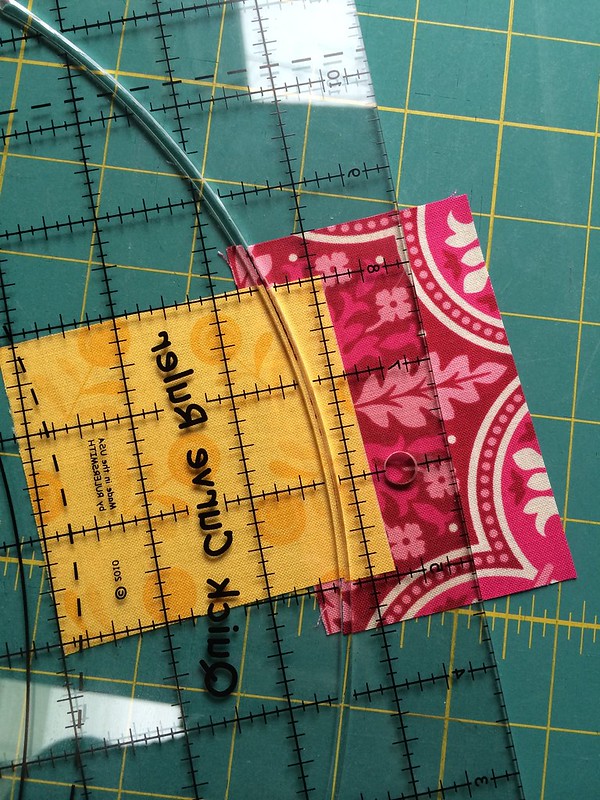
A curved edge:  I used the Quick Curve Ruler and the old "no-ruler-eyeball-it-freehand" method for cutting the curves but you can also use a pie plate, an oval casserole dish, , a french curve, an old charger from your Christmas table settings that you've since decided you hate....or nothing.  It doesn't have to be a perfect circle or oval - it just needs to have a curved side you can put against your rotary cutter.  It doesn't even need measurements!  But it's easier to use if you can see through it.

1/4" foot:  I find it tons easier to piece curves without using pins by using my 1/4" foot.  We'll get to that later...

TECHNIQUE:

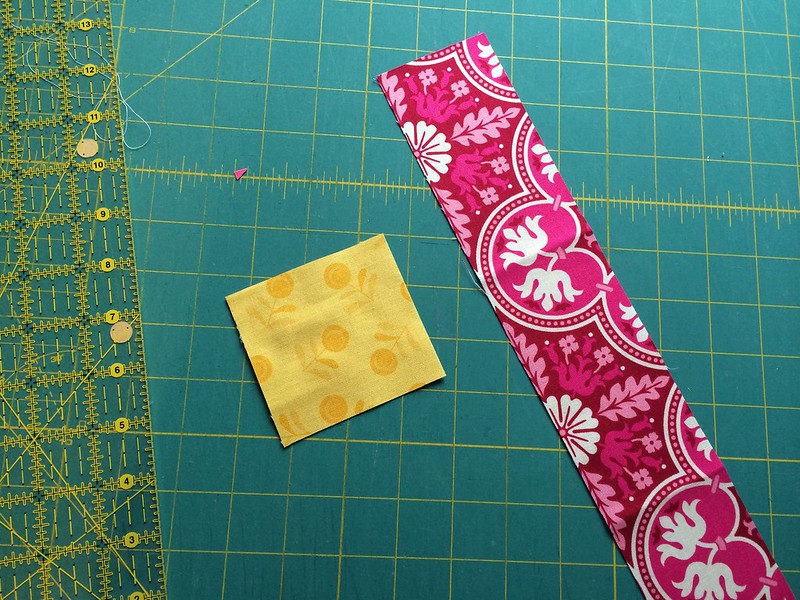
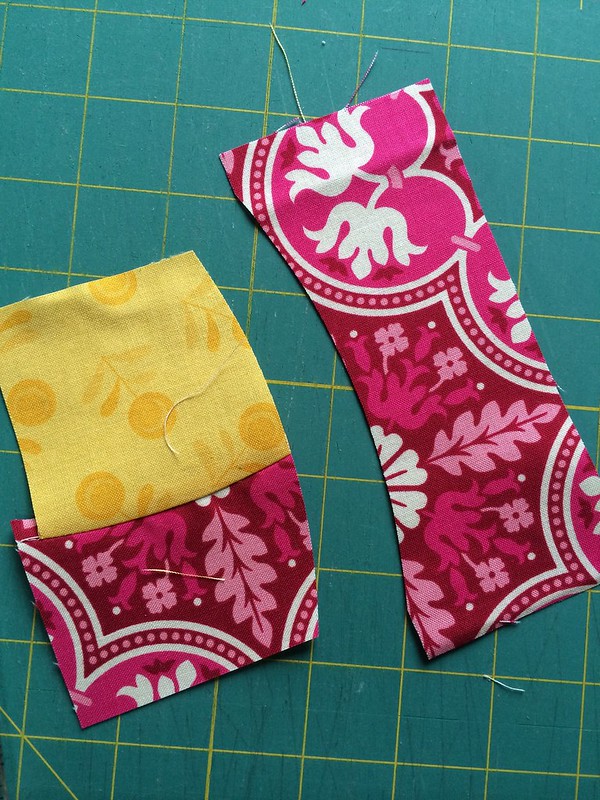
1) Choose a fabric for your center.  For ease of instructions, we'll call it Fabric A.  I used a 3" square here but you can also use a rectangle.  Measurements aren't important here - since you'll be cutting away the edges, having perfectly straight cuts to start with isn't necessary.

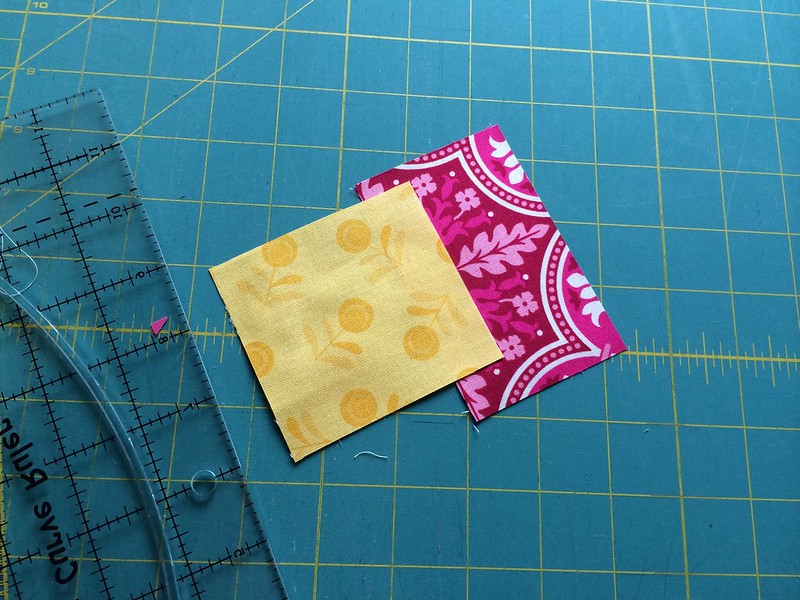
Take a strip of your next fabric (B)  - I used a roughly 2.5"strip - and layer your center piece over it just a little - right sides up.

You can trim the needed bit off the strip so you're working with smaller pieces. There should be a slight overlap.

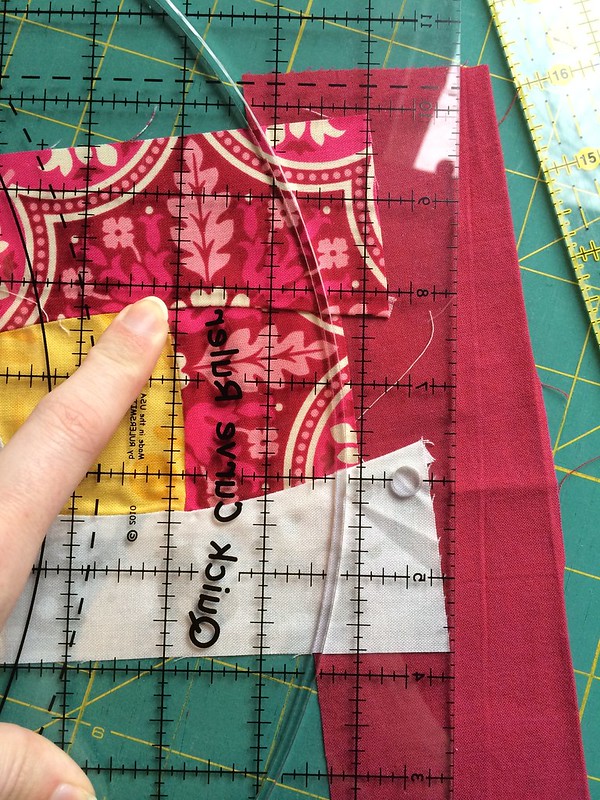
Place your curved edge (or use your fabulous sense of freeform adventure!) on the overlap.  The only thing to be aware of here is that the curve should start where the two fabrics meet at the edge on the bottom and end where they meet at the top.  At all times, the curve should pass through BOTH fabrics.  This way, you make a matching pair of curves.

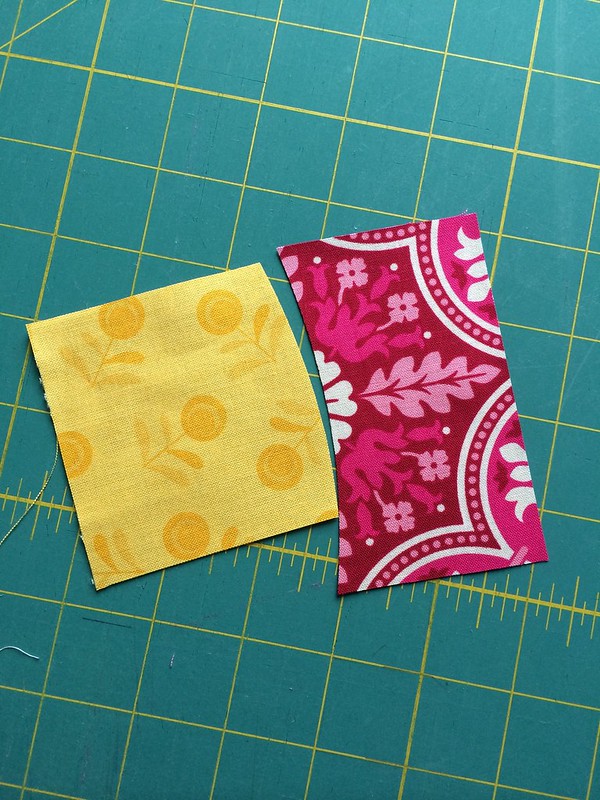
Fabric A curves out and Fabric B has a nice dent for A to fit into.  Remove the excess fabric so you're just looking at out-curved A and in-curved B.  Place them right sides together, matching at the top of the curve.

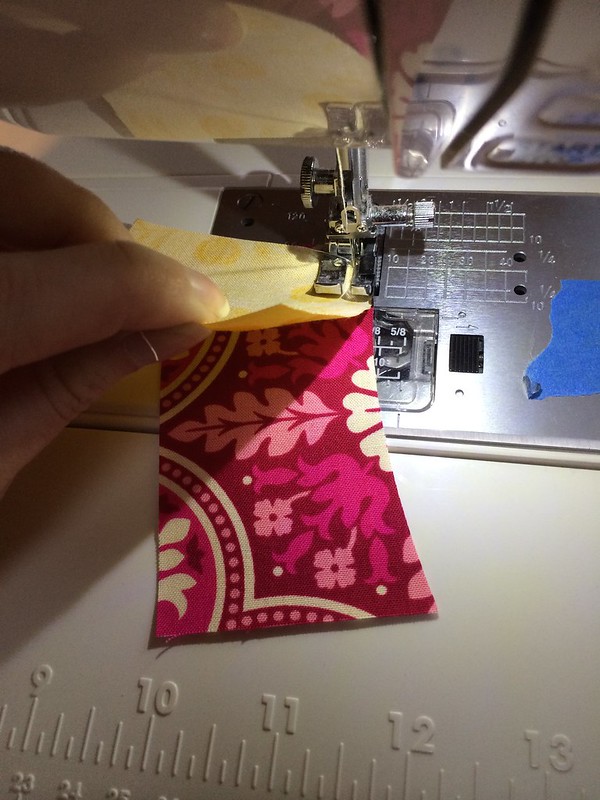
2) Using your 1/4" foot, place your RST curves underneath your presser foot and take a few stitches.    I like to put the out-curve on the bottom and the in-curve on the top. Then holding your fabrics apart as you sew, guide the bottom piece with your right hand and the top piece with your left hand, bringing them together using the 1/4" fence as a guide.

Try not to pull or stretch as you sew.   There are a couple of videos on sewing curves without pins out there if you need to see it.  This one is great!

3) Press to the side of least resistance - in or out, depending on your fabric.  There isn't a bulk issue here so direction isn't important. The seams lay fairly flat if you use the no-pins method.

4) Lay down another strip of B.

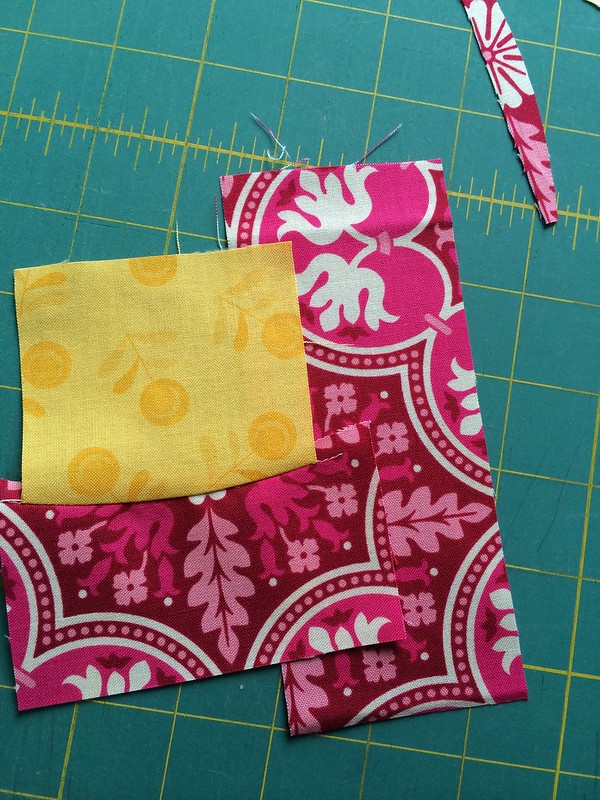
Layer your A/B center unit onto the B strip, keeping the B part of the A/B centre at the bottom.  In order to keep the traditional log cabin look coming through in this modern version, always orient the center piece so that the strip you just sewed is in the same position.  Always on the top  OR always on the bottom.  You choose - just keep it consistent for each pod/block.

Make your curved cut same as you did in Step 1.   You can play around with angling your center so that the width of the strips changes from piece to piece. It can be wider or narrower, sharper or softer curves, whatever appeals to you.  The idea is that this will take on its own shape and not be uniform. Each little cabin will be unique.

5) Sew your curves same as in Step 2.

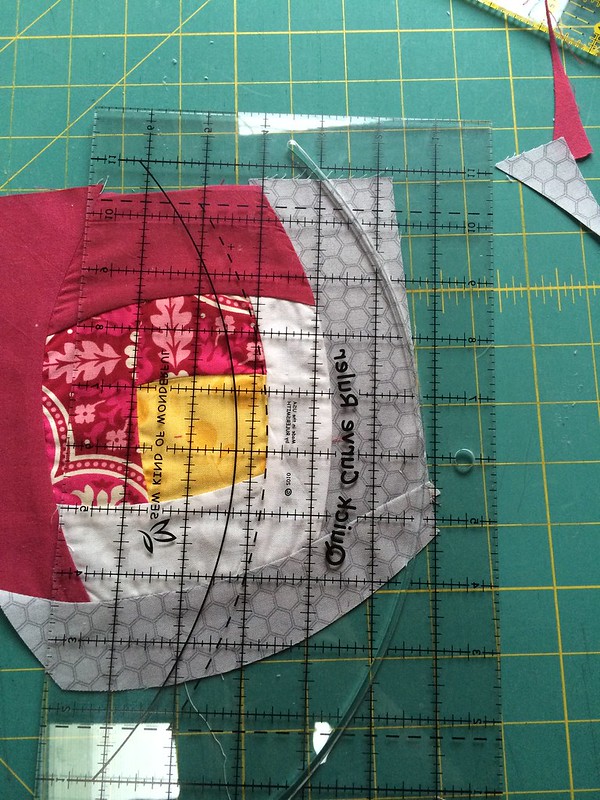
6) Repeat the steps using Fabric C, then again with each D and E. And beyond if desired!


When it's the size you want, use your curved edge to curve up the sides.

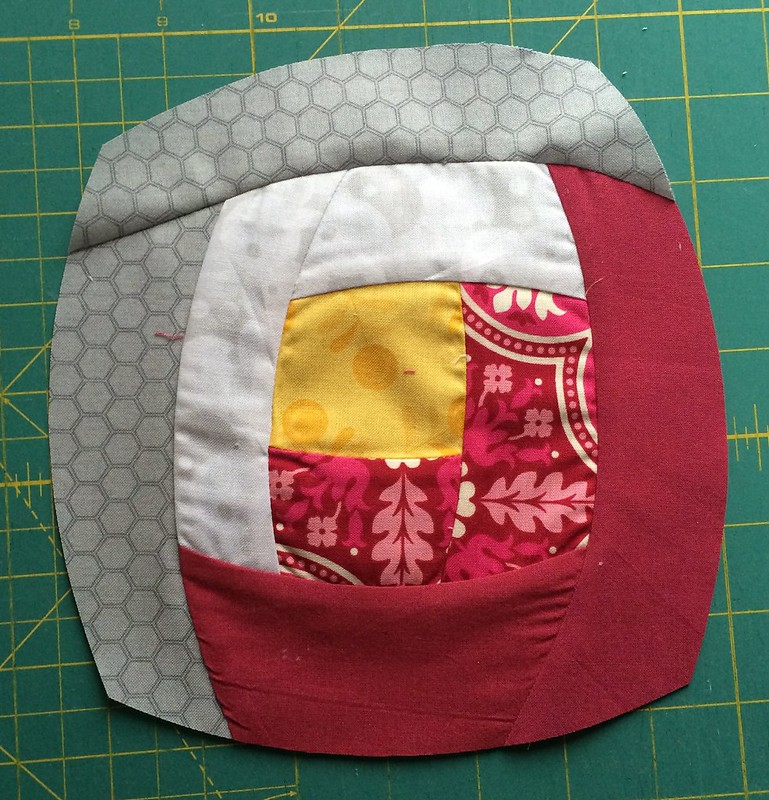
You now have a log cabin pod!

Coming next month, once I start getting bee blocks in the mail, I'll do another tutorial on how to frame them out into full blocks.  Hint:  It's very similar to what we've just done here but with larger chunks of fabric and squared outside edges. :-)

Let me know if you have questions or if you try this technique out!  I will get back to you as soon as I can (which is right after I catch up on a great deal of back emails and blog reading!)  Please make sure you're not a no-reply blogger or I can only answer questions in the comment thread.

Thanks for reading - hope you enjoy it!


Friday, October 25, 2013

Blogger's Quilt Festival: Flowers Over Falls

Hello!  If you're popping by from the Blogger's Quilt Festival, welcome!  If you're a regular visitor, you have seen this one before...
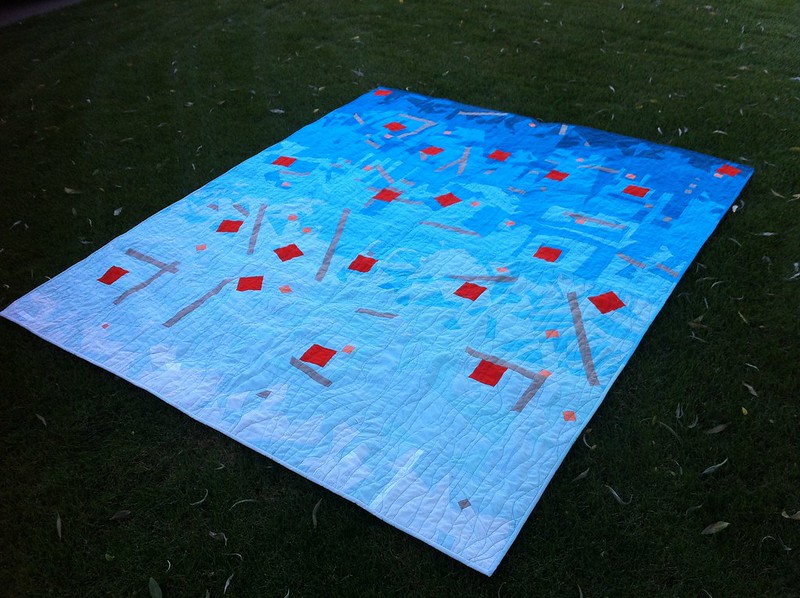
AmysCreativeSide
This year, I participated in my first online bee, called Simply Solids.  The rules were simple, too - only solids allowed!

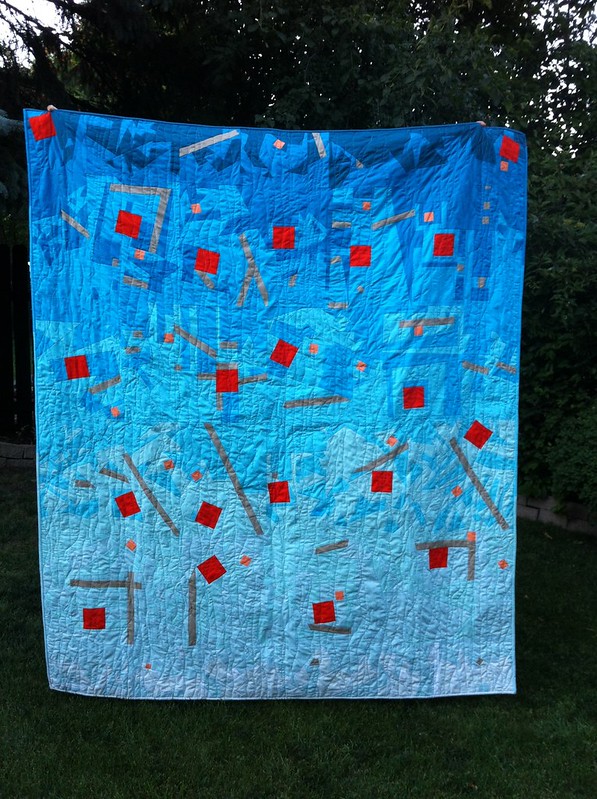
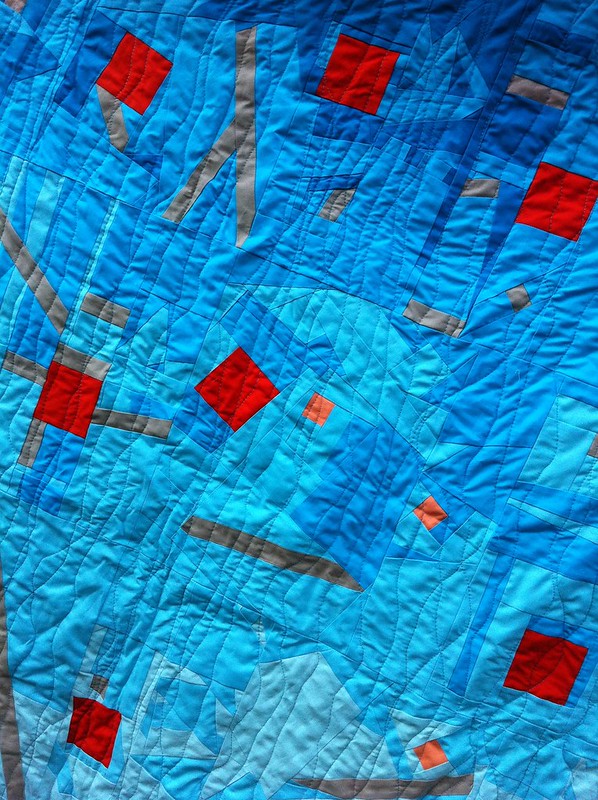
My month was June I stretched my brain for a while and was struck by the idea of a waterfall. To give it some visual oomph, I also decided flowers should be headed over the falls as well.

I sent my bee mates two different blues, two orange squares, and a strip of stone, asking them to make an abstract improv block - free-style, 12.5"x16.5".  And did they deliver!!

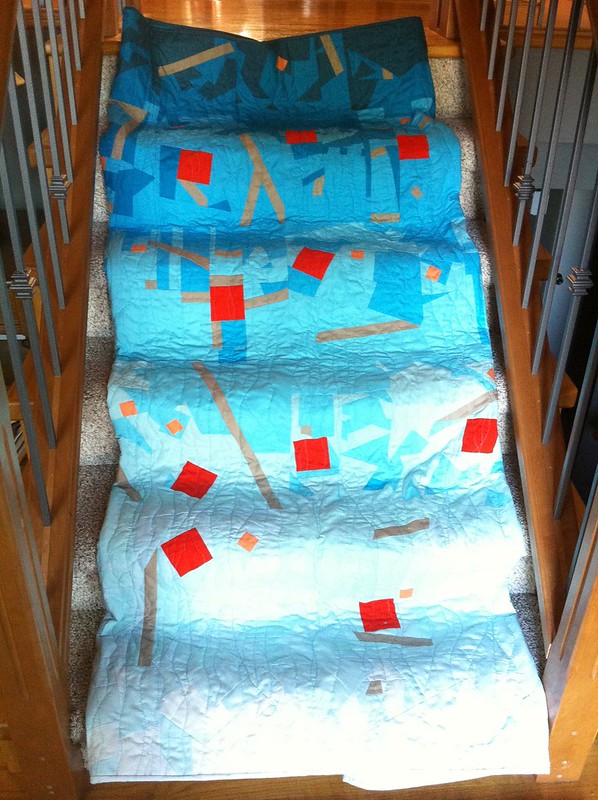
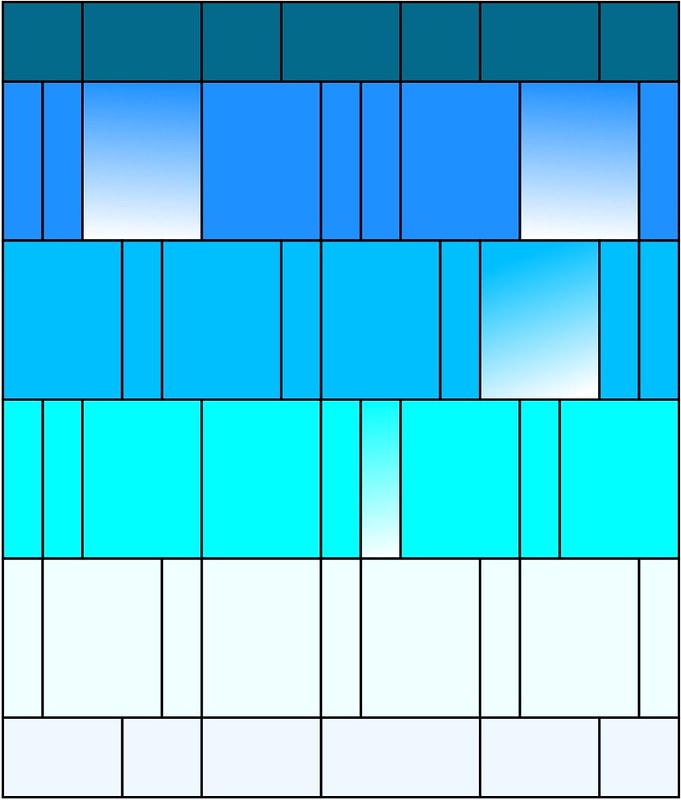
I added an irregular sashing, and some borders - the layout of the quilt actually looks like this if you get close to it.

I wanted the water look to be unbroken so I made the binding shift in tone as it went around.

Then I quilted it in wavy, watery lines, broken a little in places by imaginary rocks behind the 'water.'  It's a little hard to believe just by looking at it but there are actually eleven different Kona solids and three different threads.  There is also the handiwork of eleven different people, other than myself, and I can't thank them enough for the beautiful blocks they made.

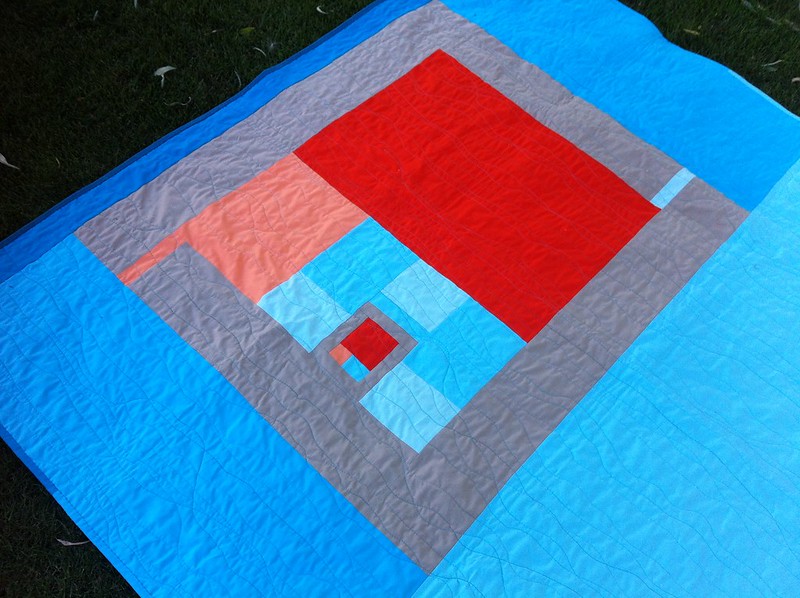
The back was built around one block I received that I absolutely loved (it's based on Fibonacci - how clever is that?) but it kept popping out when I tried in the front layout.  I did my best to emulate the design and make it macro on the back.

You can read more about this quilt and how it came to be in this post here. And if you are in Saskatoon this weekend, you can see it in person at SaskatoonQuilts!2013 out at Prairieland. :-)

Quilt: Flowers Over Falls
Size: approx. 66" x 80"
Finished: August 2013
Contributors:  Myself and the other awesome quilters of Aeneous Group - Simply Solids Modern Bee, plus one super lovely friend from UK

Thank you to Amy Ellis for hosting, all the sponsors who are so generous with their support, and all the other quilters are participating (and you for stopping by!)


Past Festival Entries:
Spring 2013 - Random Containment
Fall 2012 - Homespun
Spring 2012 - Myself as a Teacher

Saturday, August 31, 2013

Finished: Flowers Over Falls - Simply Solids Bee Quilt

Yeah, I fell off the face of the earth again.  It's been a slice.  I'll spare you the details.

I have a few things I've been meaning to share and I'll get to them.  I truly want to catch up on all the things I've missed - and I have missed you all and your projects and your wit and your insights.  I have just been incredibly unplugged this summer, and I think that's a good thing. Back to teaching on Tuesday so I imagine my routines will start coming back slowly but surely. (And I owe more than a few emails....)

I HAVE managed to finish my Simply Solids Bee quilt.  June was my month and while one bee member dropped out, an awesome block friend from UK (Hi, Susan!) offered to make one for me.  SO cool!!
One must always have a tall person in the family - thanks, bro!

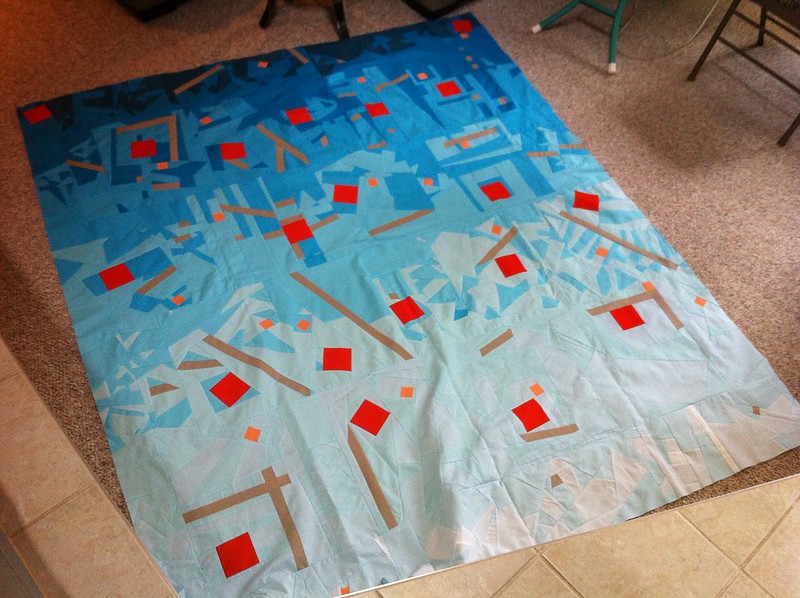
My concept for this quilt was the idea of flowers and twigs heading over a waterfall.  Each of my bee mates got two shades of blue, two squares of orange, a strip of tan (all Kona) and instructions to improv-piece an abstract block that measured 12.5 x 16.5". (See my post here for more details...)
And they did a beautiful job!!  I made the sashing strips and borders ( also improvised) from the scraps they sent back and spare yardage.
Then I sewed the top together - but in keeping with the improv/modern/abstract idea, I didn't use a traditional layout.  The layout actually looks like this:

All together, there are 7 blues (sky, aqua, baby blue, bahama blue, peacock, turquoise and teal), two oranges (mango and flame) and two neutrals (white and stone). There are only a few scraps of white. I tossed them in with the sky blue so that the sky blue looked blue and not white!

There was one block that I absolutely loved but try as I might, I couldn't make it work with the rest of the improv blocks.  It broke my heart until I figured I could showcase it on the back and actually build the back to echo that block.  The entire back is a reflection of that block and uses up all the leftover yardage.

It's quilted with watery lines in three shades of blue thread.

I matched the binding to the gradient I'd created with the blocks so that the quilt appears borderless.  And I'm really happy with how it turned out. To make it work, I used Flourishing Palms' french-style binding method with great success. (Thanks, Linda!)

This might be one of my favourite quilts of all time!  I'm chuffed to bits with how it turned out and I have my very talented bee mates to thank for it (though some of them wanted to kill me... Oops. :-).
Faux art-shot....  Does it look like water over rocks? hahahaha.
Flowers Over Falls is about 68x80" and contains the handiwork of the Aeneous Group of the Simply Solids Modern Bee and Susan of Canadian Abroad.

Thanks so much, you talented bunch, you!!  I'm glad I managed to get it finished for an upcoming show in October AND before my birthday today/yesterday (30th).

This is me at 35. And 35 feels lovely.

Saturday, June 22, 2013

Playing

Sometimes, when an idea falls flat, it leads you to a better one.
We'll see where this goes...